How to use Zapier with ChatGPT? Examples included

In this era of AI and ChatGPT, everyone is exploring the opportunity of putting these tools in their stack to scale up their business with human-like computer minds. This means using ChatGPT along with a business automation tool like Activepieces or Zapier.
These automation tools consist of flows that run in the background to connect different services together. Imagine having ChatGPT as part of these automations, it's so powerful that can generate content or reply to customers at scale.
Zapier and ChatGPT
Both tools are widely adopted, you can talk to ChatGPT through its web interface, and you can use Zapier to automate your tasks. But if you're trying to let Zapier use ChatGPT to generate content at scale and use it in your automated flows, it's already as fantastic as it sounds.
That's why ChatGPT exists as an app on Zapier, while building your flow, you can choose ChatGPT and have it as part of your flow. It also exists as a "piece" on Activepieces, which is another no-code business automation tool that replaces Zapier.
How can I use Zapier and ChatGPT together?
Before getting technical, let's see what use cases can be achieved by using Zapier and ChatGPT together. If you're looking for step-by-step guides for automations using ChatGPT, you can visit our Build with AI section. The guides are built on Activepieces not Zapier, but it's a very similar way to automate with ChatGPT.
Here are some of the use cases:
1. Automate your blog content with AI
You can set your automation tool to load content ideas from a database (it can be as simple as a Google Sheet), then create a piece of content with ChatGPT and post it to your blog website like WordPress.
In case you'd like to generate long pieces of content that ChatGPT doesn't typically produce, as in more than 700 words per article, you can still do this by generating the outline of the post in one request, then iterate over the titles and generate the content of each of them separately.
You can then combine all these paragraphs into one long article and post it to your WordPress site. This can be a way to scale up your SEO content on the blog, or engage with your readers.
2. Tweet blog content automatically
If you have an active team of blog writers (or AI blog writers) who post content regularly to your WordPress website, you probably want to put the word out about these new pieces of content, automatically.
With Zapier, you can listen to new posts added to your blog then ask ChatGPT to put them in the form of a Tweet and automatically Tweet about them. You can also include the link of the blog post. Isn't that already engaging?
3. Extract sentiment from support tickets
If you run a customer service department and you receive a whole lot of support tickets everyday, you might be misinterpreting your customers, you don't want some anger go unnoticed, and you don't want to think you're doing a miserable job while your customers are proud of you.
With Zapier and ChatGPT, you can listen to these customer supports automatically, extract the sentiments in them and submit the analysis to a Google Sheet. There you can whatever statistical work you'd like to do and find what's going on.
4. Build an SMS-based customer support agent
This is even much more powerful that what it sounds. Imagine creating a custom version of ChatGPT that is aware of your business and can support your users with zero intervention at your end.
This is what you can precisely do with ChatGPT and Zapier. You create a flow that receives SMS texts and responds to them, with ChatGPT in the middle, giving it the context of the business and the history of the user's chat.
Steps to use ChatGPT with Zapier
Let's be more practical and see how we can use Zapier and ChatGPT altogether. Follow these steps:
1. Create a new Zap
Go to your Zapier account and create a new Zap. This is what Zapier calls an individual automation flow.
2. Select your trigger
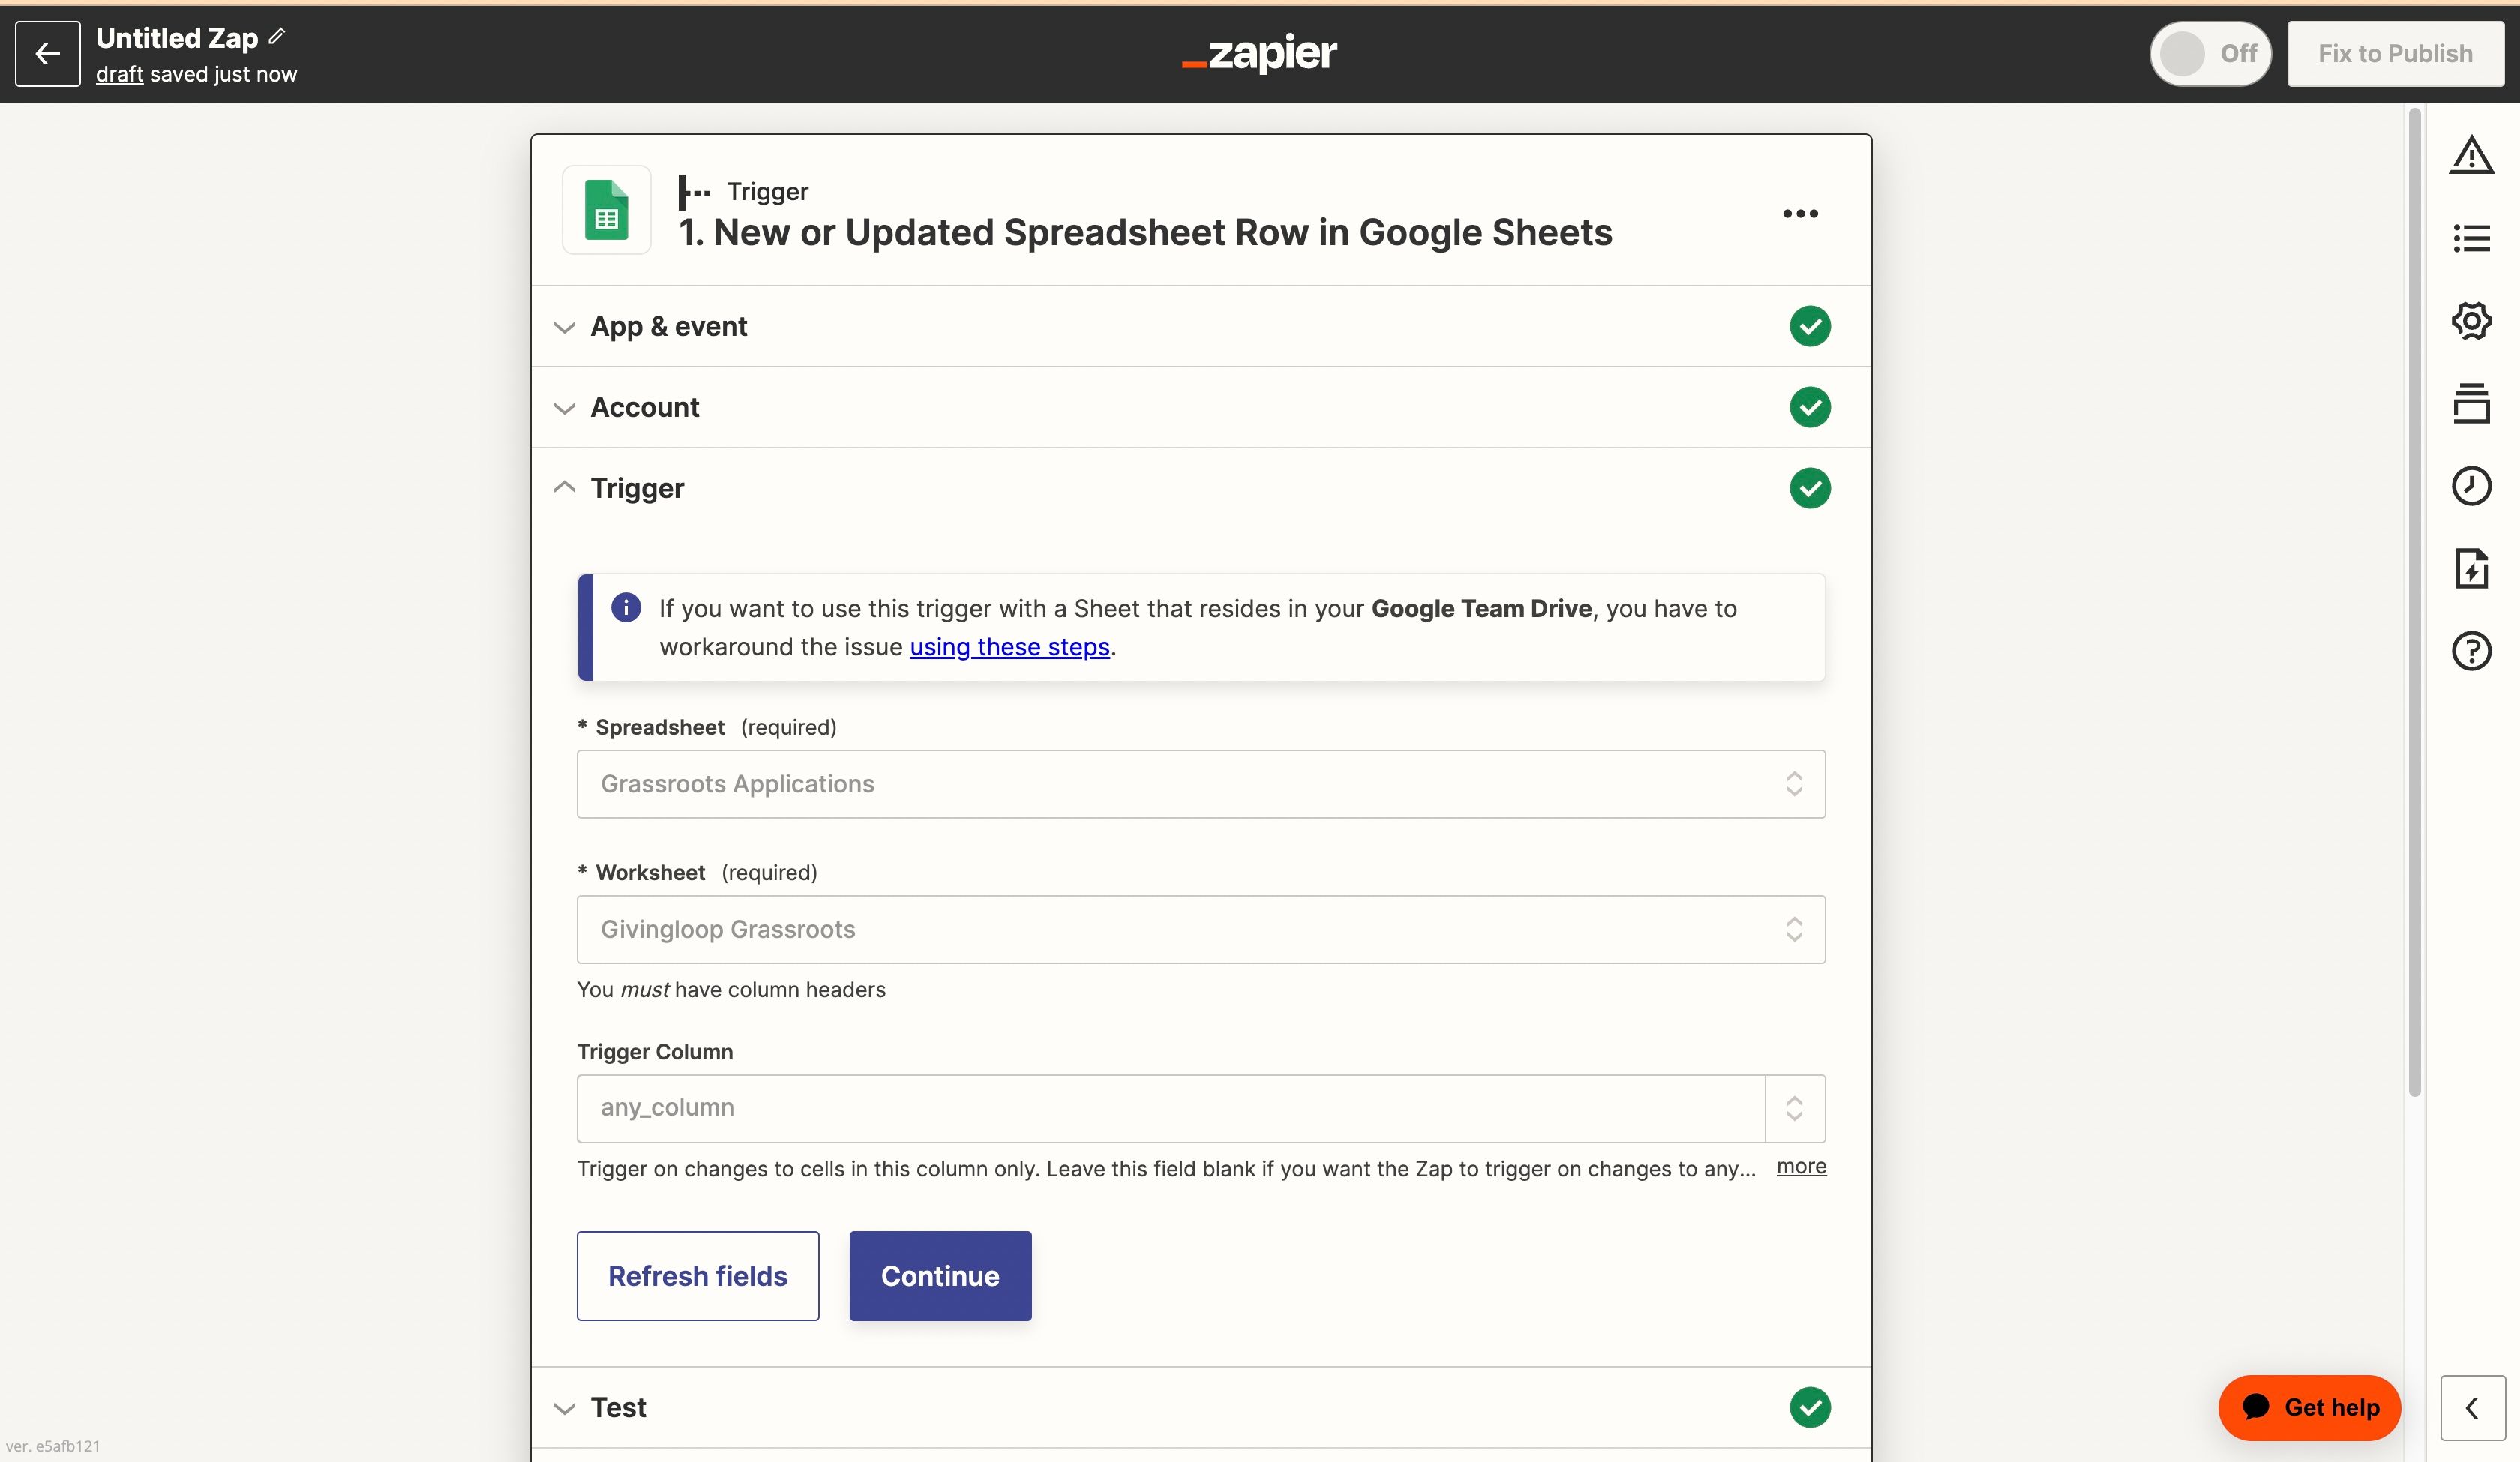
The trigger is the first step of the Zap. If you'd like this to be your content ideas in a Google Sheet, you can select Google Sheet New Row. If you'd like ChatGPT to respond to a text message, you can select an SMS service like Twilio.
Here is an example for a Google Sheet trigger selected in the Zap:

3. Add a ChatGPT step in the Zap
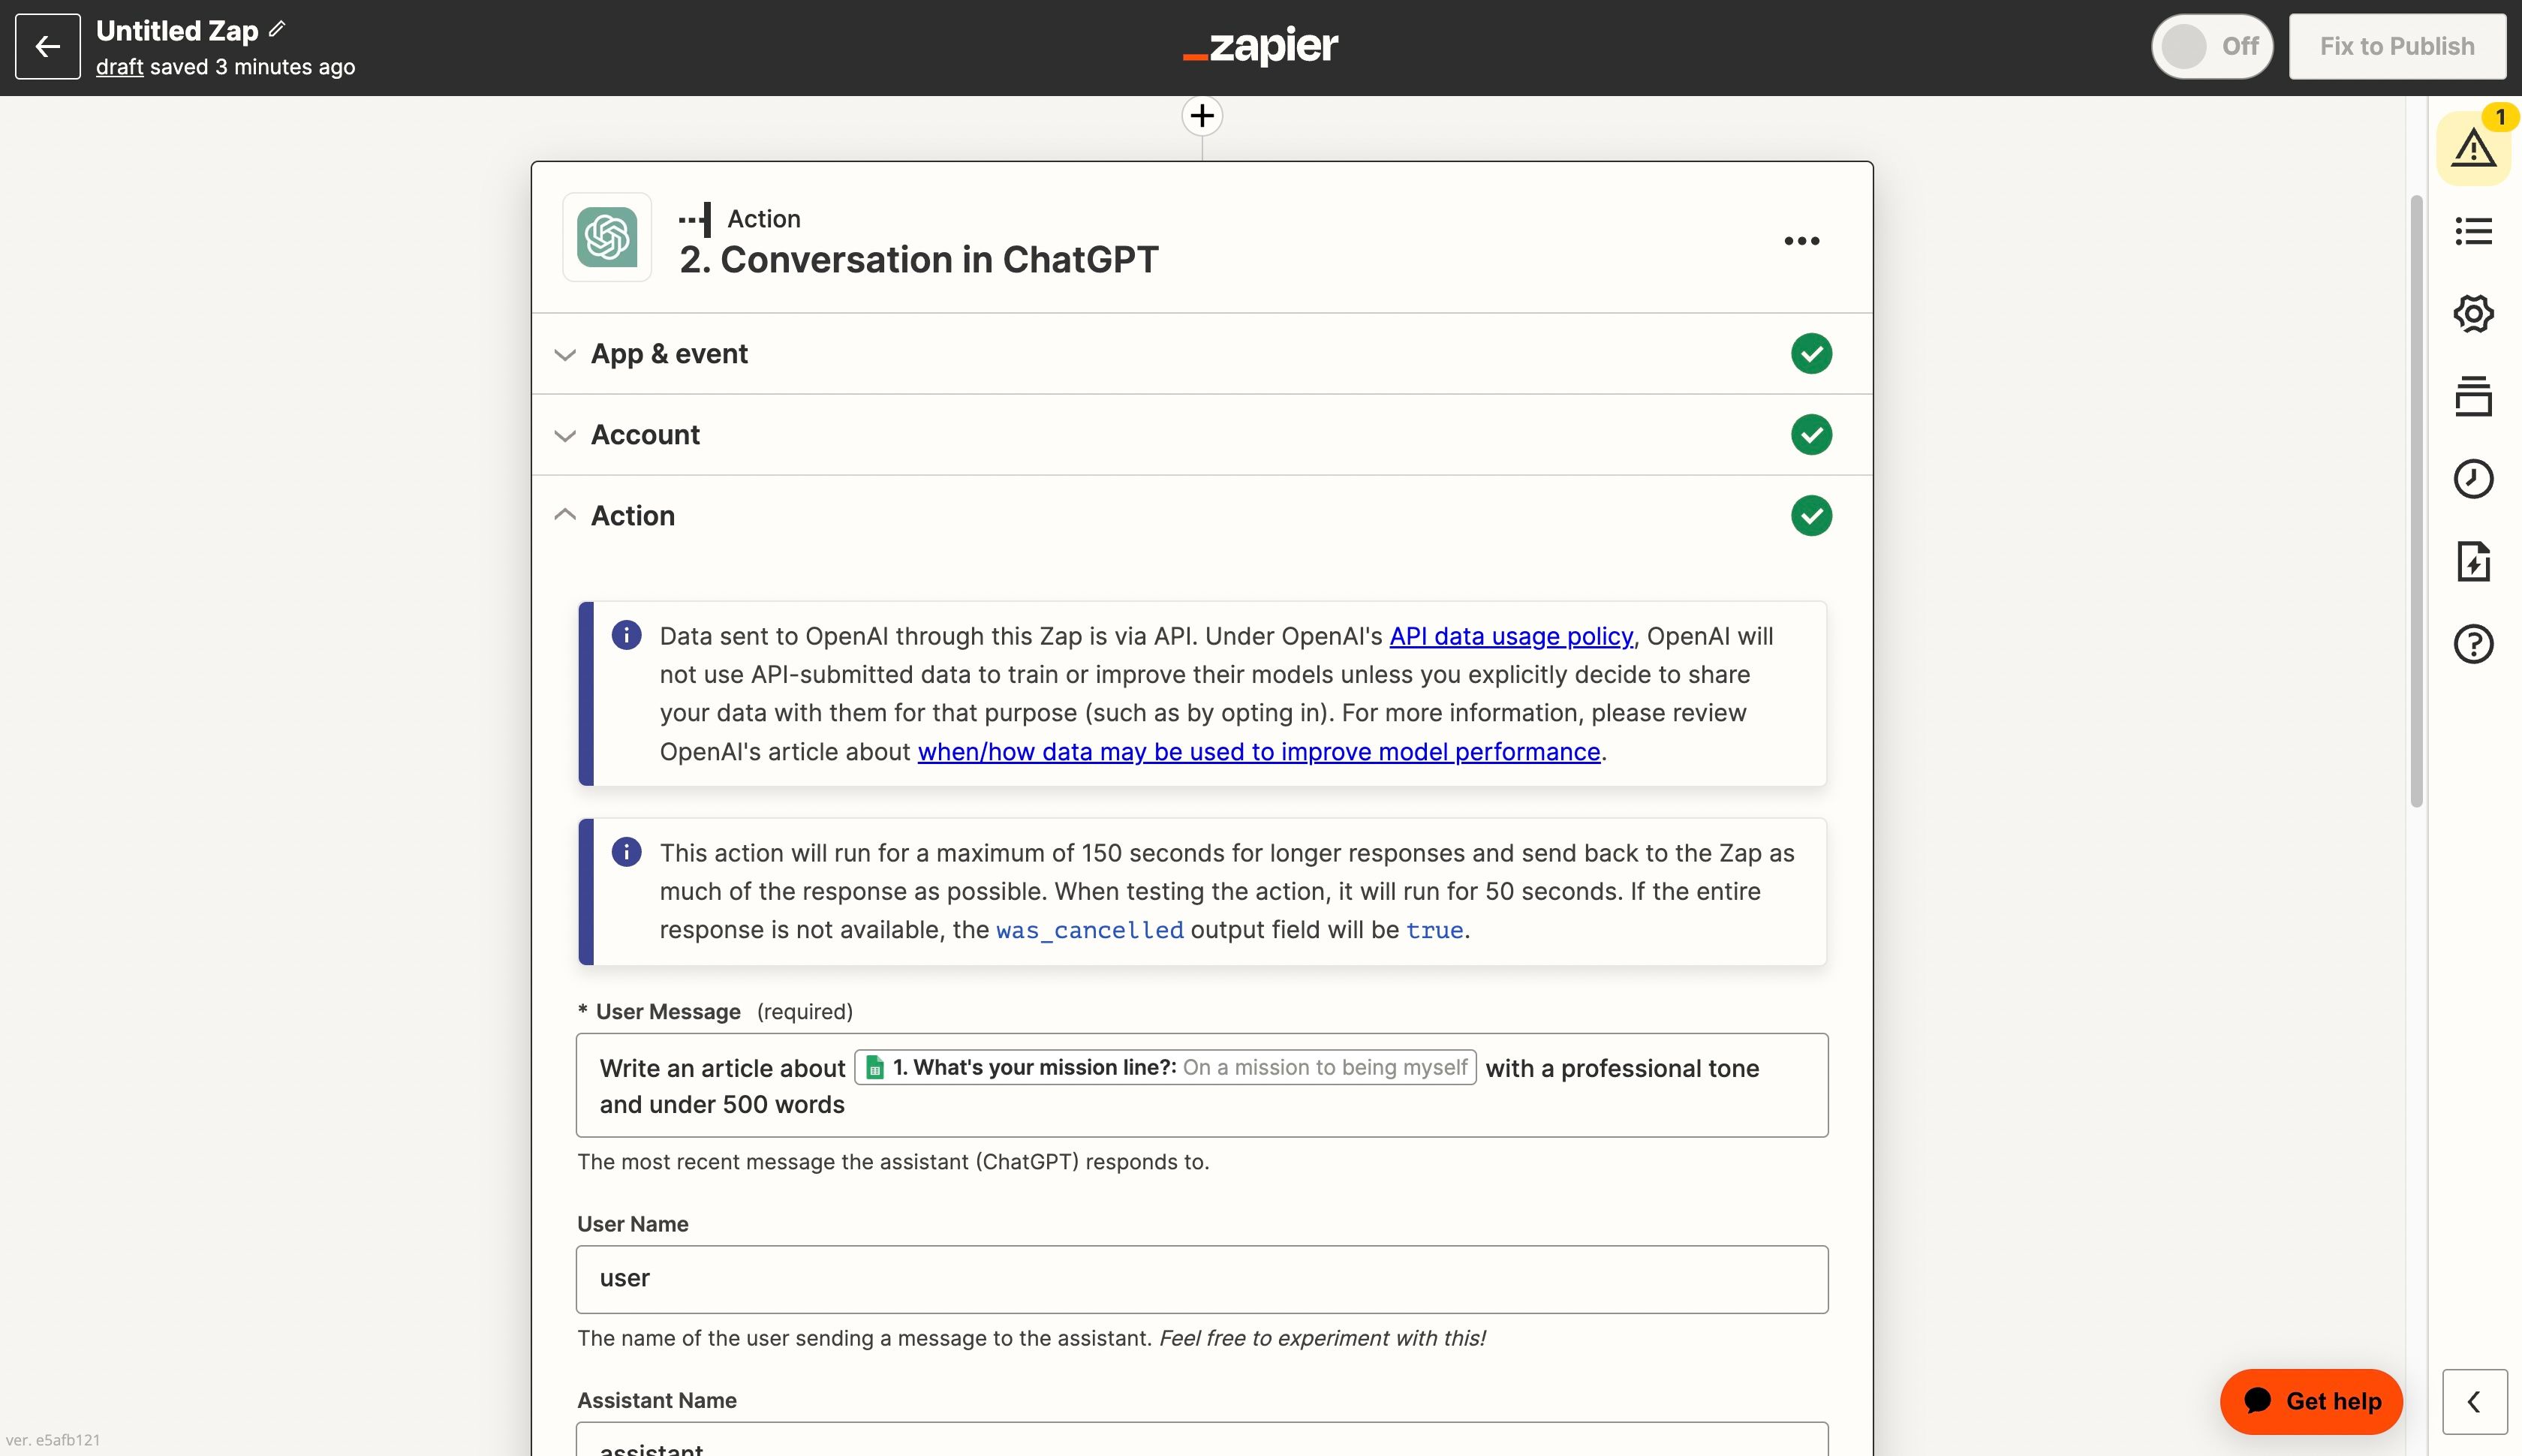
In the next step after the trigger, add a step of the type ChatGPT. You will have to sign in using your OpenAI API Key to connect your account, then you can set the prompt that you'd like to send to ChatGPT.
You can use data from the trigger step, for example, ask ChatGPT to write an article about a topic from your Google Sheet, this is what I did here:

4. Add a 3rd step to use the output
Choose a 3rd step to use the output of ChatGPT with, for example, publish the content to your WordPress site or send back an SMS to your user. There are a lot of apps that you can combine in your Zap.
5. Test the steps and publish your flow
Make sure you tested all the steps in your flow then click on Publish. Your Zap should start working in the background!


