Use ChatGPT to export the sentiments of your Zendesk tickets to a Google Sheet

If you are receiving tons of tickets in your customer service desk, namely Zendesk, you should probably start analyzing these tickets at scale to understand whether your customers are happy 😃 upset or angry 😡
If you copy one of these tickets content to ChatGPT's interface and ask it about the sentiment in it, it will definitely give you an answer. But you should do this at scale, once for all of your tickets, even the new ones.
Is it possible to analyze my Zendesk tickets with ChatGPT altogether?
Yes, but.. you can't do this if you go to the web interface of ChatGPT since that will require you to copy and paste one by one of these tickets and ask individual questions about them.
Thanks to automation tools, you can set Zendesk on one side, connect it to ChatGPT then throw conclusions in a Google Sheet. We will do this using Activepieces (a business automation tool) in this guide.
How to analyze all my Zendesk tickets sentiments with ChatGPT?
We don't have to build a solution from scratch for this, we'll start from a prebuilt template on Activepieces, we'll then configure the template and customize if to our needs.
Prerequisites
In order to analyze the sentiment of your Zendesk tickets with ChatGPT and send the analysis to a Google Sheet to further understand it, you need to have the following tools ready:
- An Activepieces account: We'll use this automation tool to build this automation flow.
- Your Zendesk account: You should have access to your Zendesk account.
- An OpenAI account and API Key: It will be responsible for analyzing the sentiment of the tickets.
- A Google Sheet: We'll post the results of the analysis to a Google Sheet.
Steps to perform sentiment analysis on your Zendesk tickets using ChatGPT at scale
Let's do it. Follow these steps to activate your sentiment analysis machine on your Zendesk tickets.
1. Copy the template of the ChatGPT-based Zendesk sentiment analyzer.
Make a copy of this template on Activepieces, this template flow will give you the basis to your Zendesk ChatGPT sentiment analyzer. Once you sign up on Activepieces and use the template, you will only need to make some configuration to it and it will start working immediately.
2. Understand the flow of your Zendesk ChatGPT sentiment analyzer.
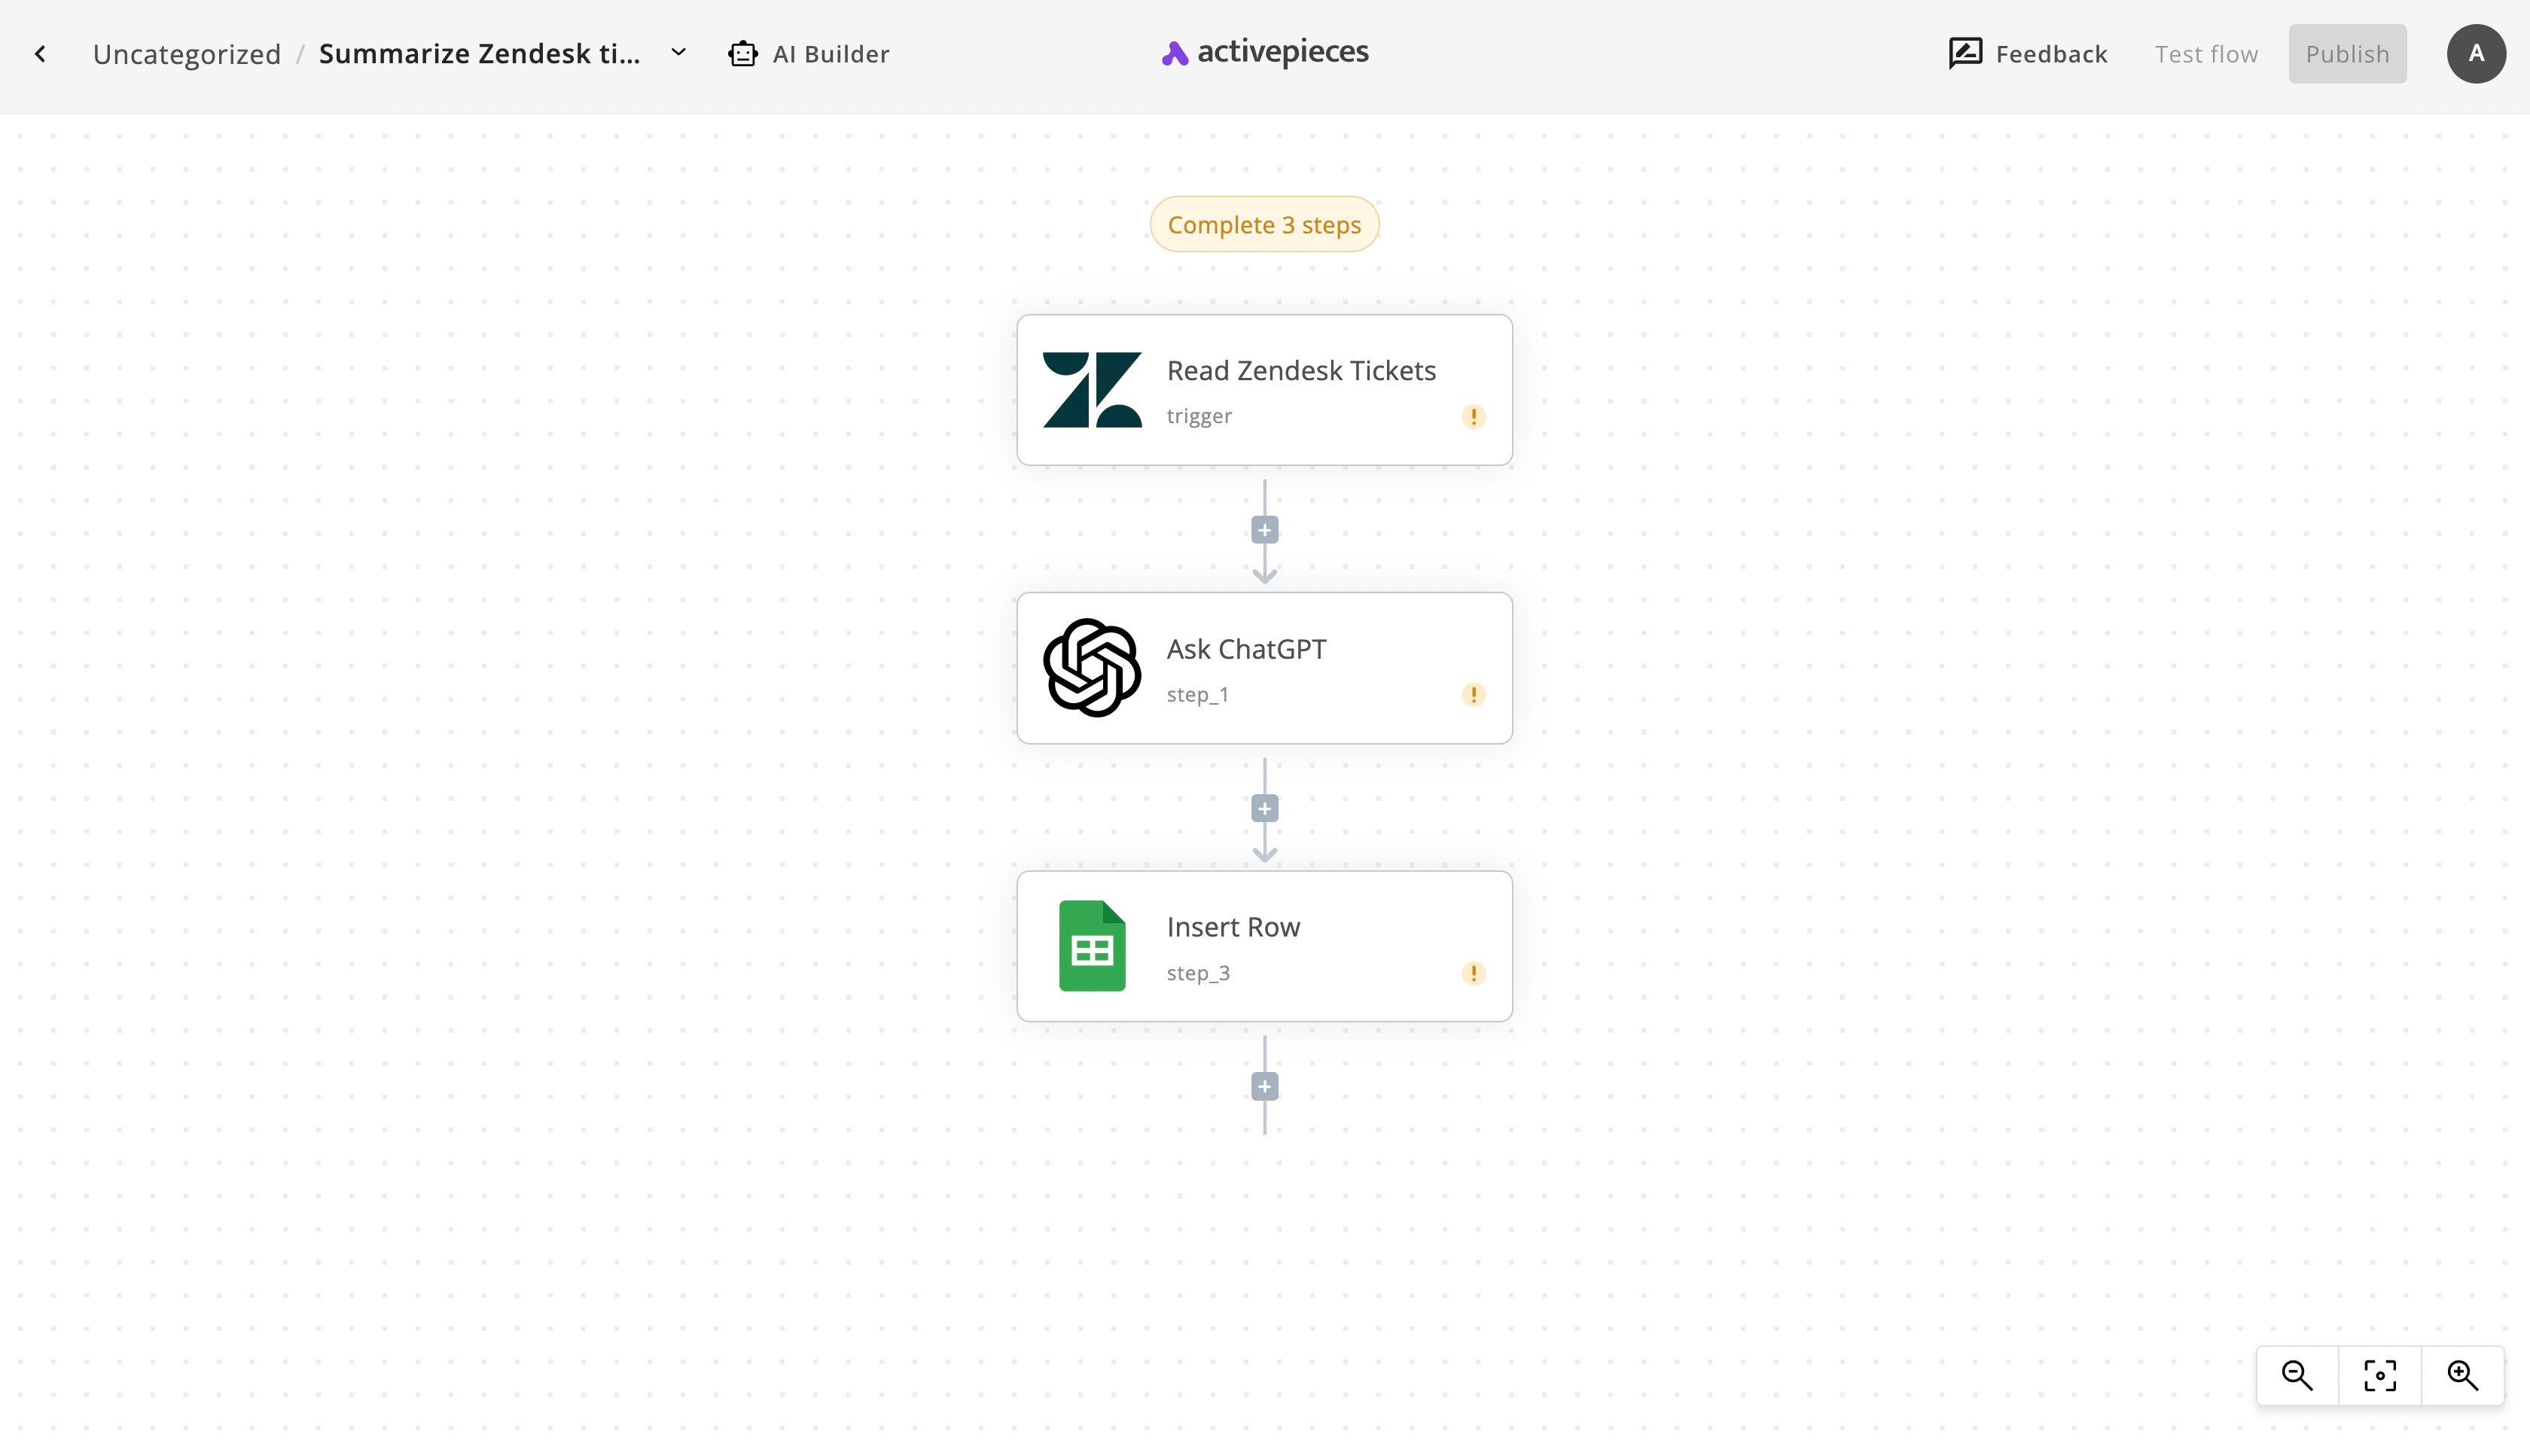
Once you copy the flow template, you will see something like this:

This is a pretty straightforward automation flow. Since we intend to analyze our new Zendesk tickets using ChatGPT to understand their sentiments and add them to our Google Sheet, the flow is designed to fulfil that intention.
The first step is the Read Zendesk Tickets, we call the first step in the flow the trigger. This trigger fires whenever a new Zendesk ticket is added to a Zendesk View. We'll select the account and the view later in this guide.
Once the ticket is added, the next step in our flow will execute, which is the Ask ChatGPT step. This one will obviously consult ChatGPT via its API regarding the sentiment in the new Zendesk ticket. The data will pass from the trigger to OpenAI. The prompt that asks ChatGPT is customizable if the one in the template doesn't exactly fit you.
When we have the sentiment produced by ChatGPT, we'll combine it with information from the original Zendesk ticket and post them altogether to our Google Sheet.
3. Configure your ChatGPT Zendesk sentiment analyzer.
To put this template to work, you'll have to do little configuration to the flow steps until it's ready to go live.
(1) Connect your Zendesk account to the sentiment analyzer
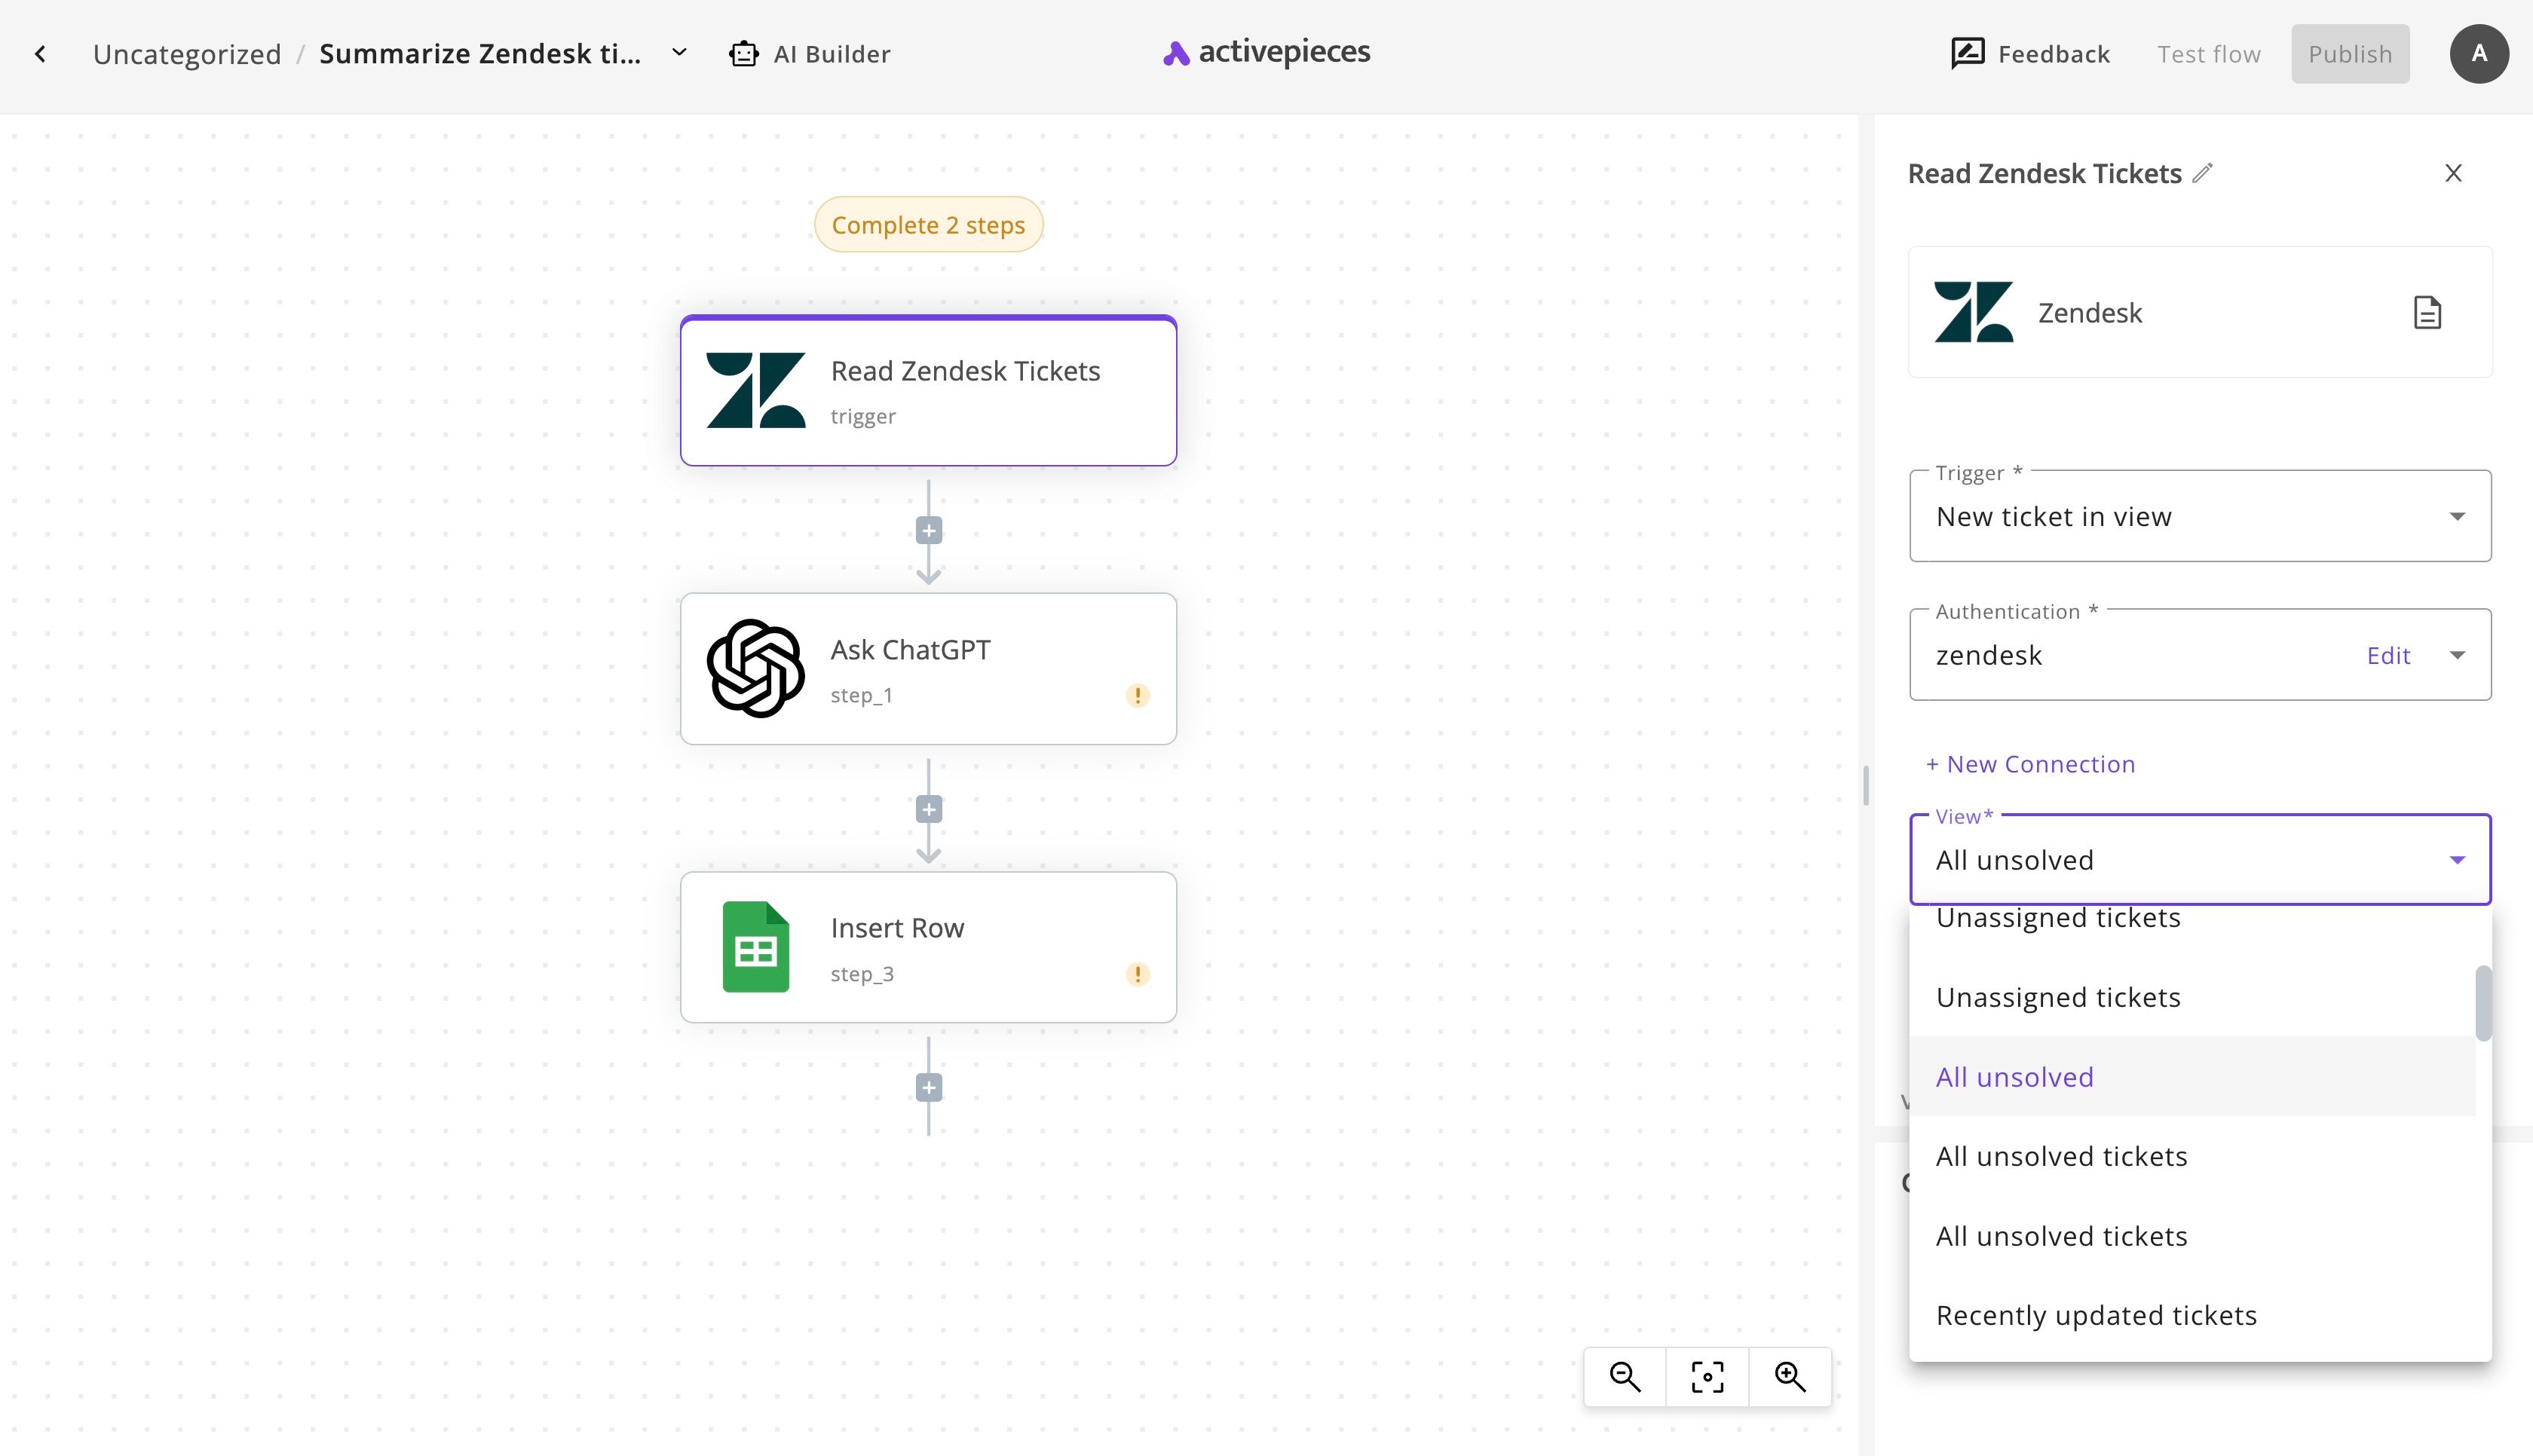
Click on the first step of the flow, the Read Zendesk Tickets step. In the right side panel, click on + New Connection to connect your Zendesk account to the flow. Follow the instructions in the connection popup.
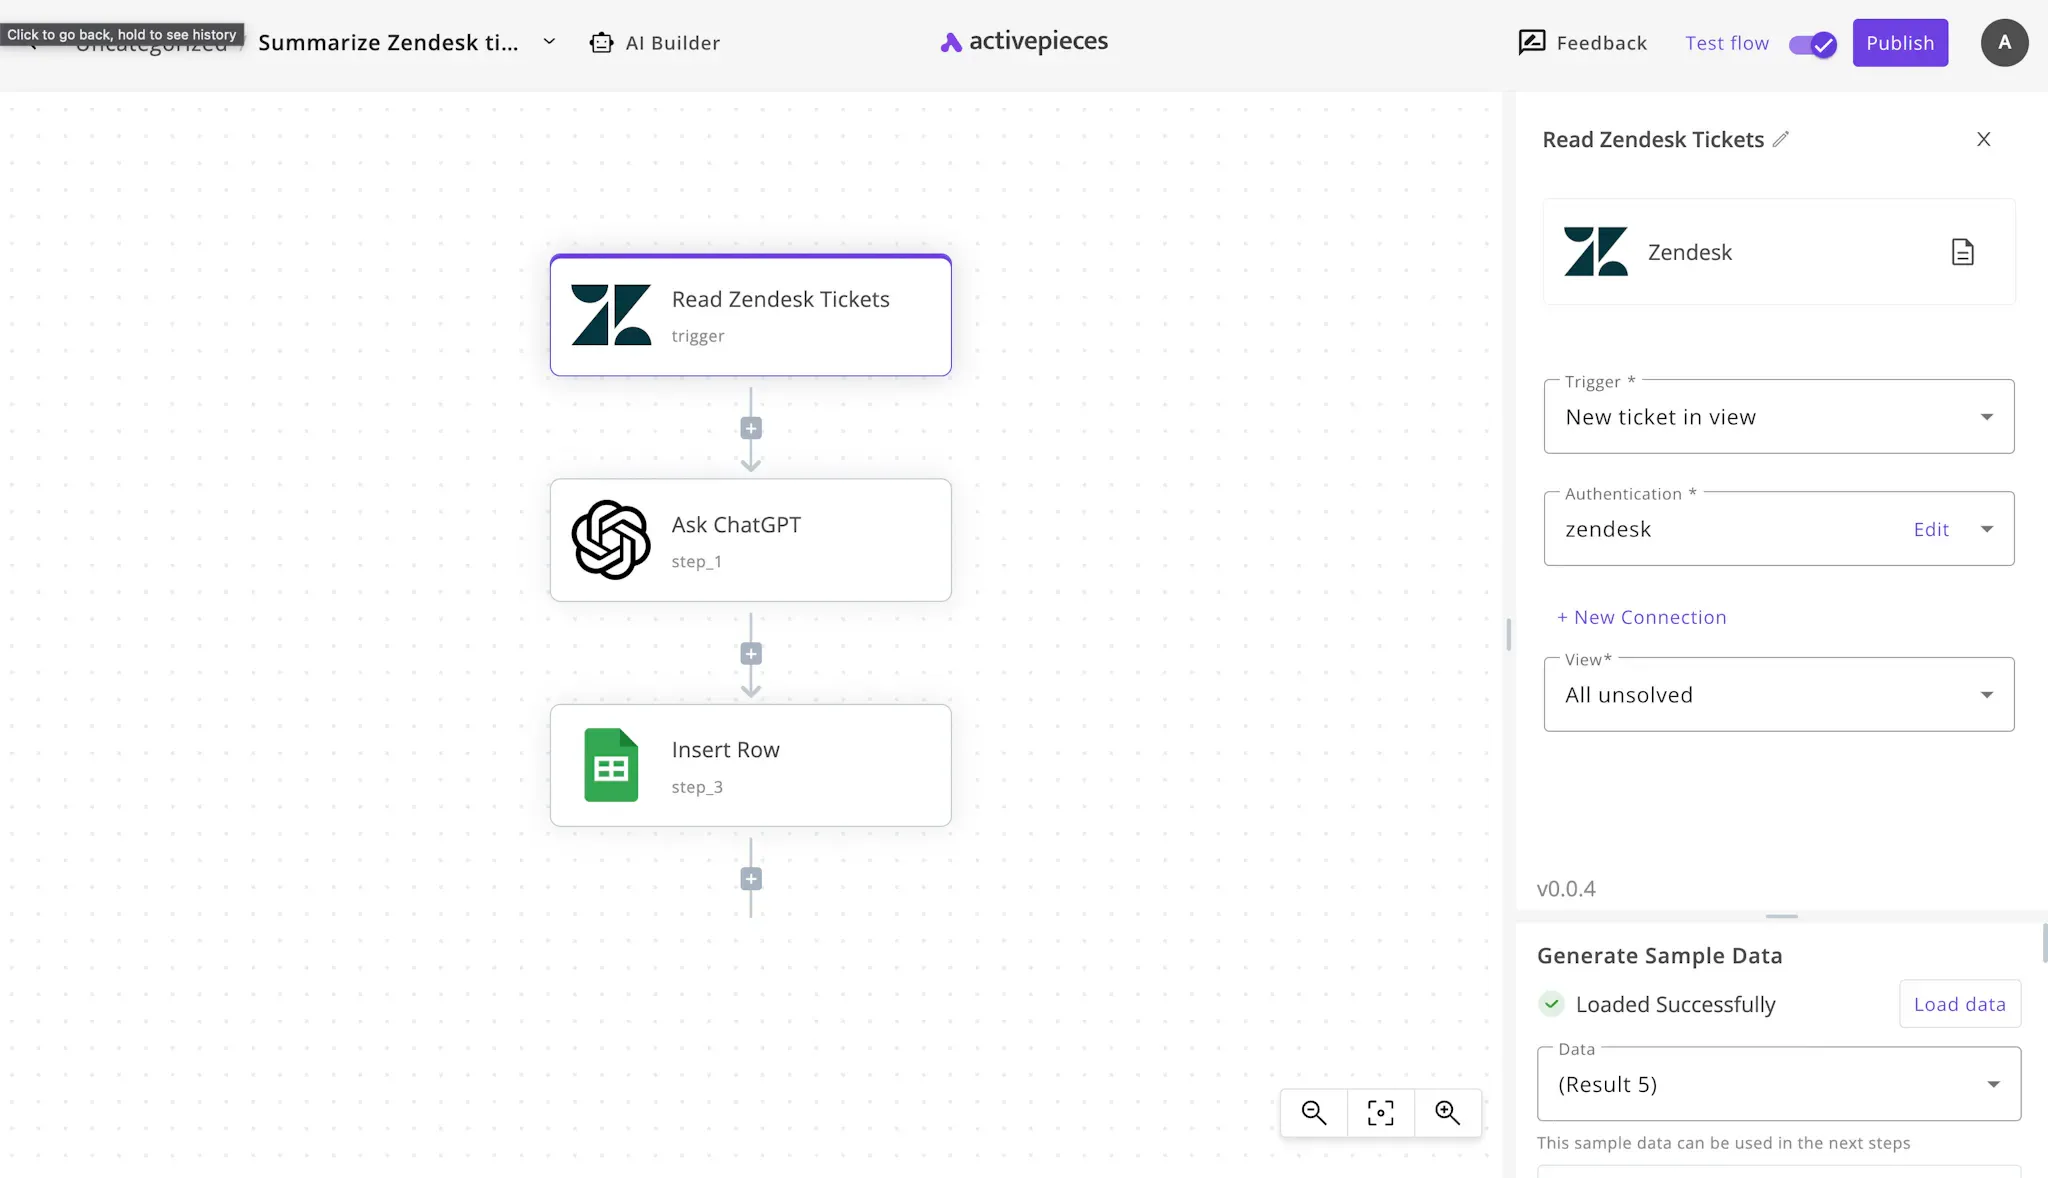
Once your account is connected, choose one of your Zendesk views to monitor for new tickets and trigger the flow accordingly. This is how you should see it:

Once you're done with this configuration, you can click on Load Data to test the trigger and load sample data from your Zendesk account. The generated data will be used in the next steps while working on the flow.
(2) Set up ChatGPT to analyze the sentiment of the support ticket
Click on the Ask ChatGPT step in your flow. Click on + New Connection to connect your OpenAI account to your flow. You should have a working OpenAI account with an API Key and a valid credit card on your account. You can get an API Key inside your account here.
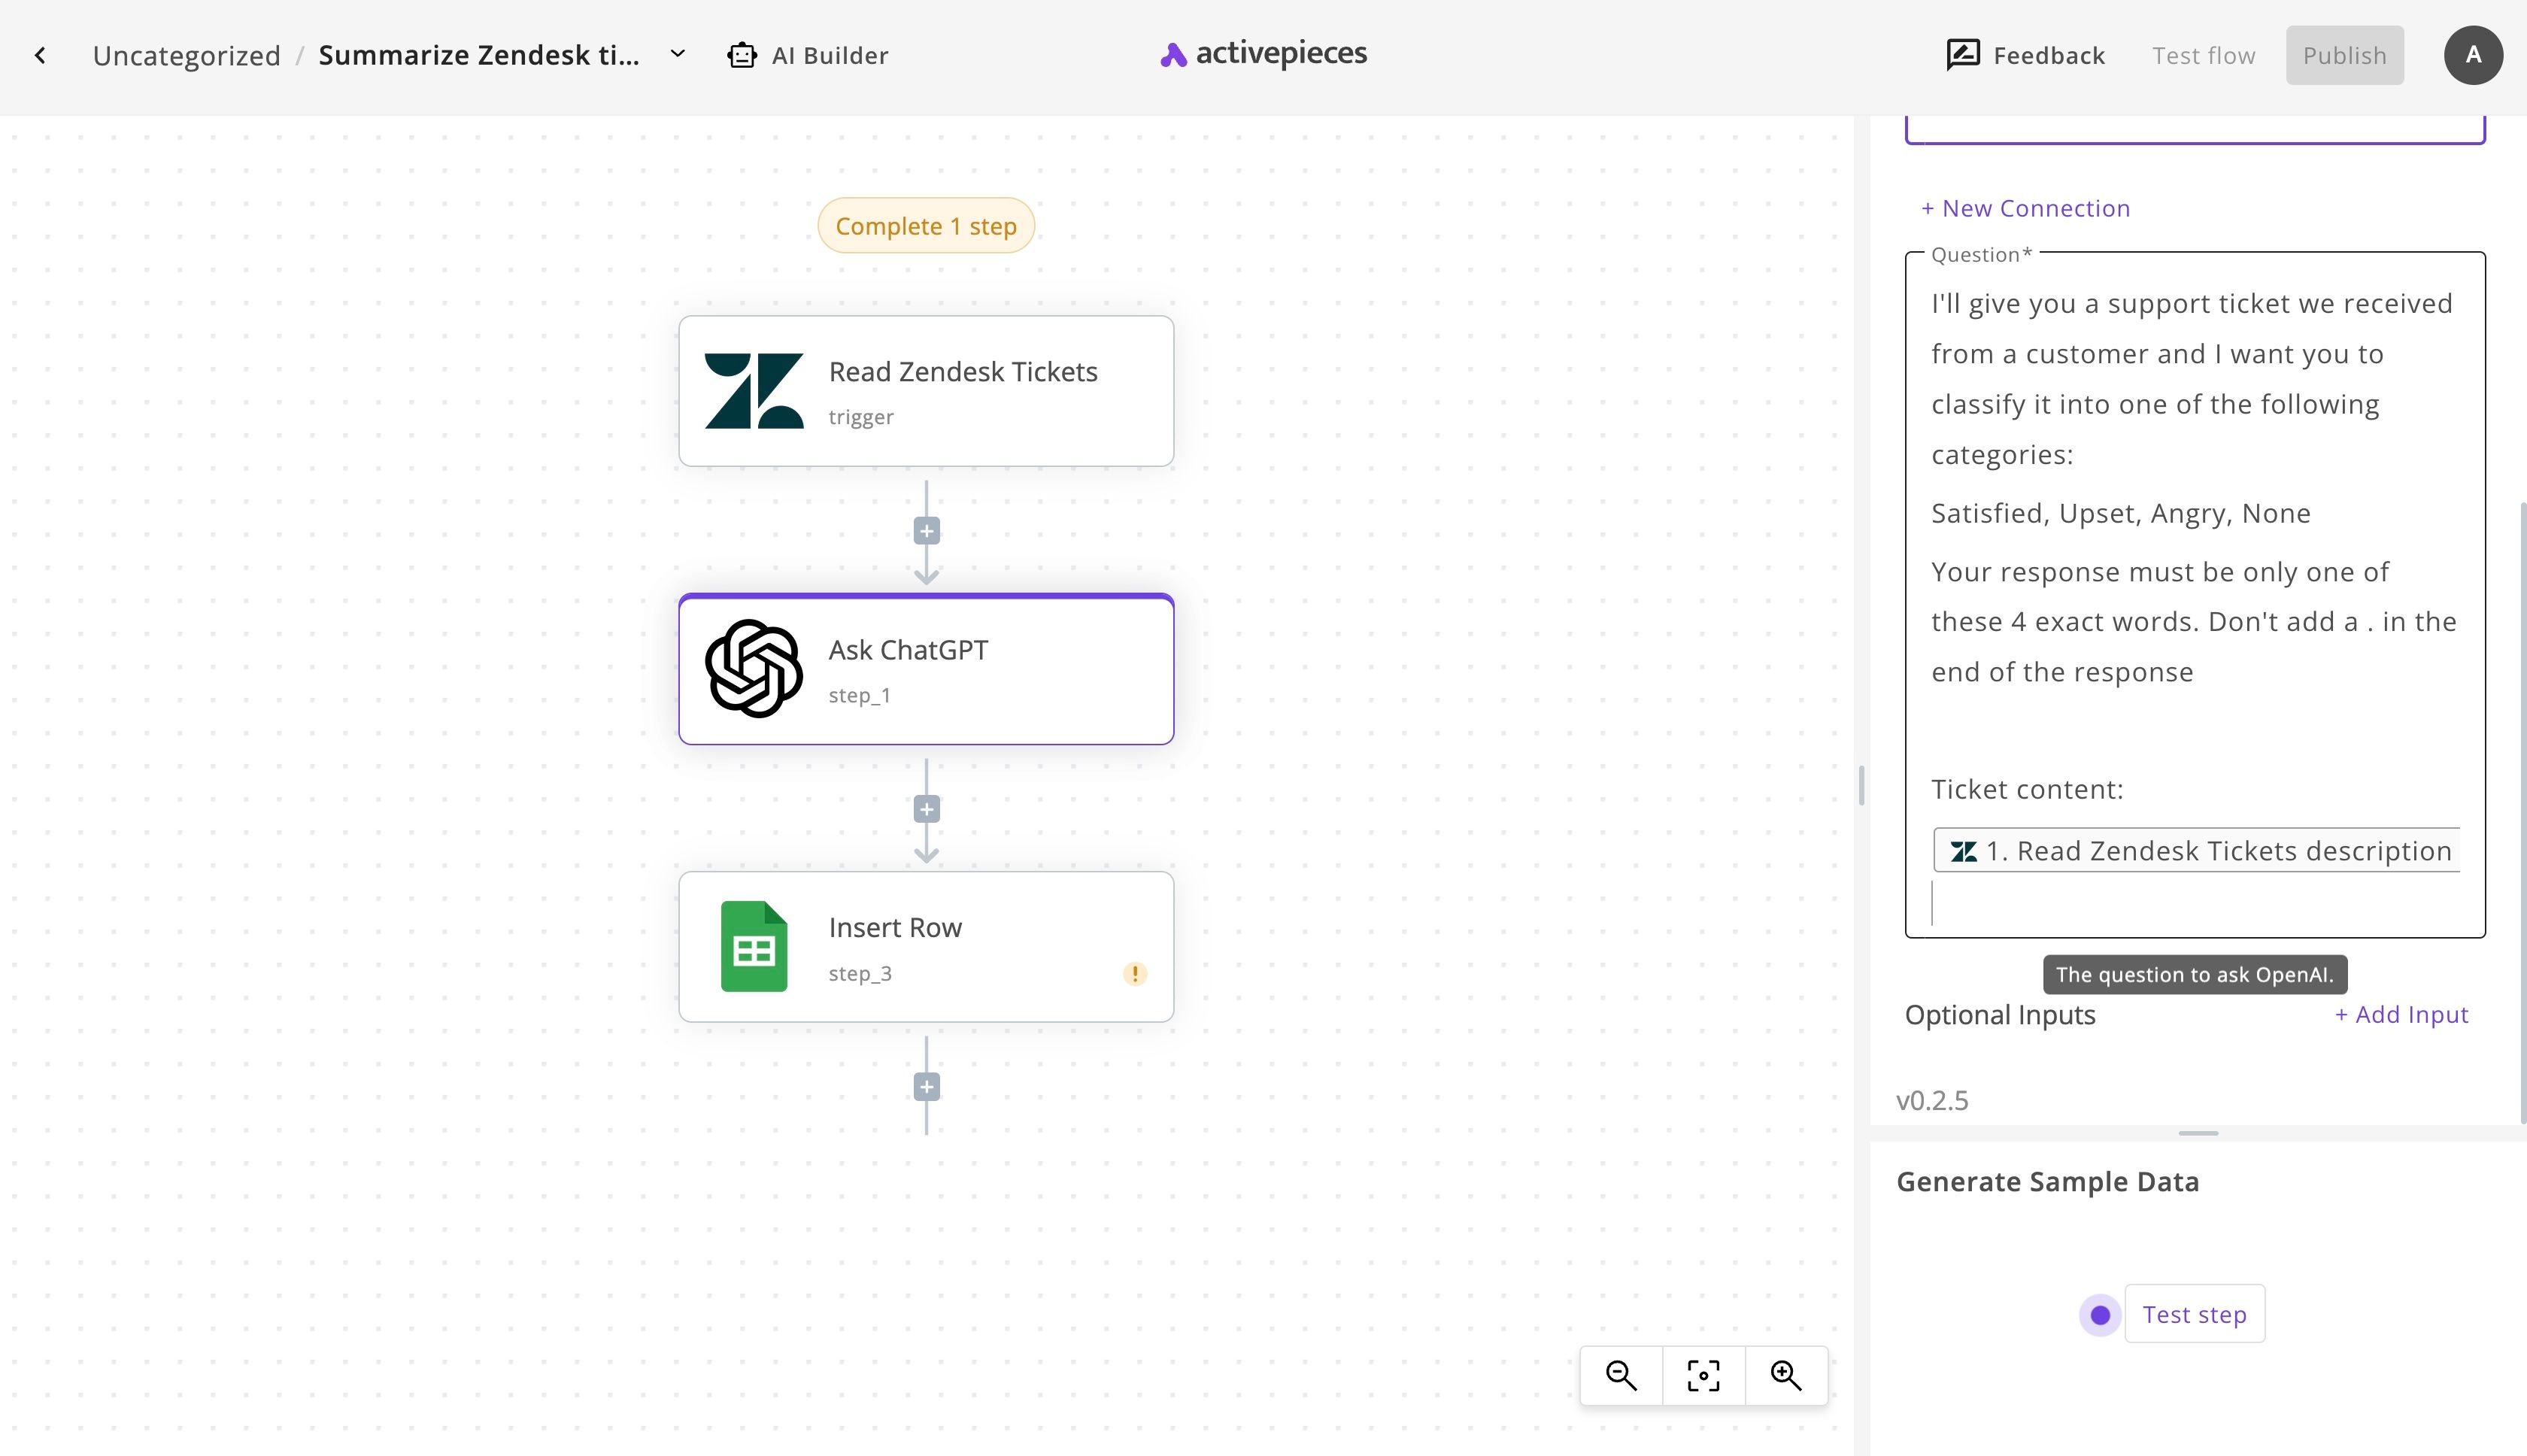
The goal of this step is to pass the ticket information from the trigger step to ChatGPT and ask it about the sentiment of the ticket. I suggest that you read the prompt we provide ChatGPT with and customize it to your needs, for example, maybe you are looking for a different classification to user sentiments. Or maybe you are using this template for another analysis goal than sentiment.
So read the prompt that comes in the ChatGPT step that looks like this, and fit your goal within it.

Click on Test step if you'd like to confirm that it's working fine. It will show the output according to one your sample tickets you tested in the trigger step.
(3) Set up the Google Sheet that receives the analysis
It's time to configure the last step of the flow. Click on the Insert Row step in the flow, and click on the + New Connection to connect your Google account. Once connected, you will be able to choose the Spreadsheet and sub Sheet that will be receiving the sentiment analysis of each new Zendesk ticket in the specified view.
You can run a quick test to this step by clicking on Test step to the bottom of the sidebar. If it succeeds, you're done with building your flow that analyzes the sentiments of your Zendesk tickets by now.
(4) See your ChatGPT Zendesk sentiment analyzer in action
Congrats, your flow is complete now! Click on the main Publish button in the corner to take it live. Now, for any Zendesk ticket you receive in that view, you'll have in the sheet along with its analysis like this:


