Send a personalized welcome email using ChatGPT to new MailChimp subscribers
In the ChatGPT era, it became very possible to write single different email messages at scale. It wasn't practically possible back in the time.
If you treat MailChimp as your main service to sign up users on, for your newsletter or service overall, we'll learn how to send new personalized welcome emails to new sign ups on MailChimp.
If MailChimp is not your main sign up service, you can still apply the same method by changing the input data. They can come from your in-house service or another 3rd party like Shopify.
How to send personalized emails with ChatGPT to new users on my MailChimp account?
Activepieces lets you automate work at scale without having to worry about doing the task manually. It's true that without such a tool, you'll have to find who signed up last, prepare the personalized messages manually on ChatGPT's interface, and go to your email app to send these messages.
You don't need to do any of this with an automation tool like Activepieces. You build an automation flow only one time, this flow will run every time a new sign up comes through.
Steps to personalize welcome emails with ChatGPT and MailChimp
I don't want to overwhelm you with information and let you build this automation from scratch, especially if it's your first time to use an automation tool. I prepared a ready-to-use template that has all what you need for this automation, you'll use it and customize it to your needs.
Prerequisites
Before we start with the steps, you should know that you will need the following tools in hands to complete the automation successfully:
- An account on Activepieces: The ChatGPT personalized email automation will live in this automation tool.
- A MailChimp account and an audience: You will listen to your MailChimp Audience for new members to send welcome emails to.
- An OpenAI account and an API Key: You will generate the personalized welcome email using ChatGPT through the API. I recommend being on OpenAI's paid plan then generating the API Key to avoid failing responses from OpenAI.
- A SendGrid account and API Key: We'll send the welcome email using SendGrid. You can replace this step by a normal Gmail step if you'd like to send emails right from your email, but it might not work at a larger scale.
Let's get to the details, the following steps will guide you through the process of building this automation. It's very simple but I'll explain it step by step.
1. Use the ready template to personalize welcome emails with ChatGPT to your MailChimp subscribers.
Copy this template to use as your automation basis to send personalized emails using ChatGPT to every new MailChimp subscriber. This is an automation template that has the needed structure for you. While copying it, it will ask you to sign up or login with your Activepieces account where the automation will be running.
After copying the template, you'll be able to configure it to work for you or you can modify some steps to better sound like you. For example, you should give ChatGPT some context about your business so it can speak on behalf of you in the welcome email.
2. Understand the ChatGPT personalized welcome email to MailChimp flow.
Once you copy this template, the flow will be rendered on your screen and will look something like this:
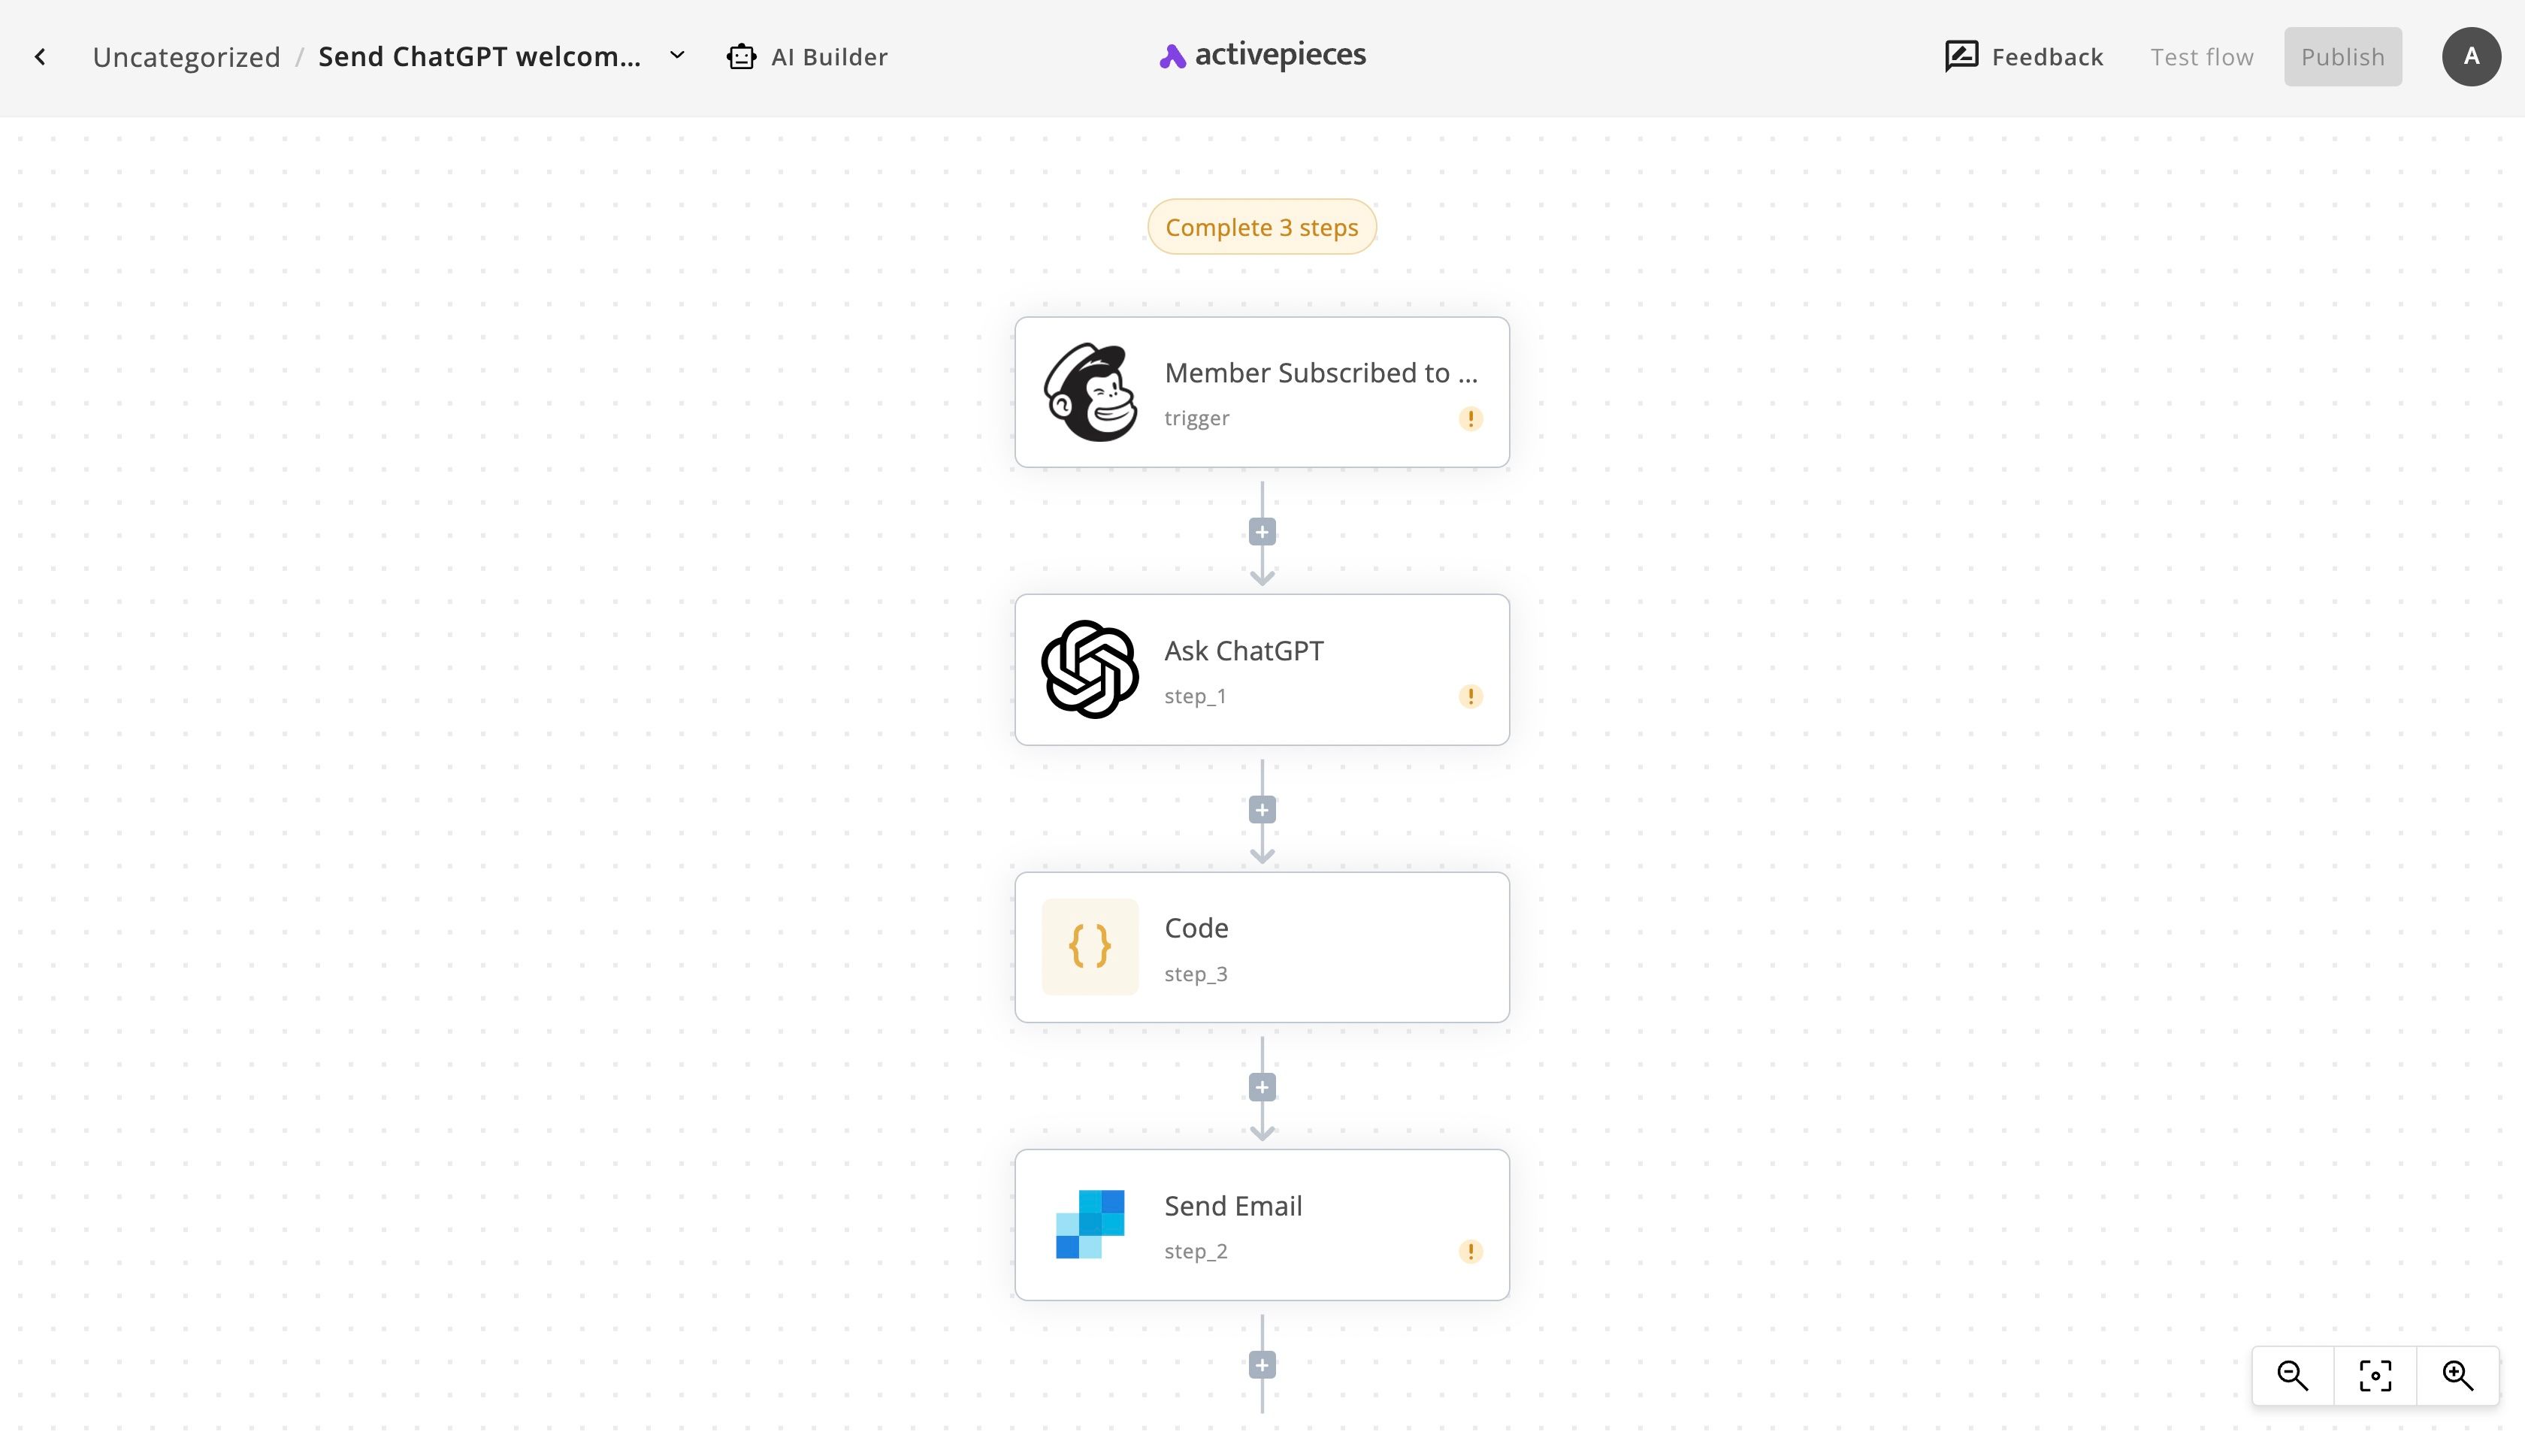
This automation flow consists of 4 steps. We call the first step the trigger. The first step in this flow is the "Member Subscribed to ...", which in this case represents MailChimp (see the logo). This means the automation will run every time a new member is subscribed to your MailChimp audience.
Then once the flow runs, it will send a prompt to ChatGPT to ask it to generate the personalized email according to the data of the new member subscribed to the MailChimp audience. See Ask ChatGPT, the second step.
The third step is a little bit technical, it's a Code step. That means we wrote Javascript in it. The goal of it is to take the output from ChatGPT and convert it to an actual format that can be ready in the last step of the automation. We ask ChatGPT to return a JSON object (technical term) but ChatGPT returns it as text, so we need a code step to convert the JSON text to an actual JSON object.
The last step is Send Email and this is a SendGrid step. We'll get the email written by ChatGPT from the previous step and use it to actually send it to the subscribed member from MailChimp.
3. Complete the personalized welcome email automation.
The goal is to get this automation to run, so we'll have to finish the setup of the different steps in the flow before taking it live with real users. Let's do it.
(1) Configure the MailChimp step
Click on the first step in your flow, the "Member Subscribed to ..." then click on + New Connection to connect your MailChimp account. This should be straightforward.
Once your account is connected, you will see all your audiences in the next dropdown. Choose the audience that you'd like to listen to in order to run this flow. In other words, choose the audience that you'd like to send personalized welcome emails to its new subscribers.
When I connected my account and selected the audience, my screen looked this way:
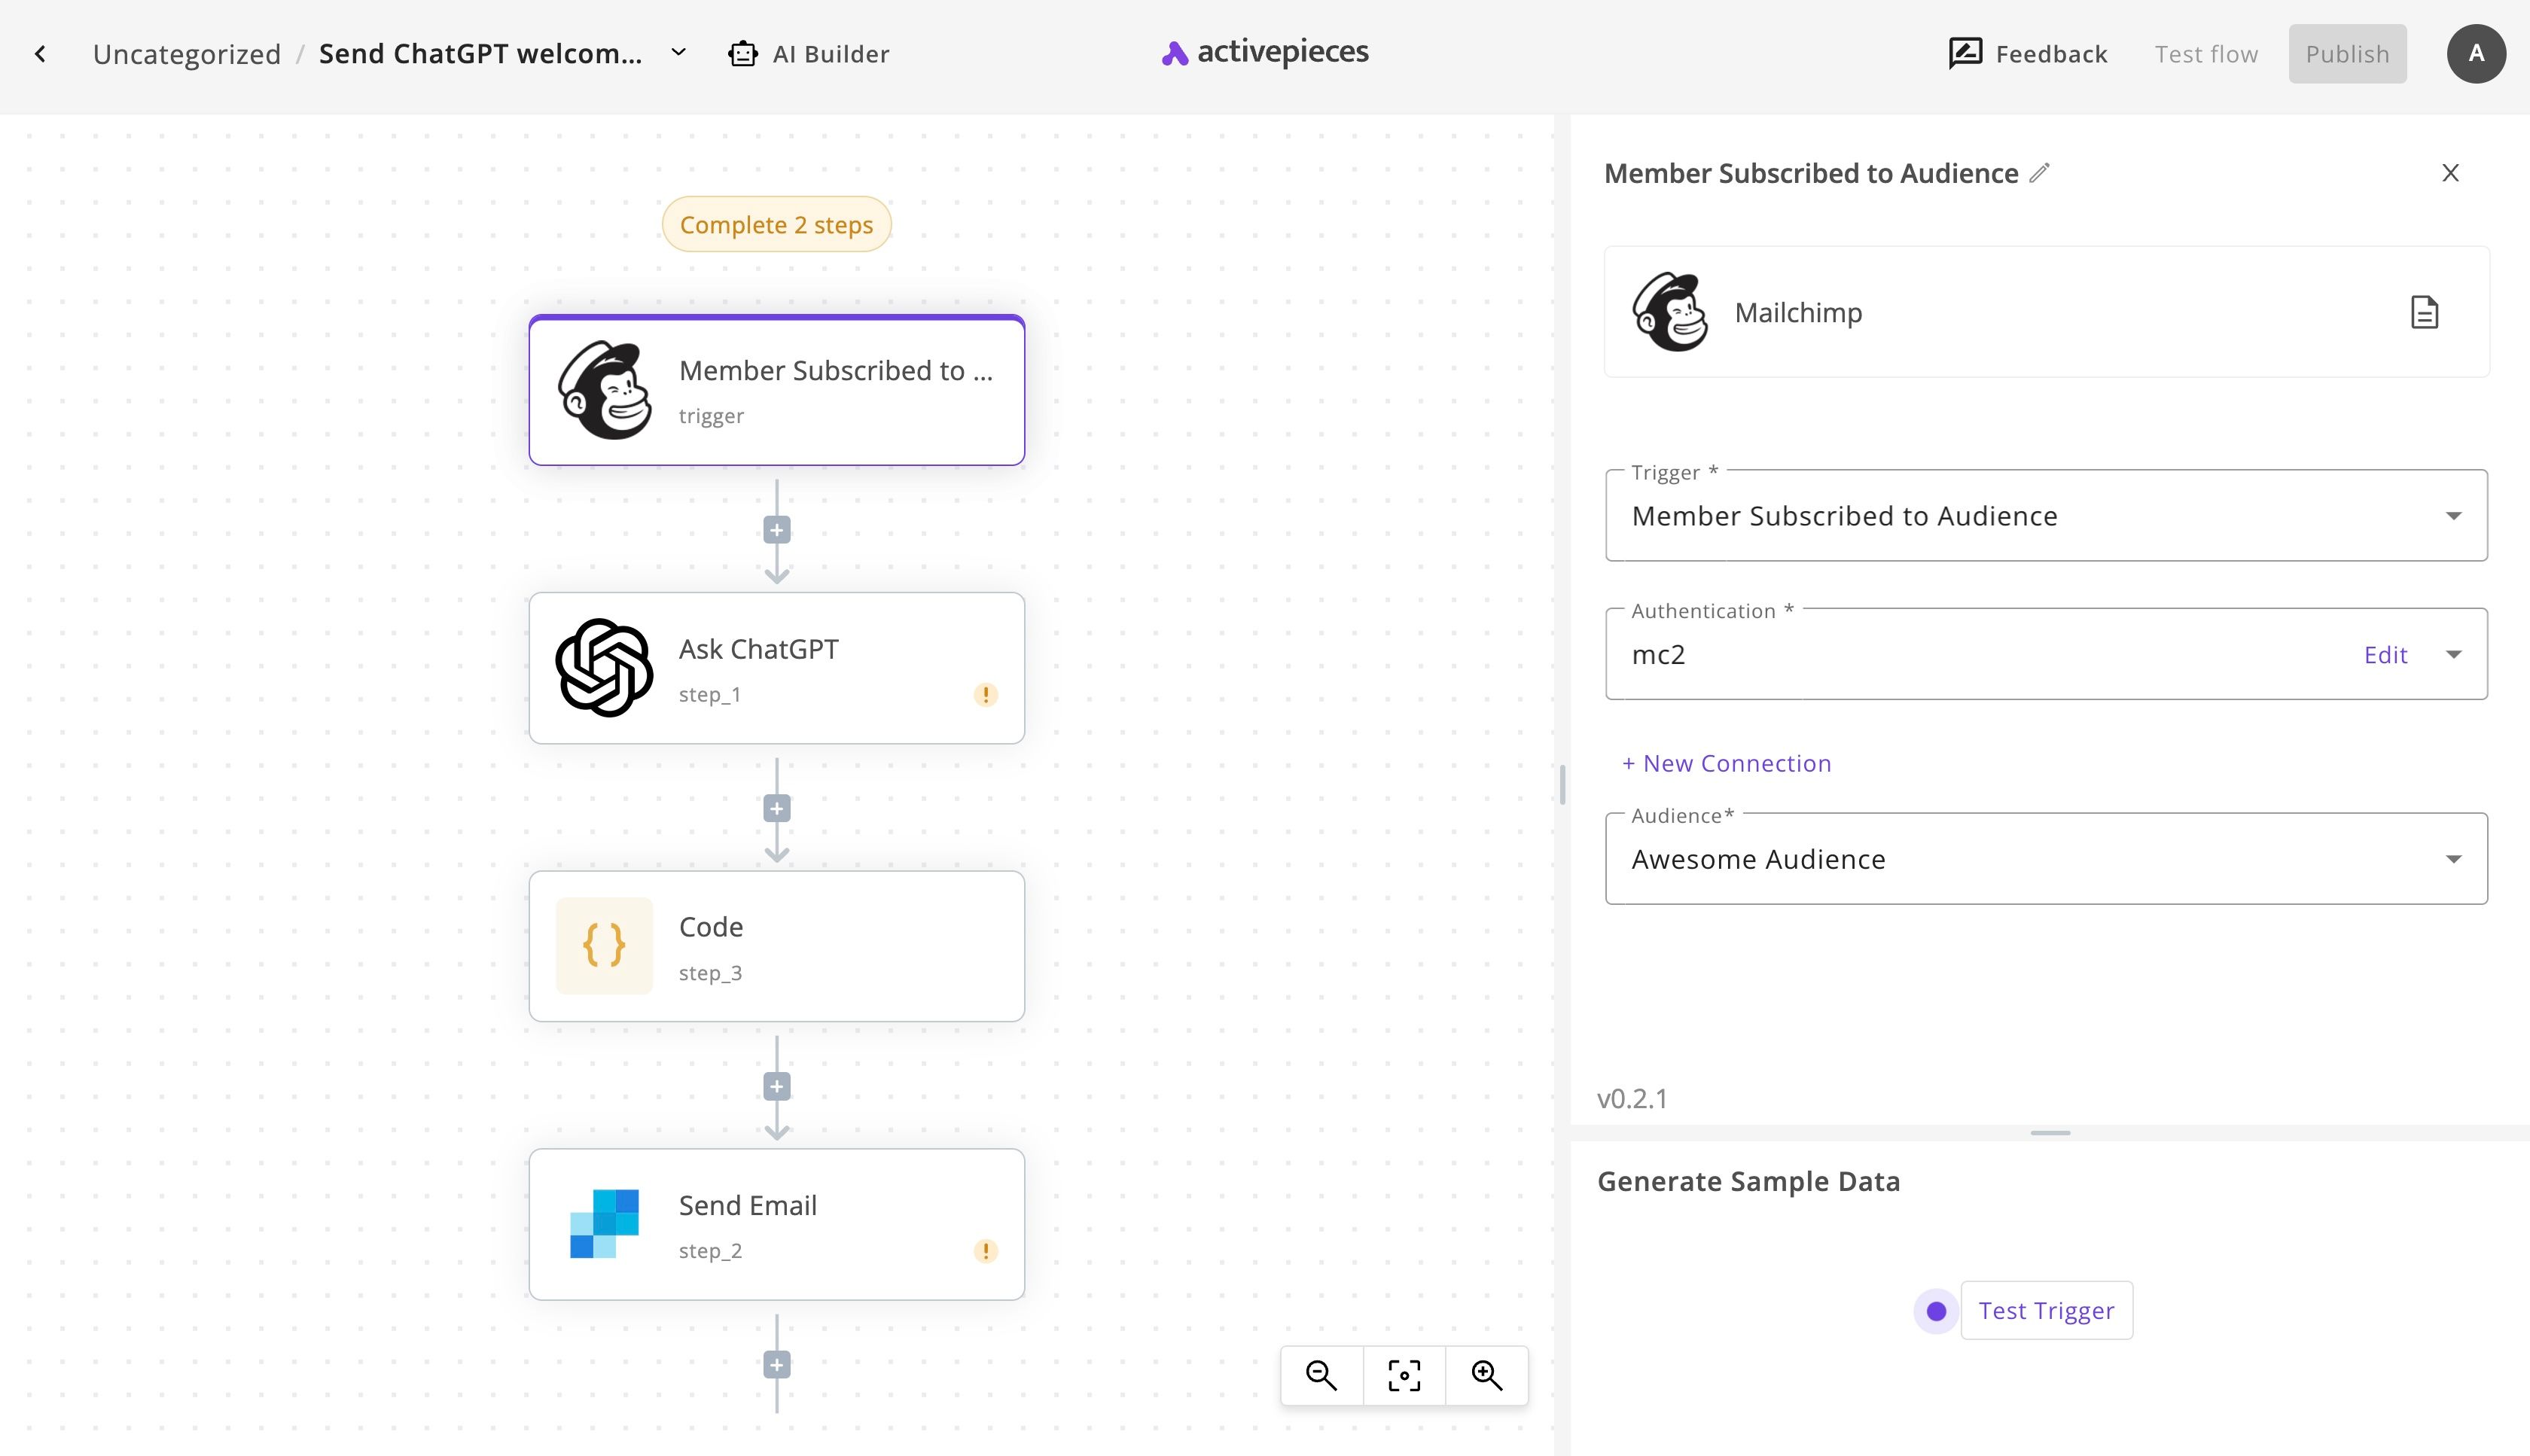
Yes, I call my audience the Awesome Audience! Click on Test Trigger to the bottom of the panel in order to generate test data that can be used throughout your flow design process. After clicking, you'll have to go and add a member to your audience to see if it works.
(2) Set up the Ask ChatGPT step
Let's now configure the step responsible for generating the personalized email message. Click on Ask ChatGPT in your flow, and + New Connection in the right side panel. Then get your API Key from your account as instructed in the connection popup.
Many users reported that ChatGPT doesn't work very properly in the free tier through the API, so it might be wise to add a credit card, upgrade your ChatGPT API plan and then generate the API Key.
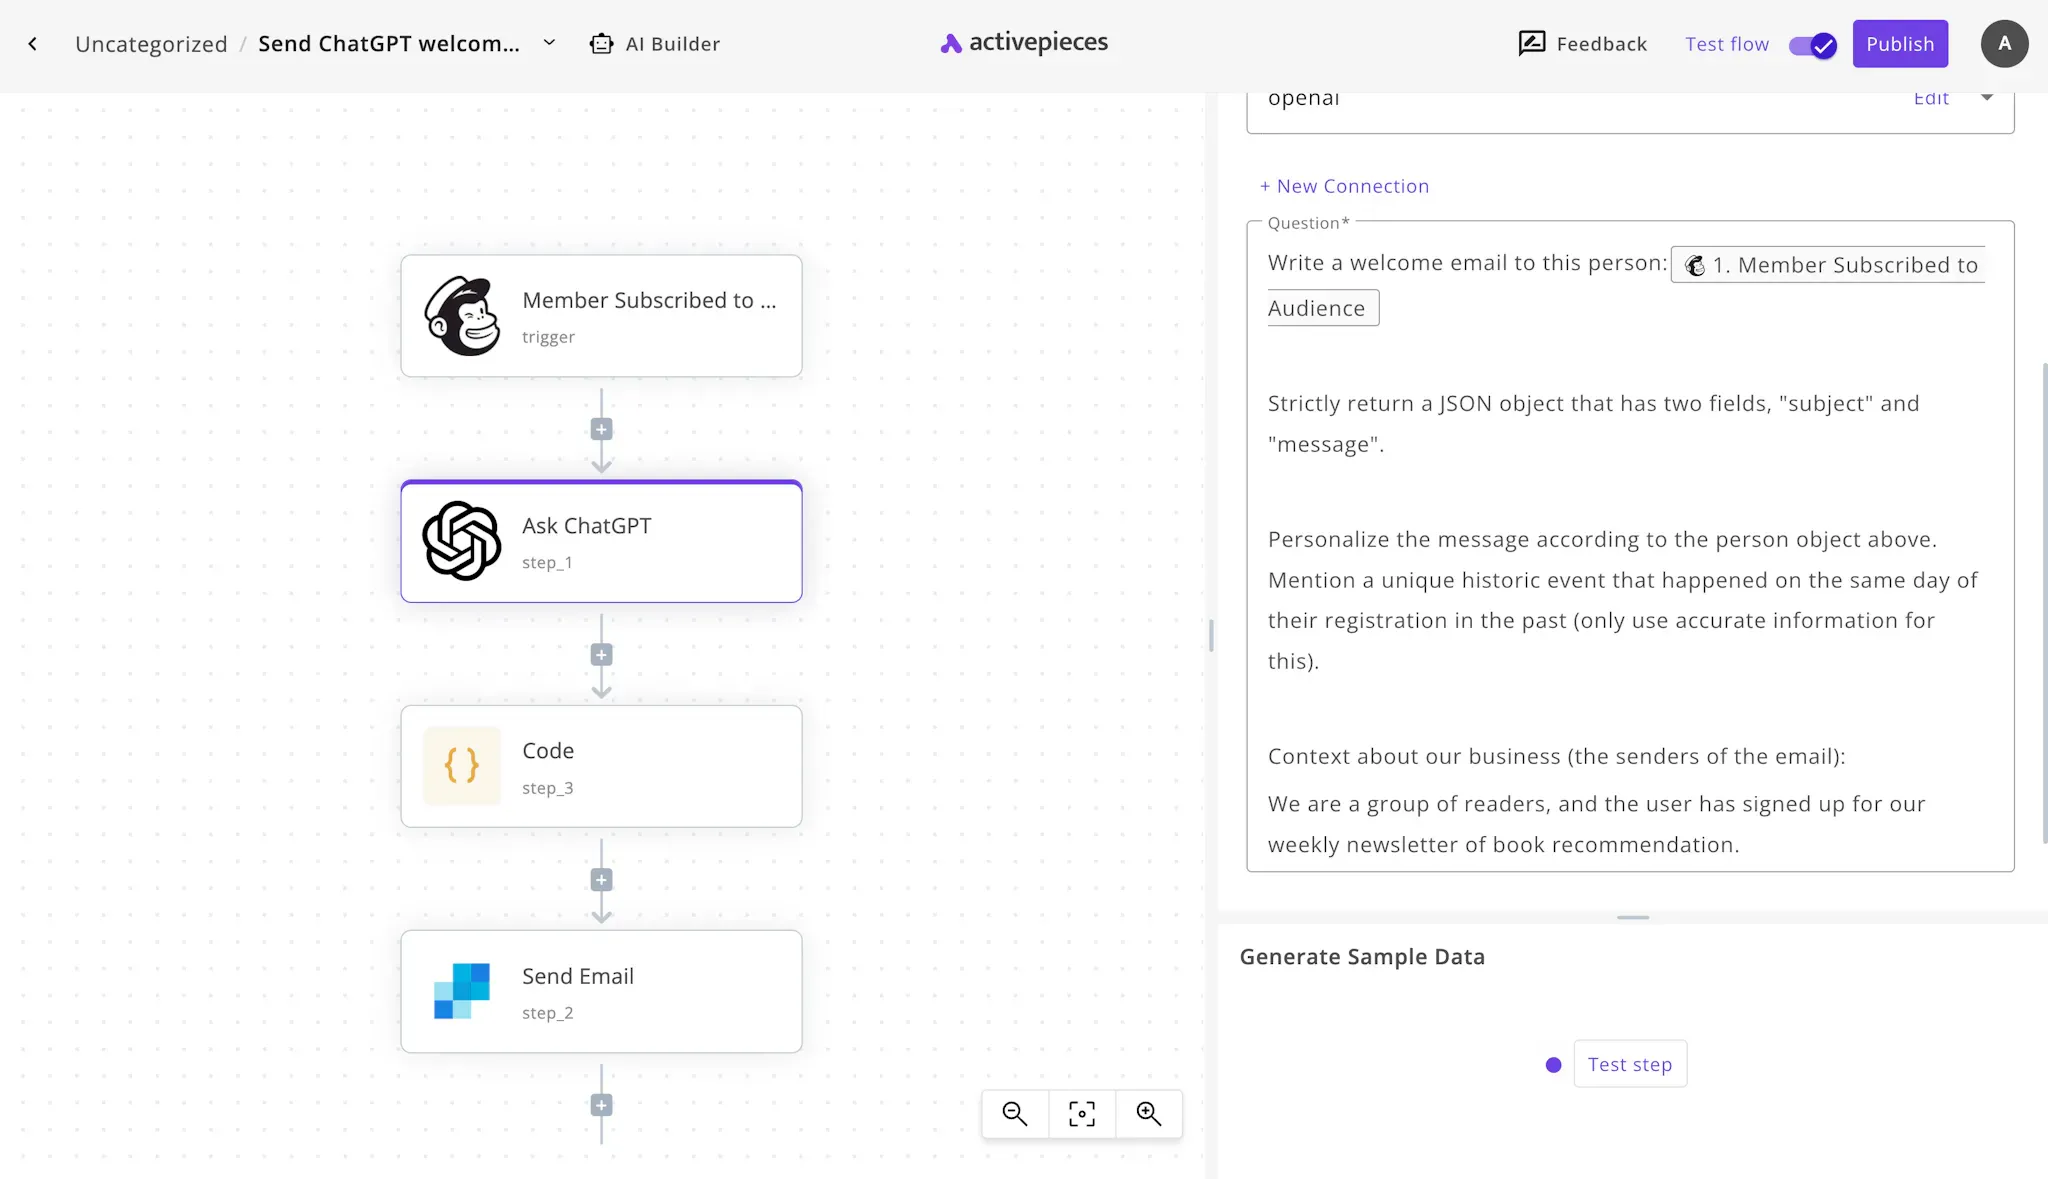
Now that your OpenAI is connected, let's take a look at the prompt we're sending to ChatGPT. This is an important part of the flow as the email will be sent according to your instructions to ChatGPT.
This is what the template has by default:
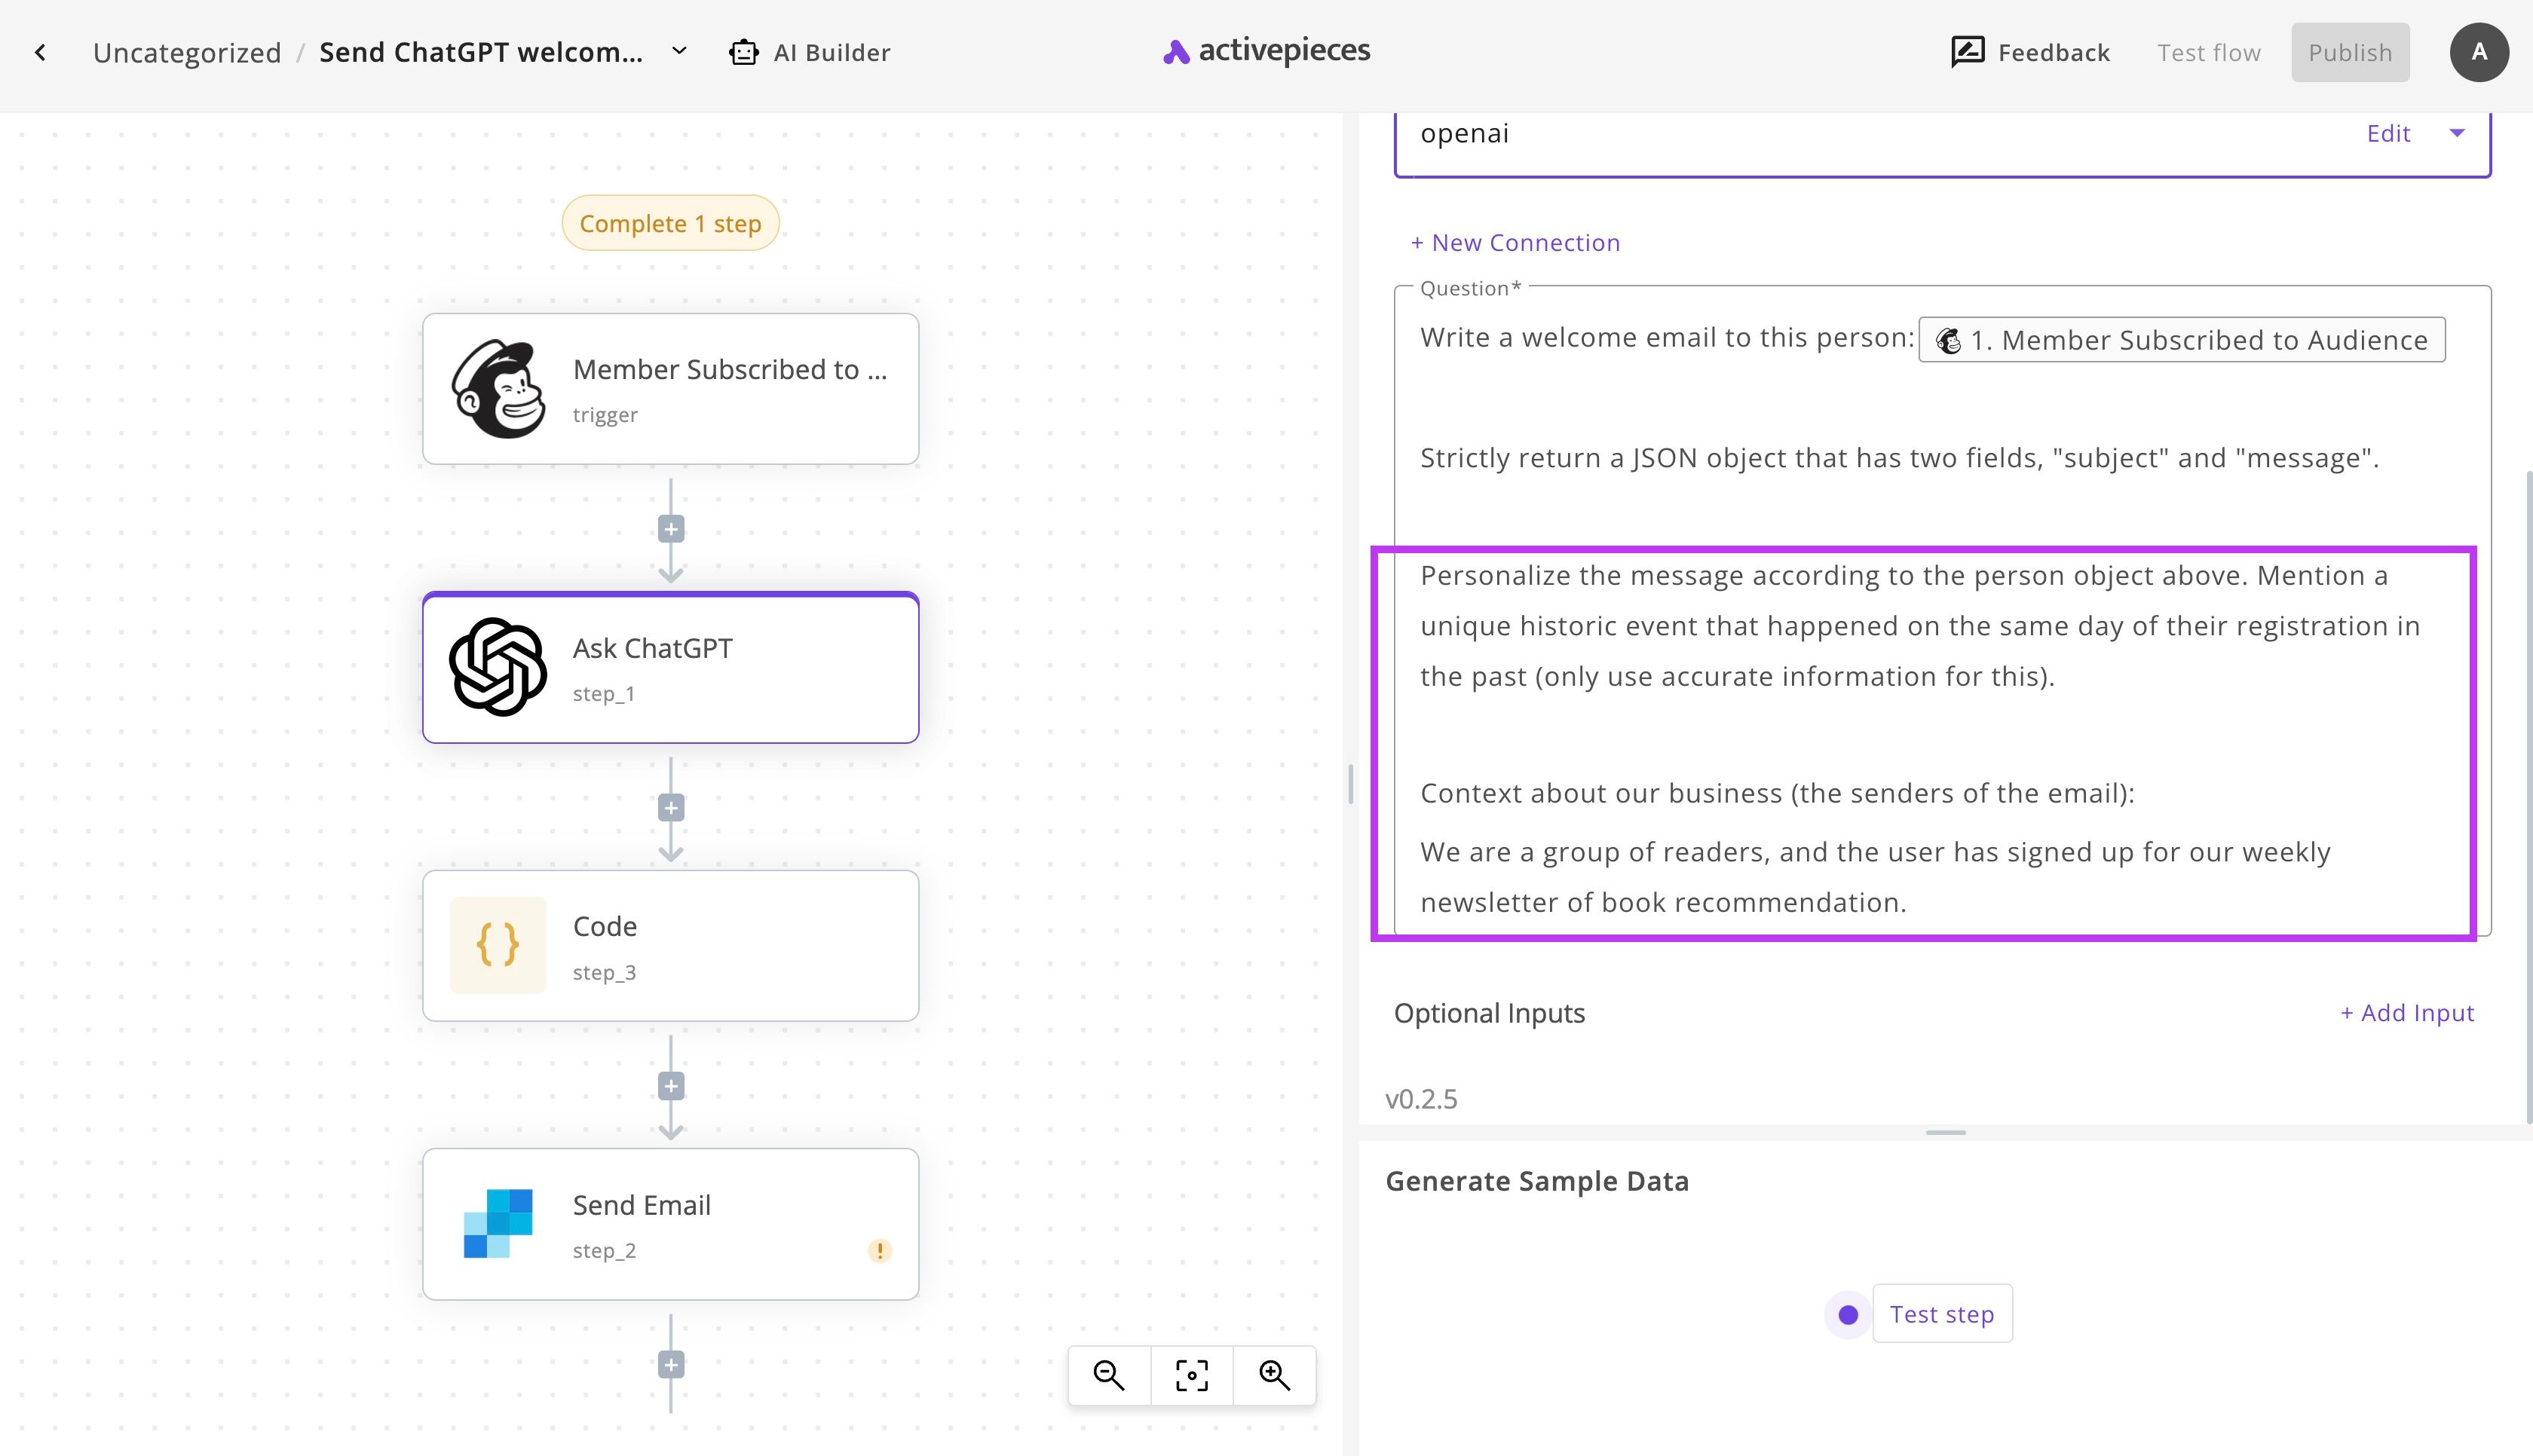
We decided that the business who's sending the welcome email is a book club and the subscription is for a book recommendation newsletter. We also decided that we'd like to send a historical event that happened on the same day of the sign up of the user.
These details can be changed to fit your business description and need, you can also be creative with them.
Now click on Test step to see if ChatGPT is generating relevant content to what you need. The output will look a bit technical but you can try to read it (because it's formatted as a JSON object).
The reason behind this is that we need to generate two different things, the subject and the content of the email, instead of sending two requests to ChatGPT, we ask it to generate them in one request and return them together as an object that will let us access the information by the keys of the object.
(3) Configure the email sending step with SendGrid
Click on Send Email. This step uses SendGrid to send your emails. SendGrid is one of the very popular services for email sending.
We don't recommend that you replace this with a Gmail step and use your personal email as that won't scale up (can send to 50 or 100 people then will most likely stop).
So now, click on + New Connection, find your SendGrid API Key from your account and fill it in the input. Once your account is connected, look at the other fields.
You'll have to modify the sender email and name which are the information that will be displayed to your user as the sender when they receive your personalized welcome email. These bits can be found here:
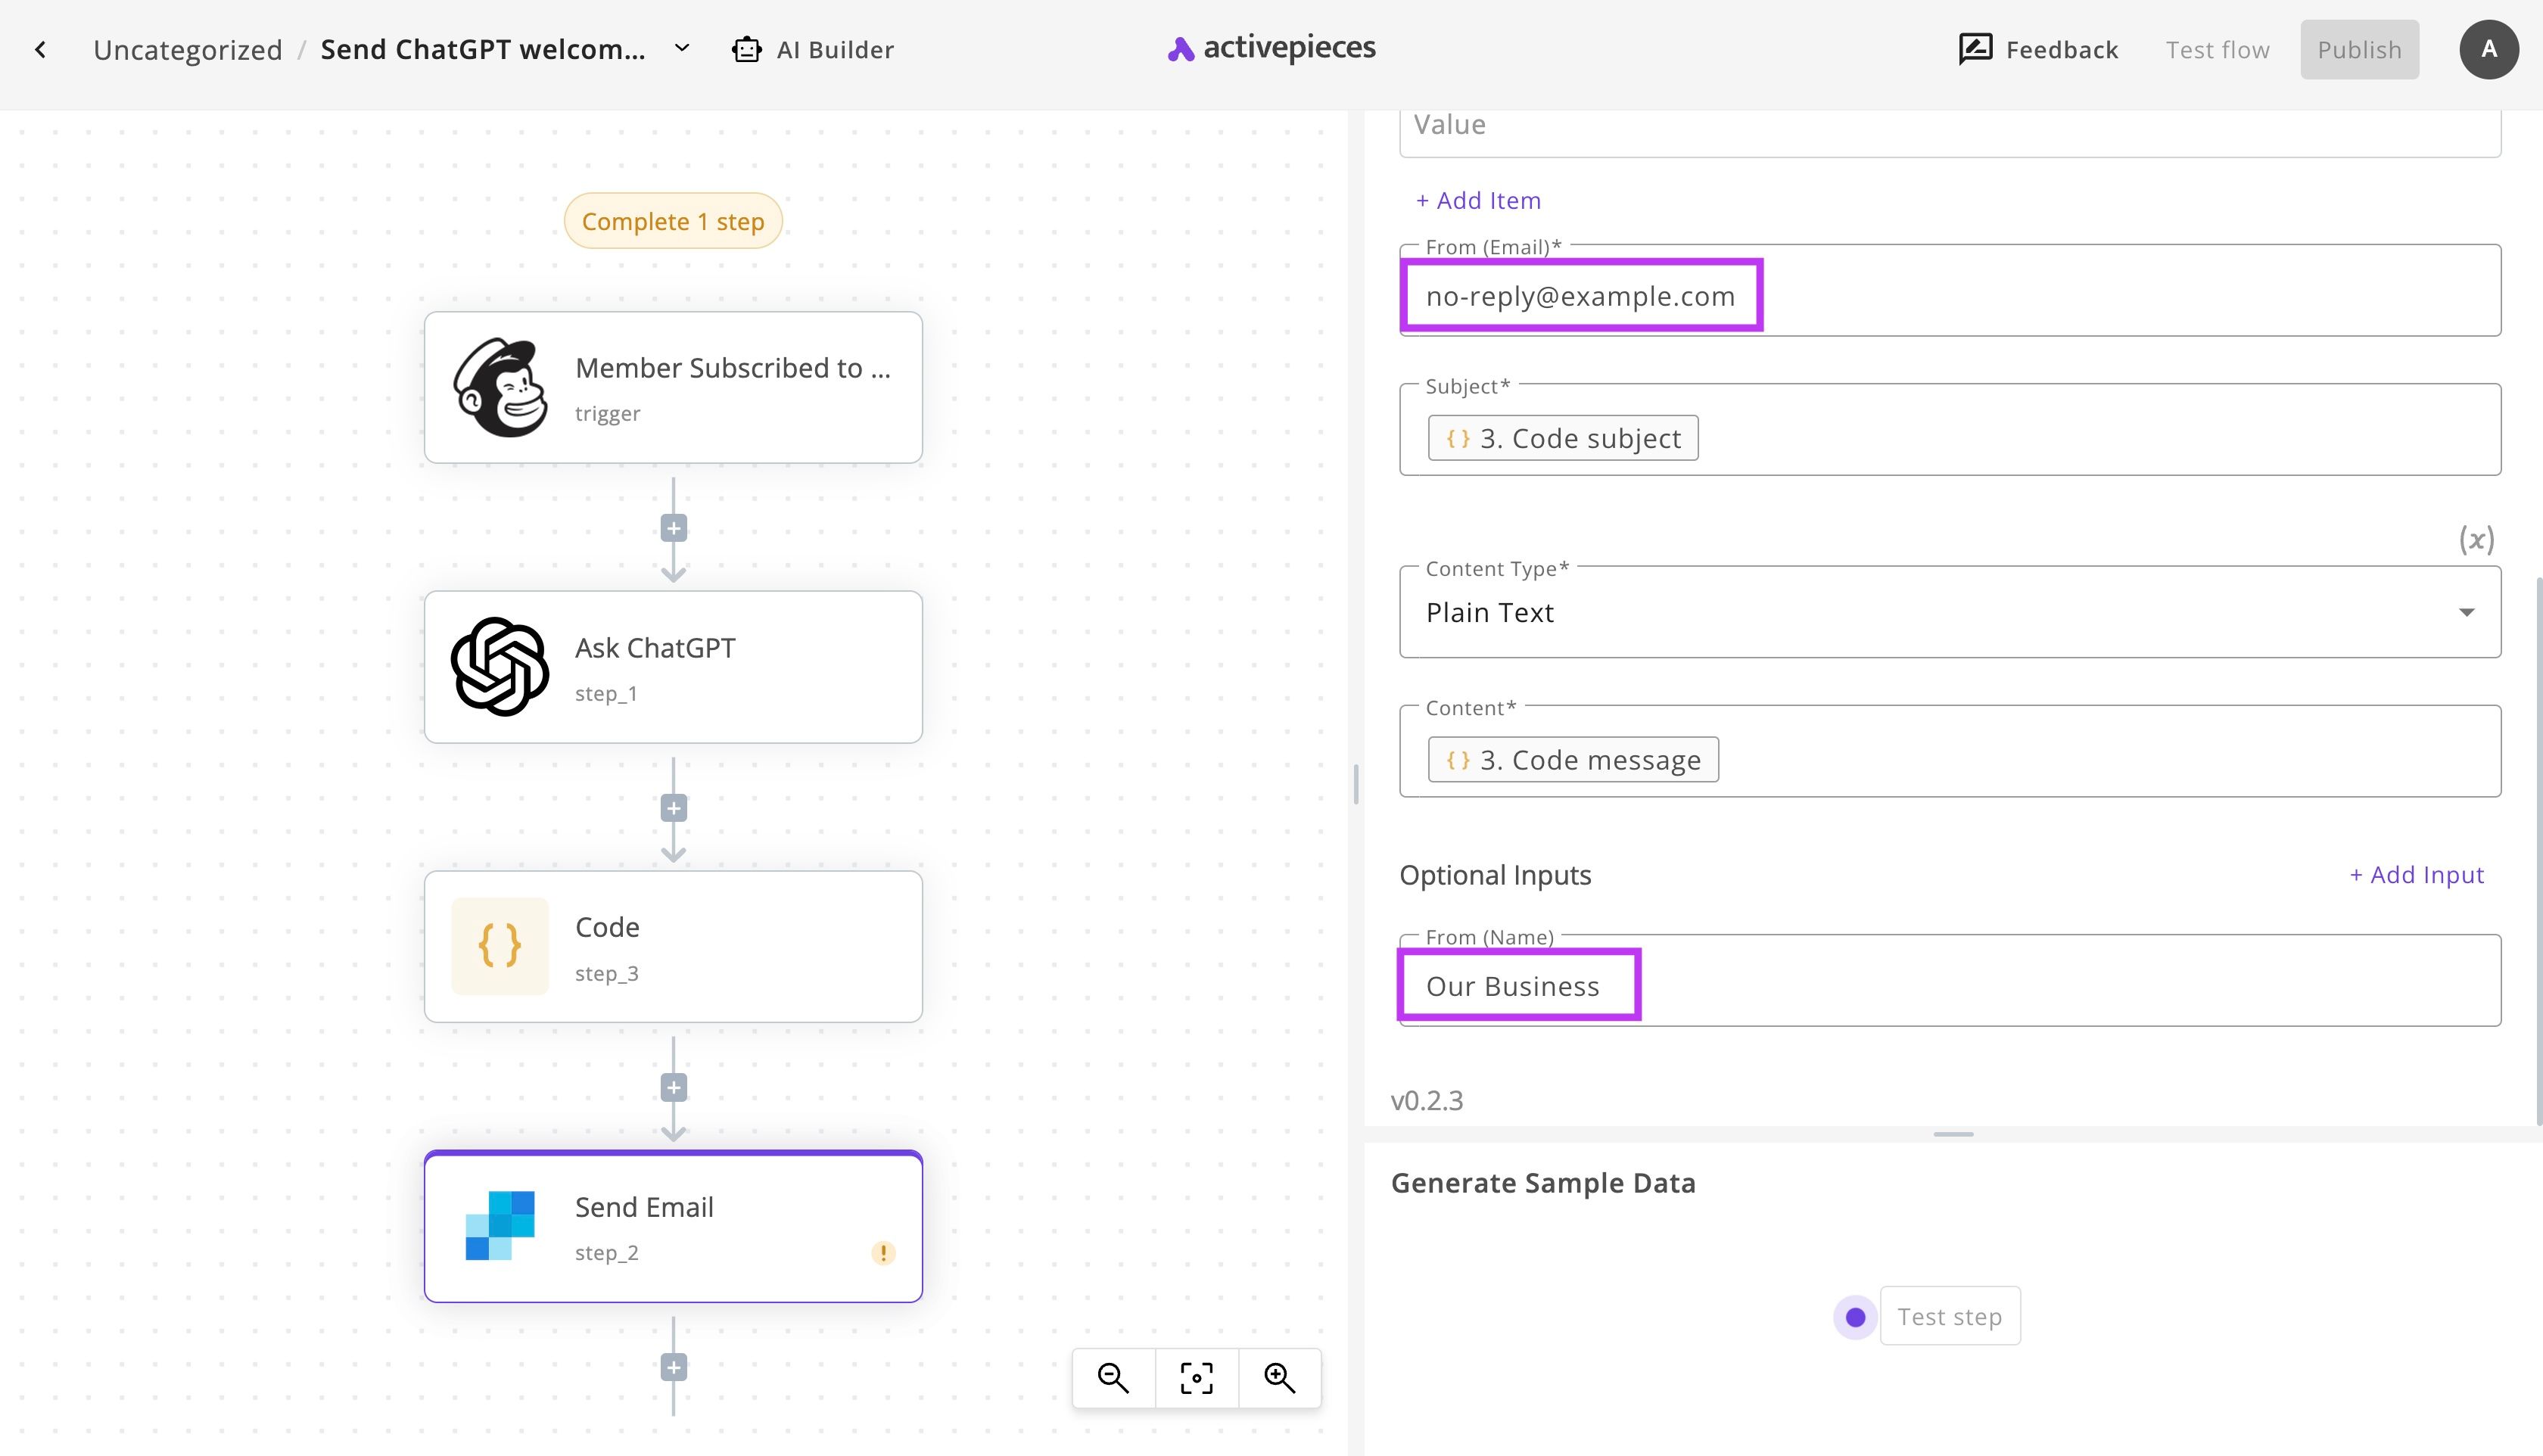
You can now either Test step or Test flow (since this is the last step in your flow), if you'd like to see how it will work until your email inbox.
(4) Take your personalized welcome email (powered by ChatGPT) live
This is it! Click on Publish, the main button on the screen to take this automation live and enable it. Now, whenever a new subscriber is added to your selected MailChimp audience, they will receive an automated welcome email personalized to them.
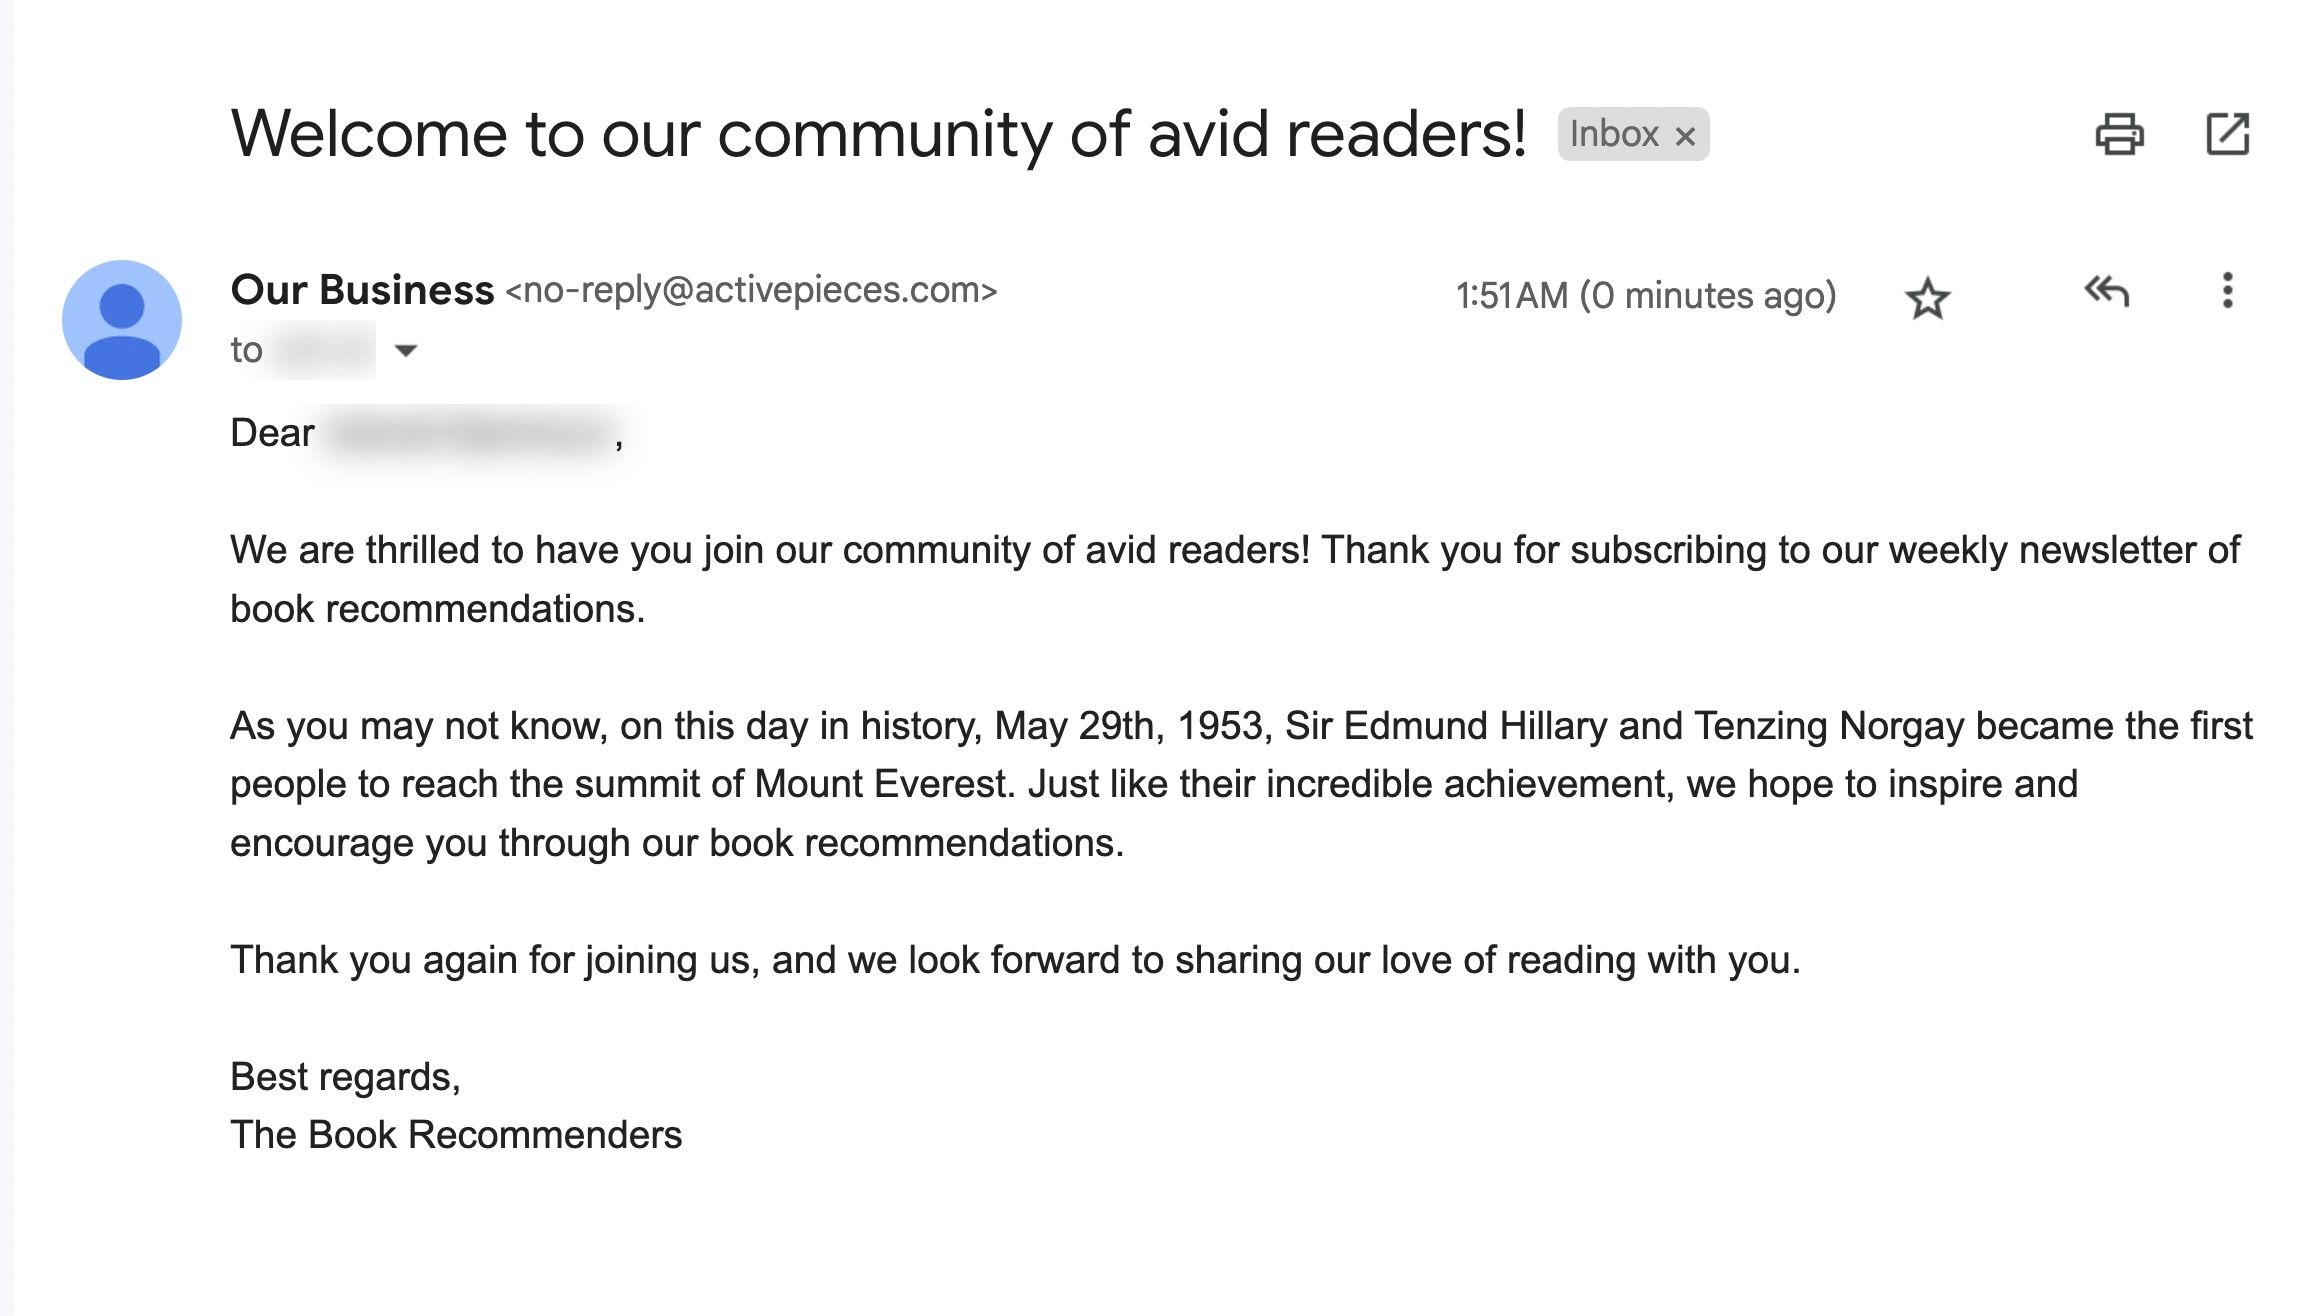
When I enabled the flow and signed up to the MailChimp list, I received this email message in my inbox:
