Use ChatGPT to automate writing long blog posts on WordPress (1,500+ words)
ChatGPT is capable of producing long articles but OpenAI (the company behind ChatGPT) says they restrict it only to short content to keep it practical and useful. If you're working on a blog for your organization and would like to scale it up with detailed high quality content, chances are you trying to hack ChatGPT.
I saw some users talking to ChatGPT asking it to write content then asking it to add more paragraphs or simply saying "more" in the next prompt. That works but it's unplanned and it needs continuous intervention. Let's explore better ways to achieve this mission!
How can I automate long form blog writing with ChatGPT into my WordPress?
Our goal is to ask ChatGPT to write blog posts about specific topics in a long form. That should consist of 5-6 main headings and about 1,500 words.
There are 2 issues with this: Forcing ChatGPT to write long form content to the contrary of the shorter type of content it typically produces, and automating this task to post directly to our WordPress site from ChatGPT.
We'll solve both issues today using Activepieces, a business automation tool that can connect to ChatGPT and WordPress, and can handle the logic in between.
Prerequisites
In order to achieve our goal and automate ChatGPT with WordPress for long form blog posts, we'll need the following tools in hand:
- An Activepieces account: We'll build this automation flow on Activepieces.
- A Google Sheet: This will be our database of ideas for the blog posts.
- An OpenAI account and API Key: This will let us use ChatGPT programmatically through the APIs.
- A WordPress site with Basic Auth plugin: We need to have a WordPress website to post the generated content to, we should also install the Basic Auth plugin that will allow us to use WordPress through the APIs.
Steps to let ChatGPT write long form blog posts and send them to our WordPress site
I've put all the steps required to automate long form posts between ChatGPT and WordPress here. All you have to do is to follow them step by step.
1. Start with the template for long posts automation with ChatGPT.
Start by using this template on Activepieces. The template will give you all what you need to generate long posts with ChatGPT and post them to your WordPress website, then send an email to your team to take a look and approve the post if you don't want to publish it immediately.
On your way to use the template, you'll have to create an Activepieces account as the template is designed to work in the Activepieces automation builder.
2. Understand the ChatGPT long posts automation.
Once you copy the template successfully to your account, you will see a flow in the builder. The flow is responsible for all the automation we're planning to build. I'll explain it part by part here, but I'll take you through the concept first.
Producing long articles concept
In our automation, we'll get the title from our Google Sheet, ask ChatGPT to generate an outline for our long article. We namely ask it to generate 5 outlines in our template. It will then return the outlines, we'll iterate over these headings in the outline and ask ChatGPT to write a shorter article about each heading.
We'll keep combining them until the end of the flow where we'll have a long article of 5 main headings with a short article under each of them which will usually be around 1,500 or 1,600 words.
Step by Step explanation
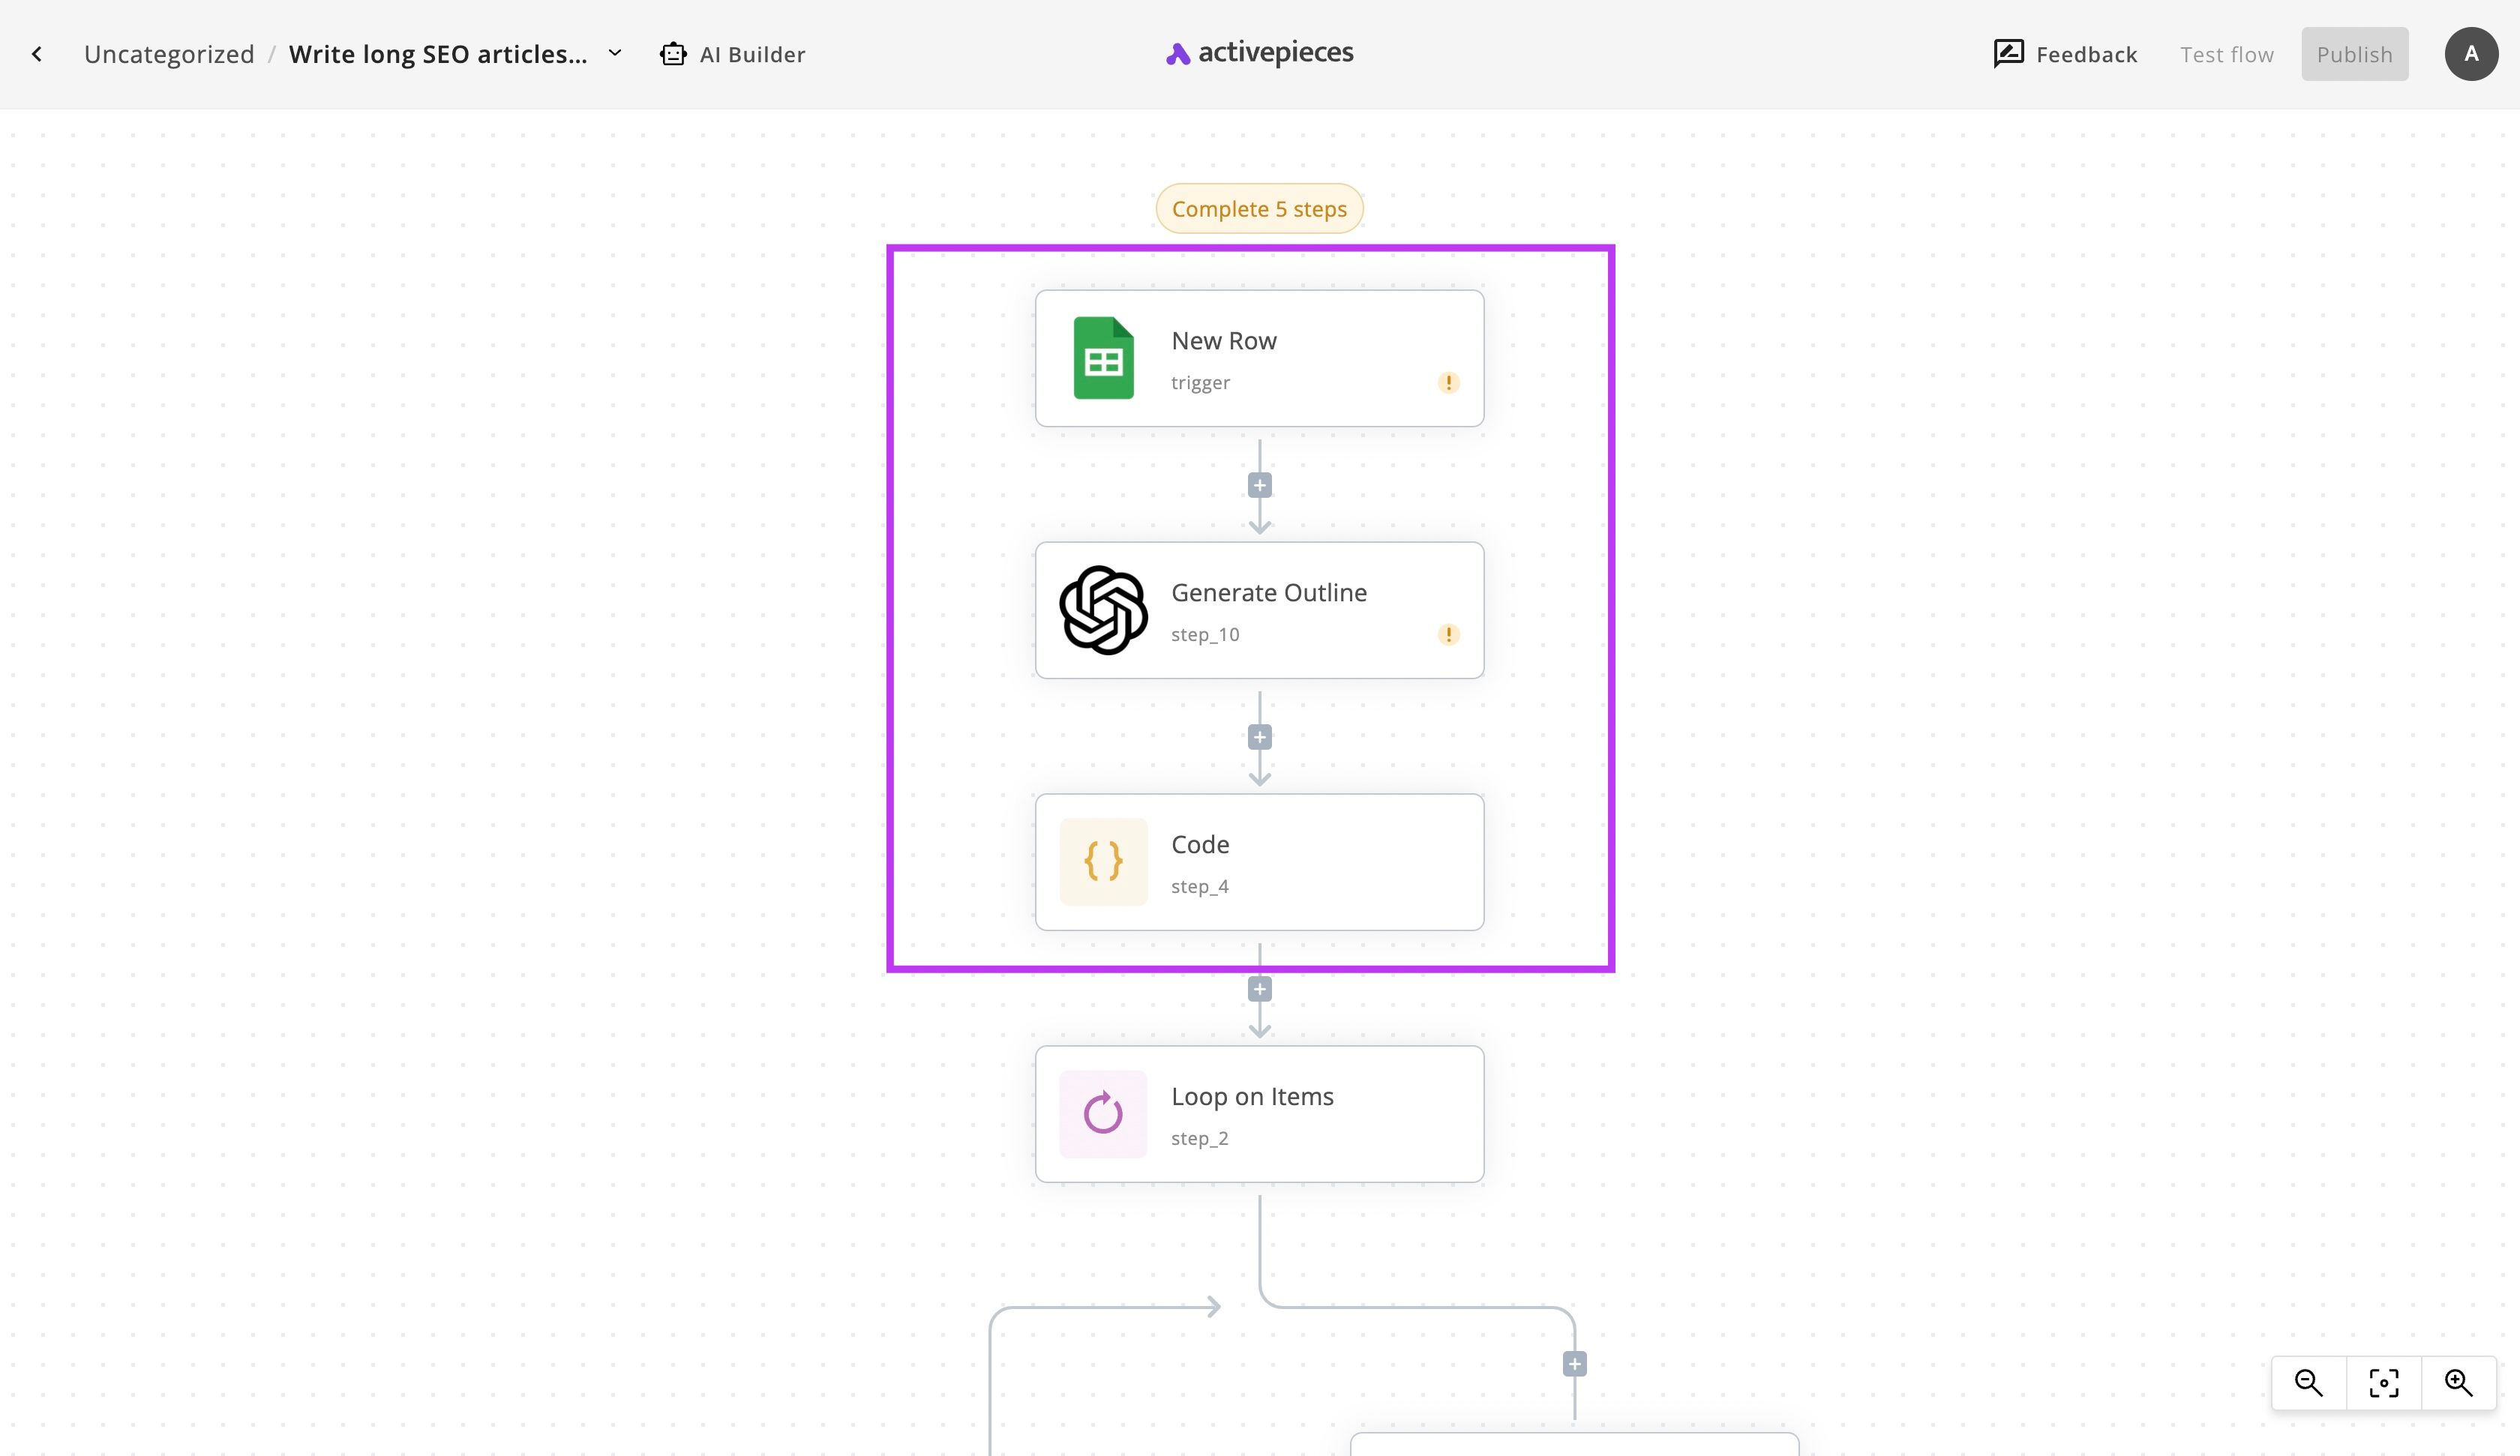
The first step of the flow is called the trigger. The trigger controls when our flow will run. This flow starts whenever a New Row is added to our Google Sheet (we'll set up the sheet later). As I mentioned earlier, this sheet will be our database, whenever we add a new title to it, the flow will run and generate a long form blog post for it!
The second step is the first use of ChatGPT in our flow. As the name says: Generate Outline will ask ChatGPT only to generate the main headings of our article following the main title of the article and our guidelines. We ask ChatGPT to return the outline in JSON format rather than just text because we can loop through a JSON array very easily and generate a short article for reach heading.
The Code step takes the JSON output from ChatGPT (which is text) and converts it into a real JSON object that we can use in the next loop step.
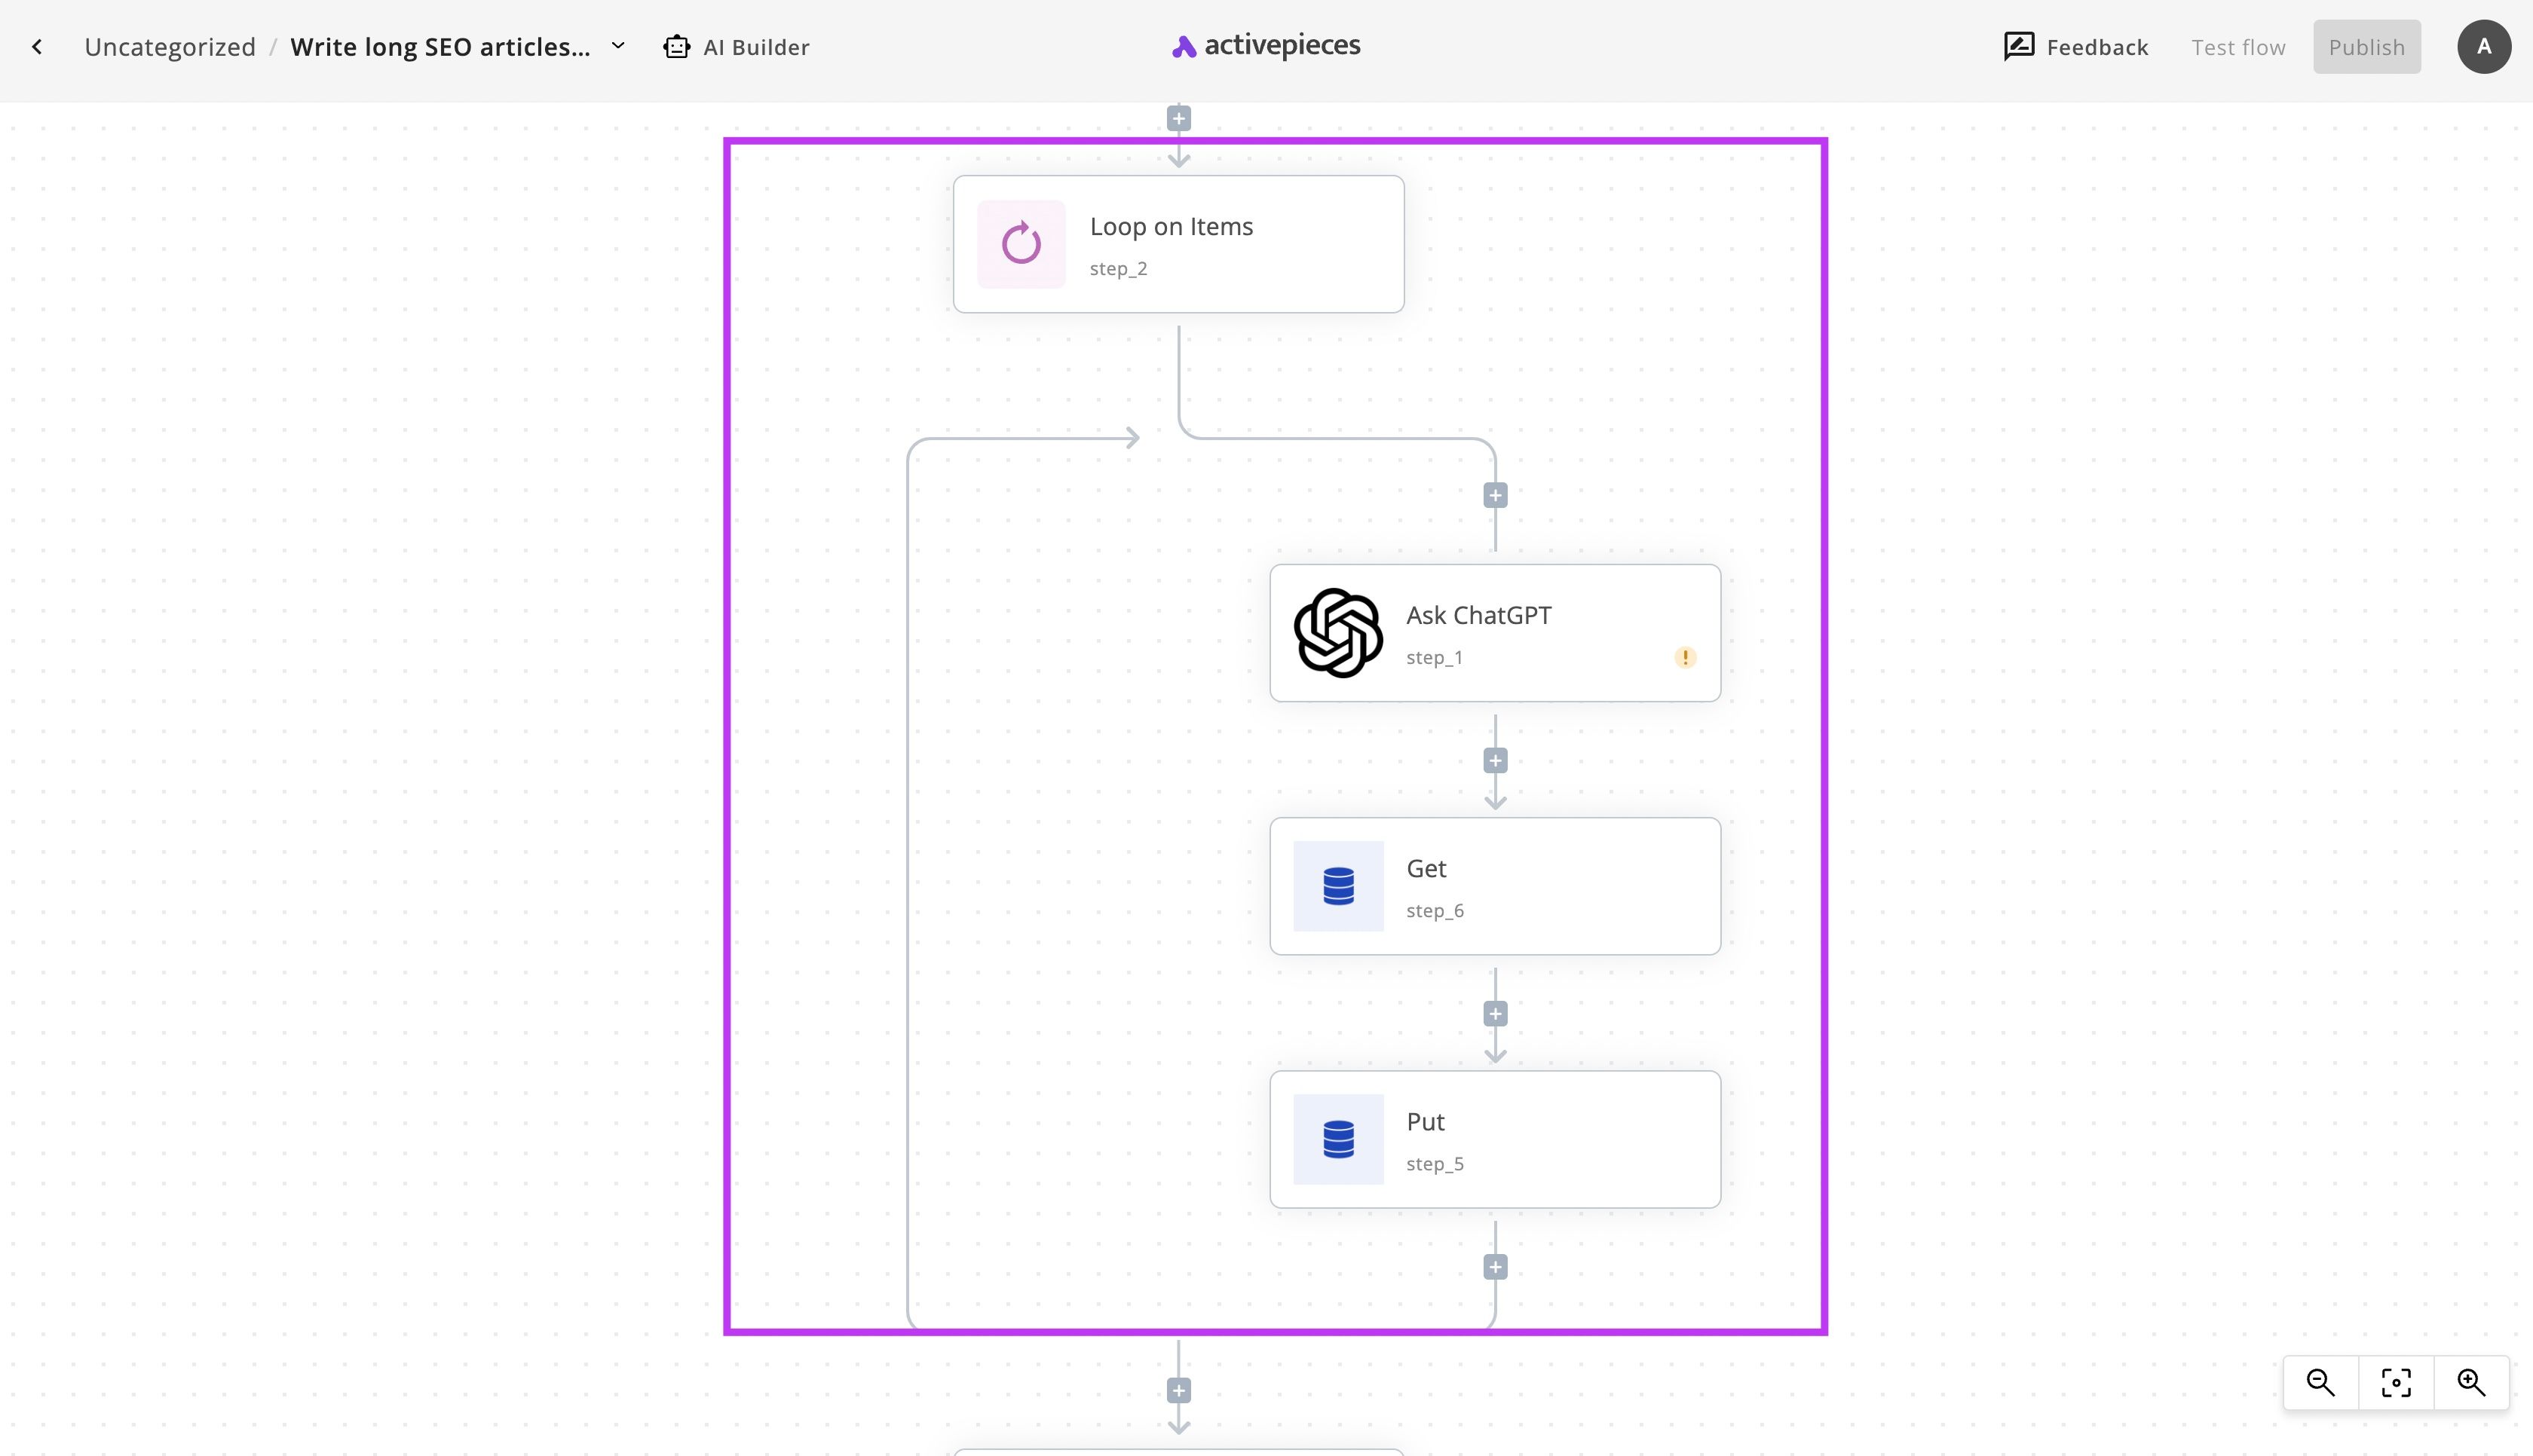
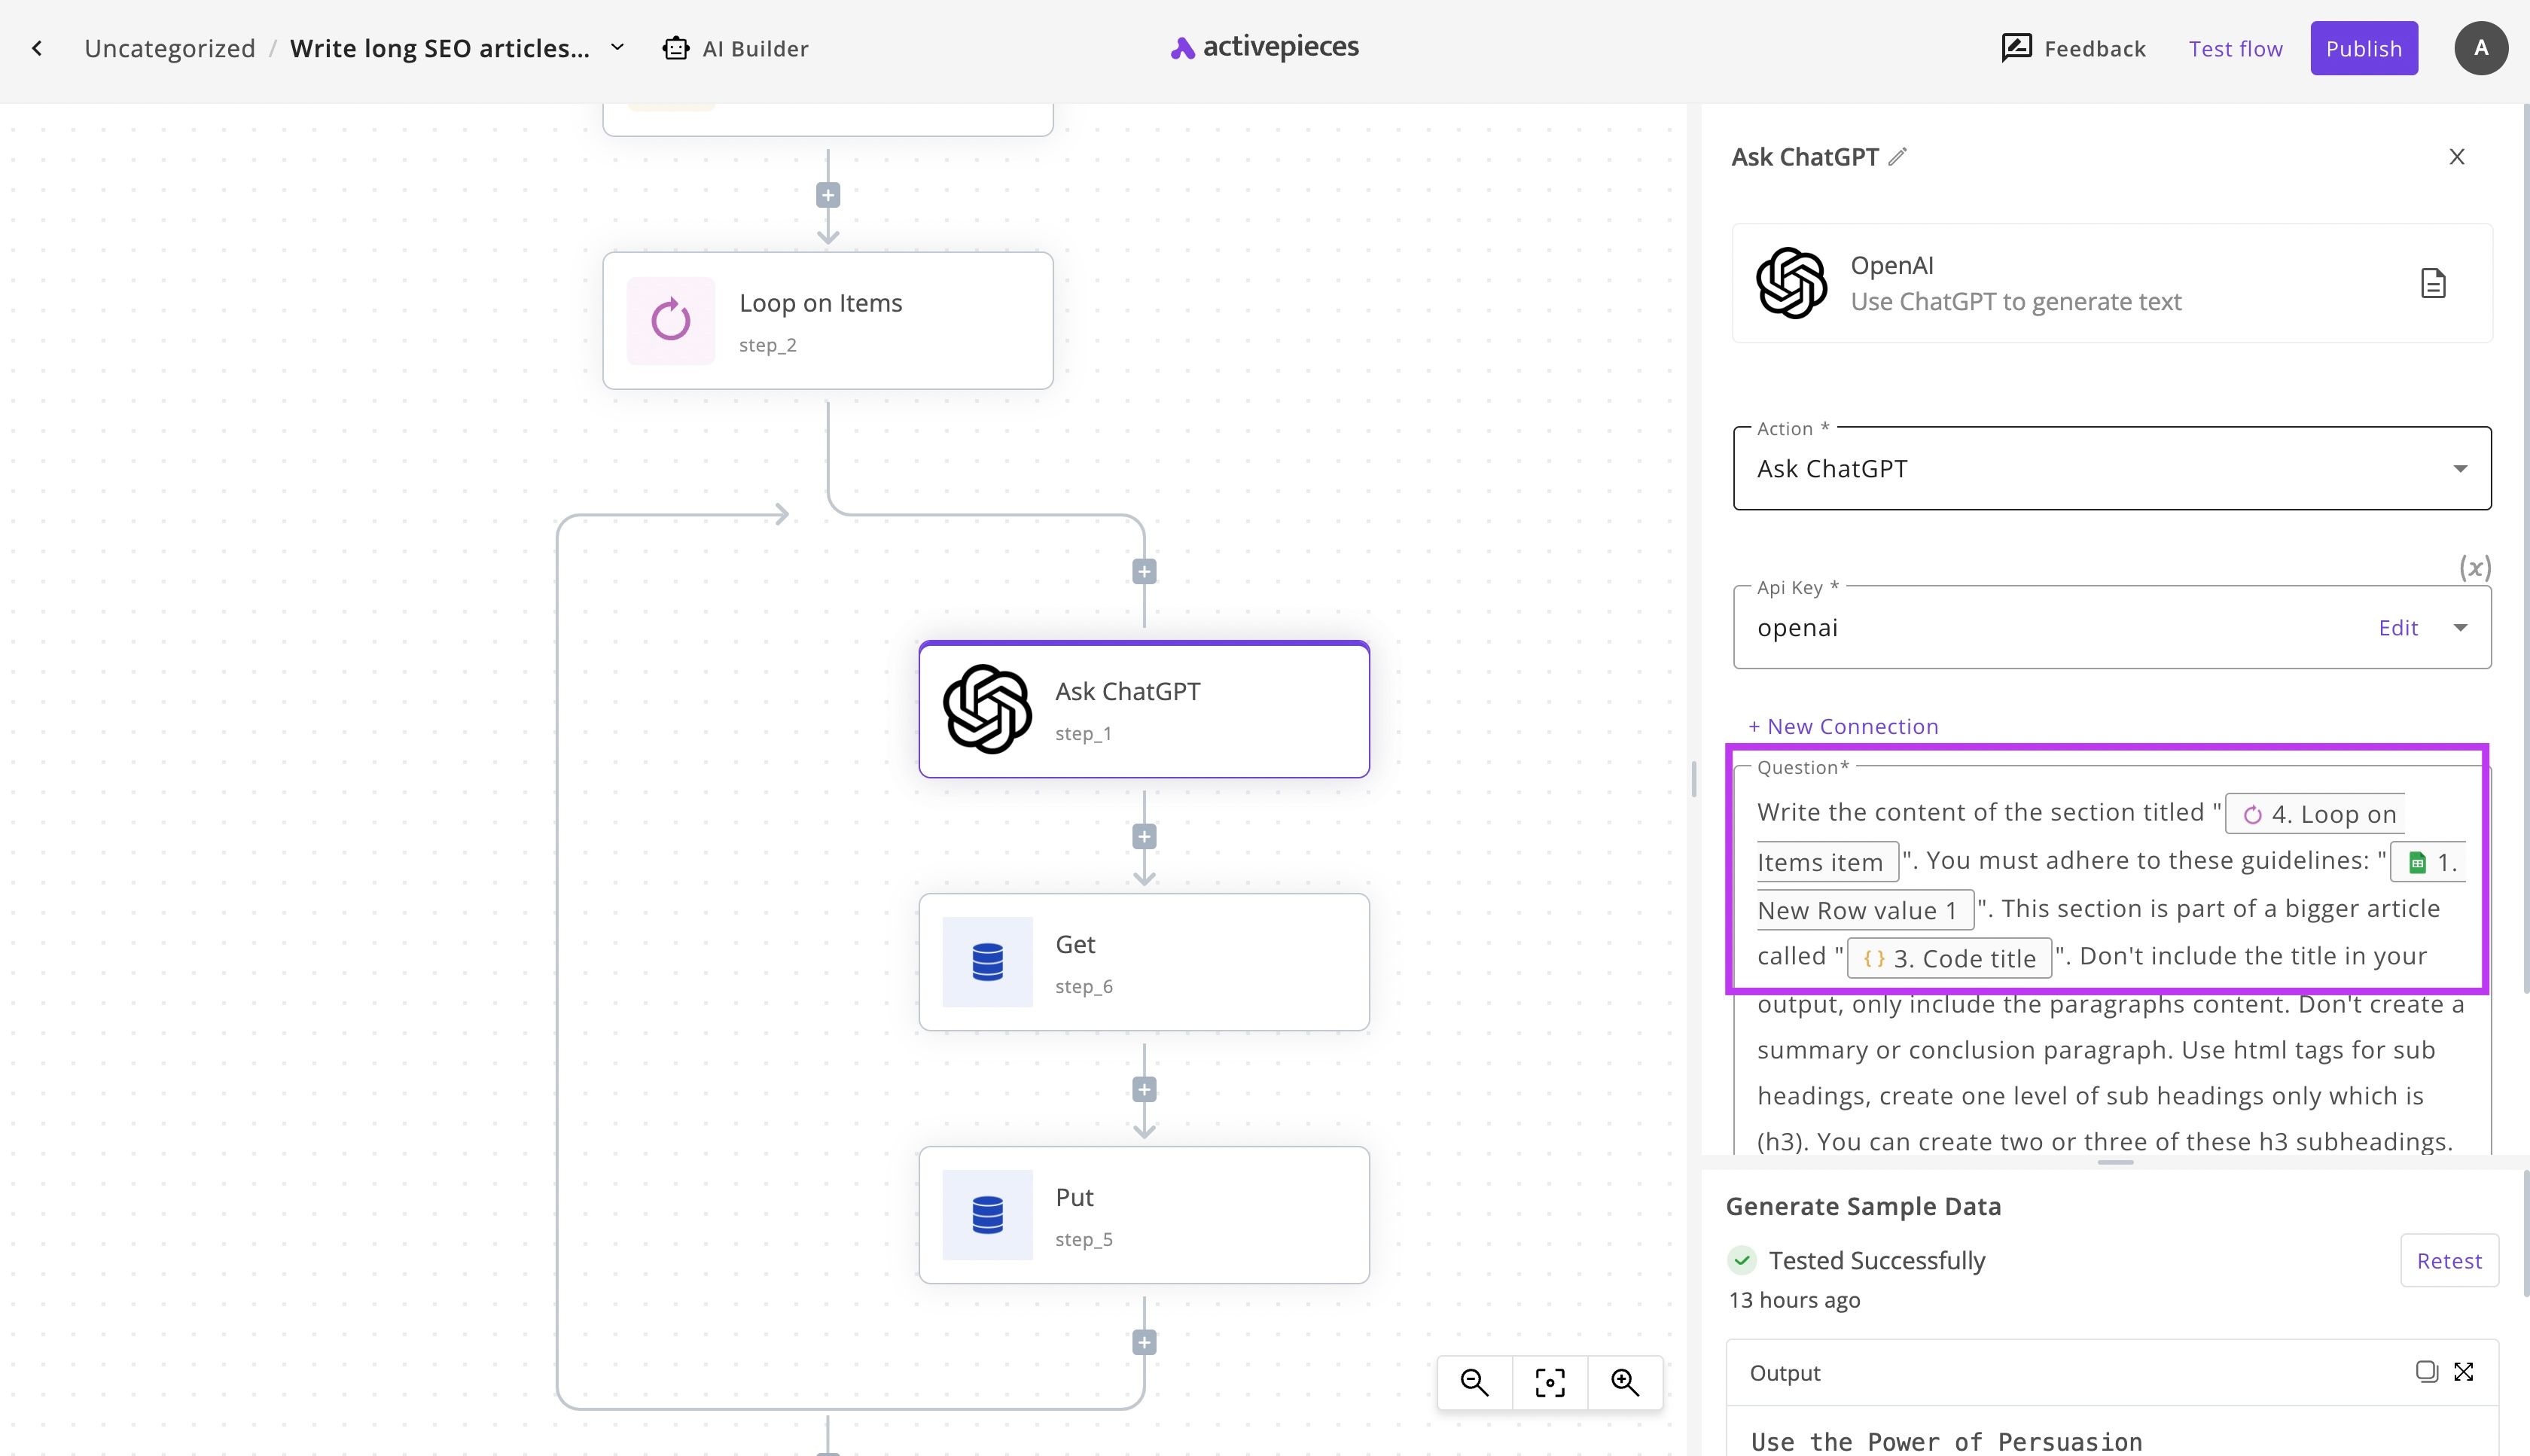
Now we have the outline of the main headings, the Loop on items will iterate over these headings and execute all the steps inside for each of these headings. The child steps start with Ask ChatGPT, this will only ask ChatGPT to write a short article under this main heading and not the original title. It will also give some context to ChatGPT that this is part of the full article so it can use general ideas inside the paragraphs.
Then we use storage pieces (Get and Put) to append the generated content to the previously generated parts so they become one long article altogether.
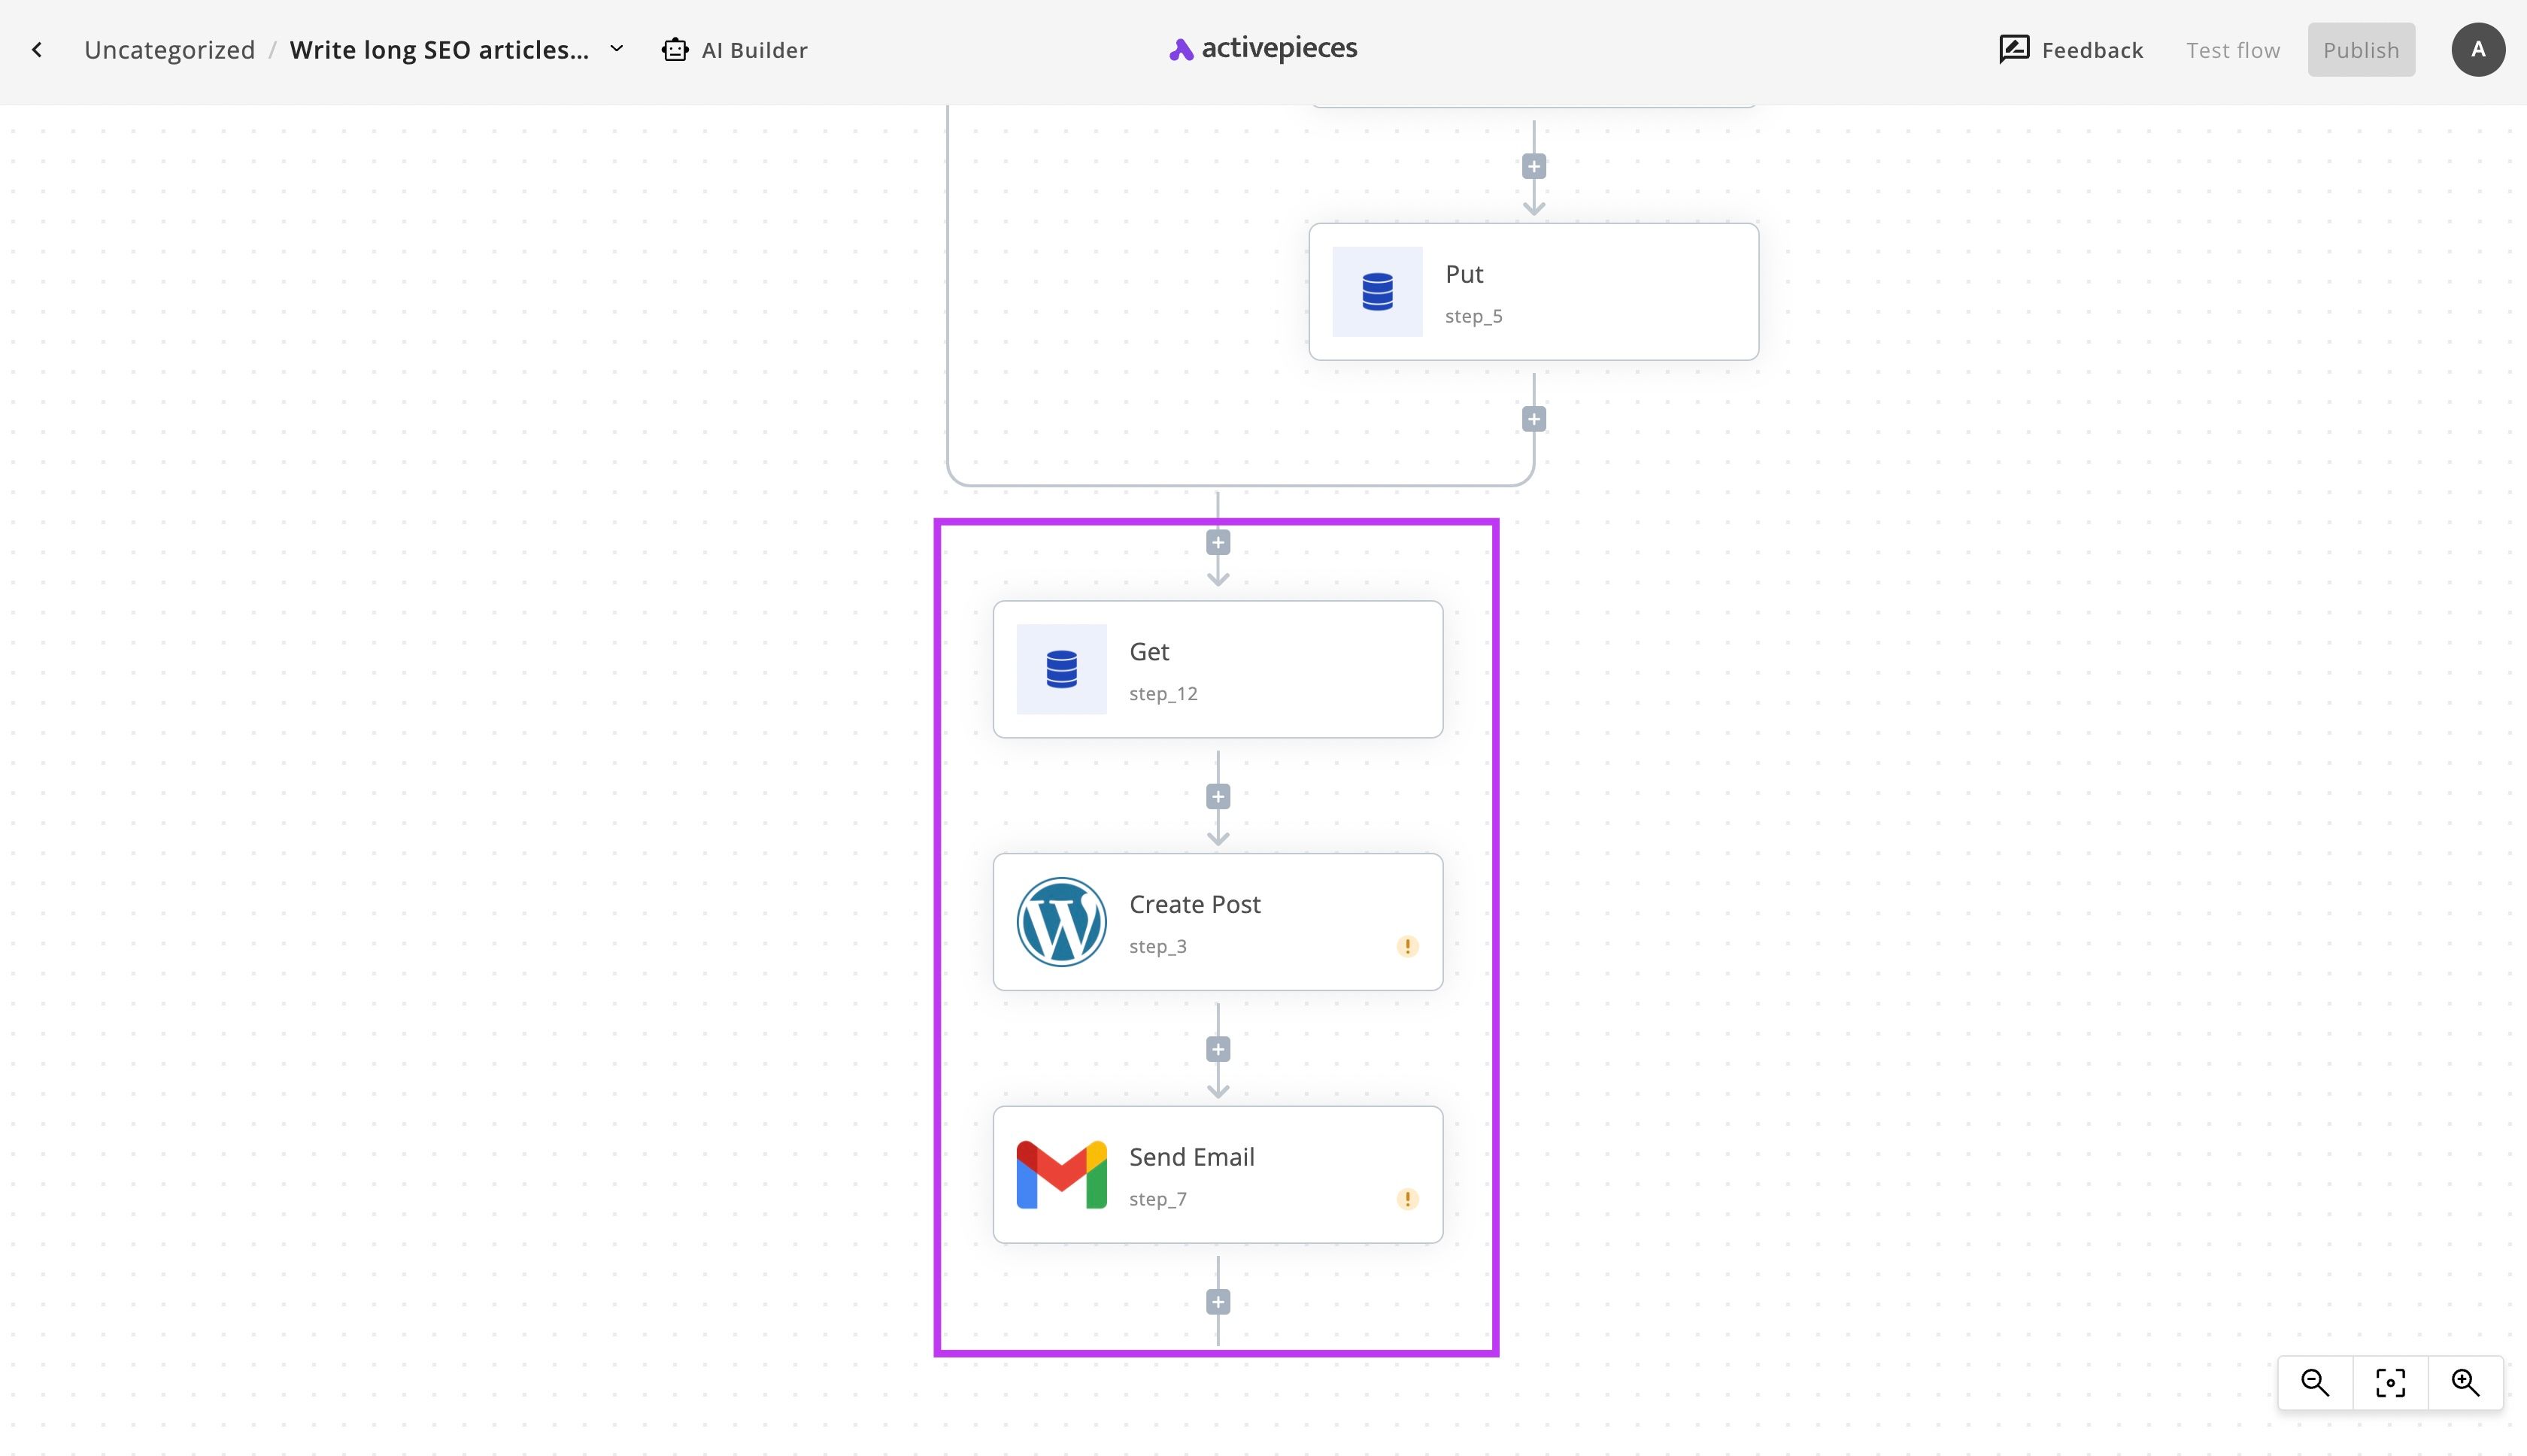
Once we are done with generating the parts and combining them, we read them and post them to our WordPress website in the Create Post step. The Send Email step (last one) notifies our team about the posted article and gives them a link to review and approve it.
3. Complete the setup of the ChatGPT long content automation with WordPress.
Now as we have the flow in hands, we are so close to complete the flow and put it to work. We have to visit some of the steps and make some configurations to them in order to take this automation live.
(1) Prepare your titles database on Google Sheets
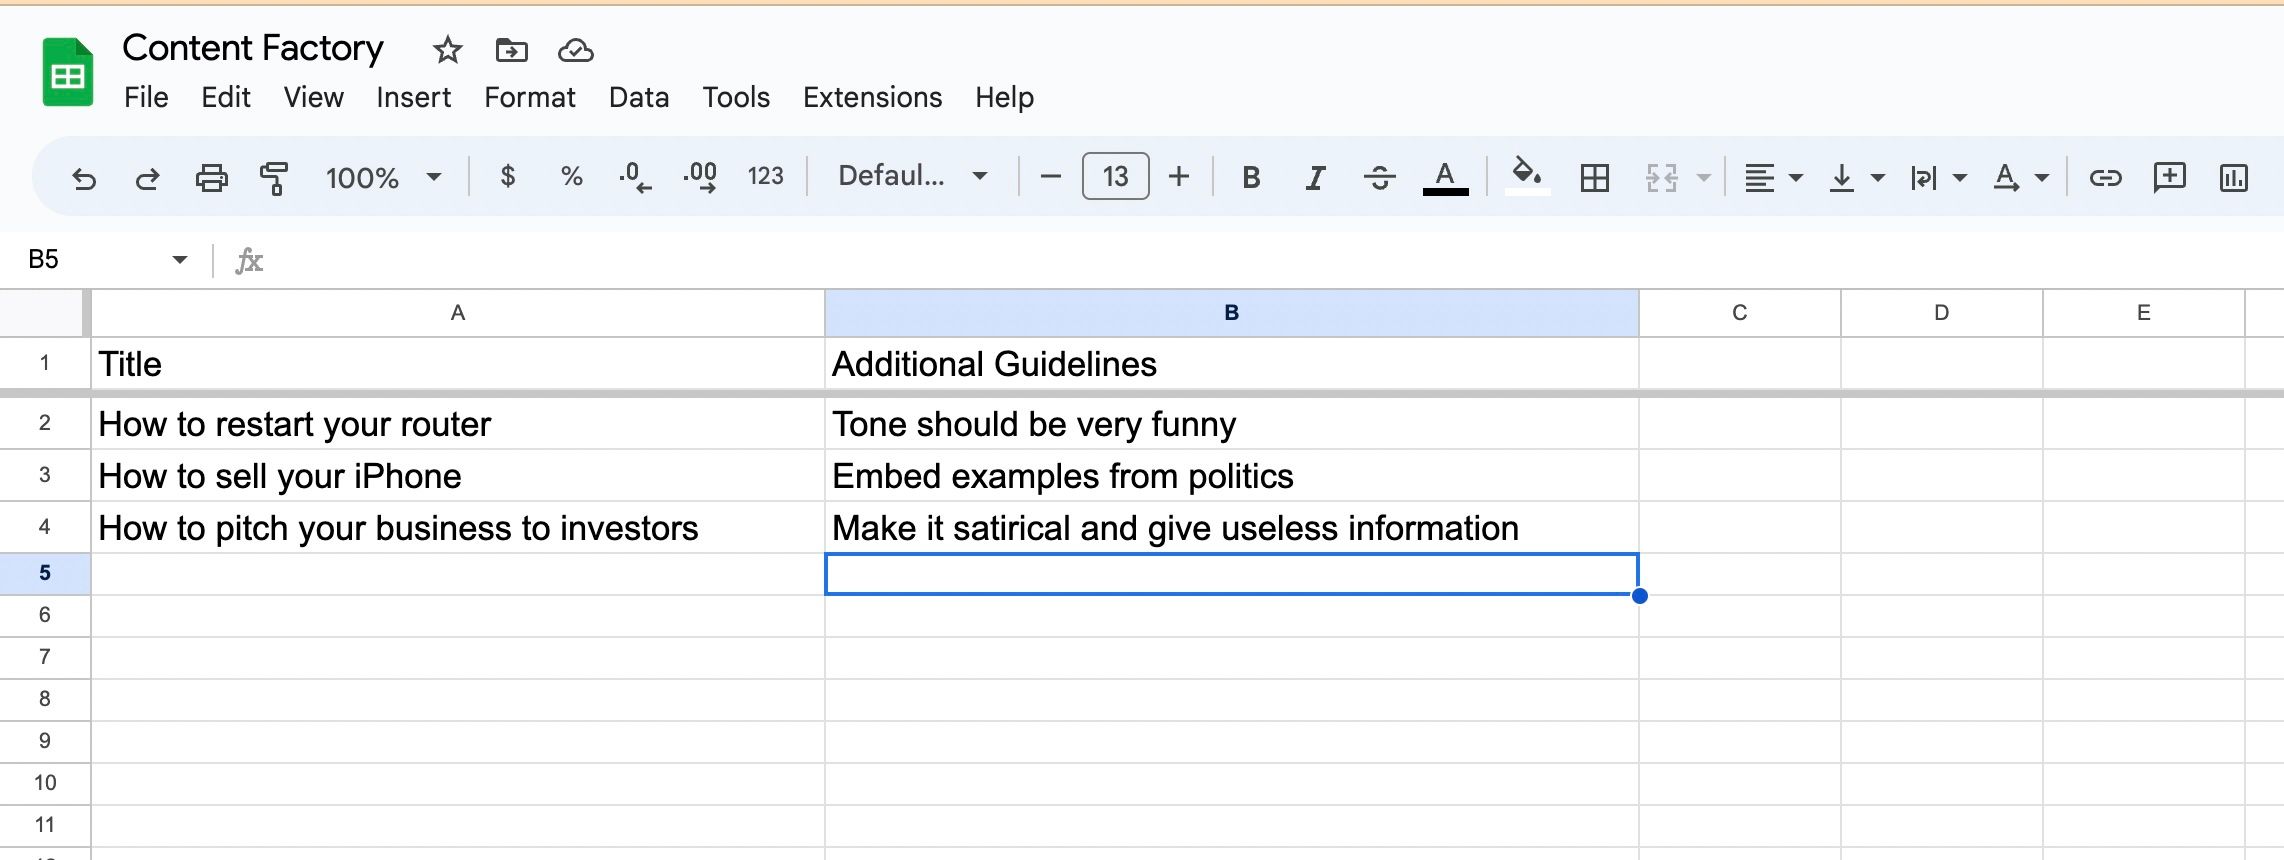
We need a Google Sheet to act like a database of our titles that we'd like ChatGPT to write the content about. I called my sheet "Content Factory". This sheet needs to have two main columns according to our template setup. The first column is the title and second is the guidelines. It doesn't matter how you name the columns in the first row.
This is how my sheet looks like:
Now, click on the first step in your flow, the New Row step. In the sidebar, click on + New Connection to connect your Google account that has this sheet. Once connected, you can choose the Spreadsheet and the sub Sheet in the dropdowns there.
You can click Load Data to the bottom of the sidebar to load some data from the sheet to be used in the next steps while testing.
(2) Configure the ChatGPT steps
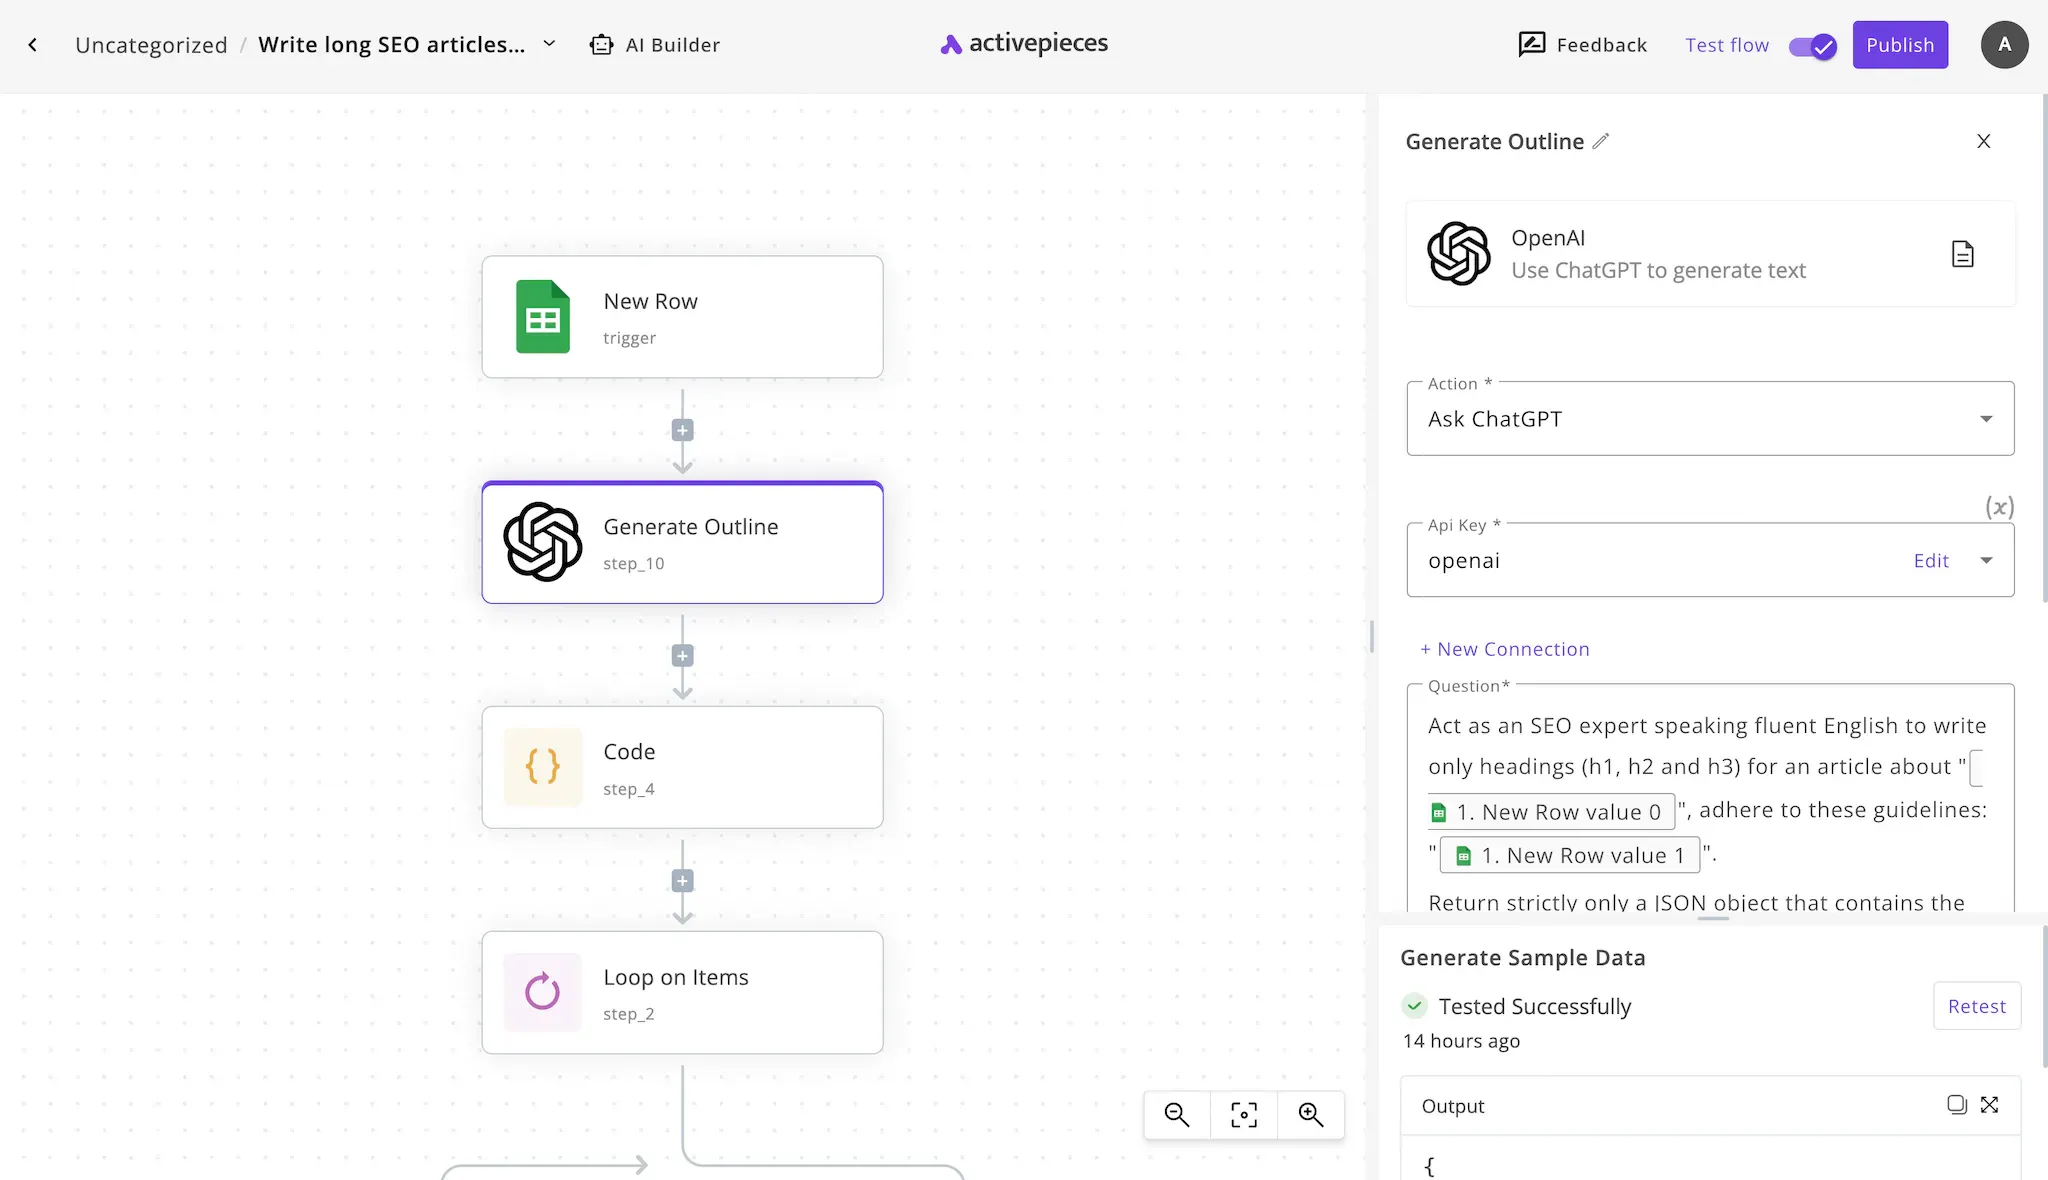
There are two steps that use ChatGPT, we'll need first to make the connection with our account using the OpenAI API key. Click on the Generate Outline step, then click on + New Connection, follow the instructions to get your OpenAI connected to Activepieces.
Take a look at the prompt in the step and make sure it expresses the way you'd like to generate the outline of the article. It includes a bit of a technical language, make sure you don't change that language as it could break the flow. This is where you should review the prompt:
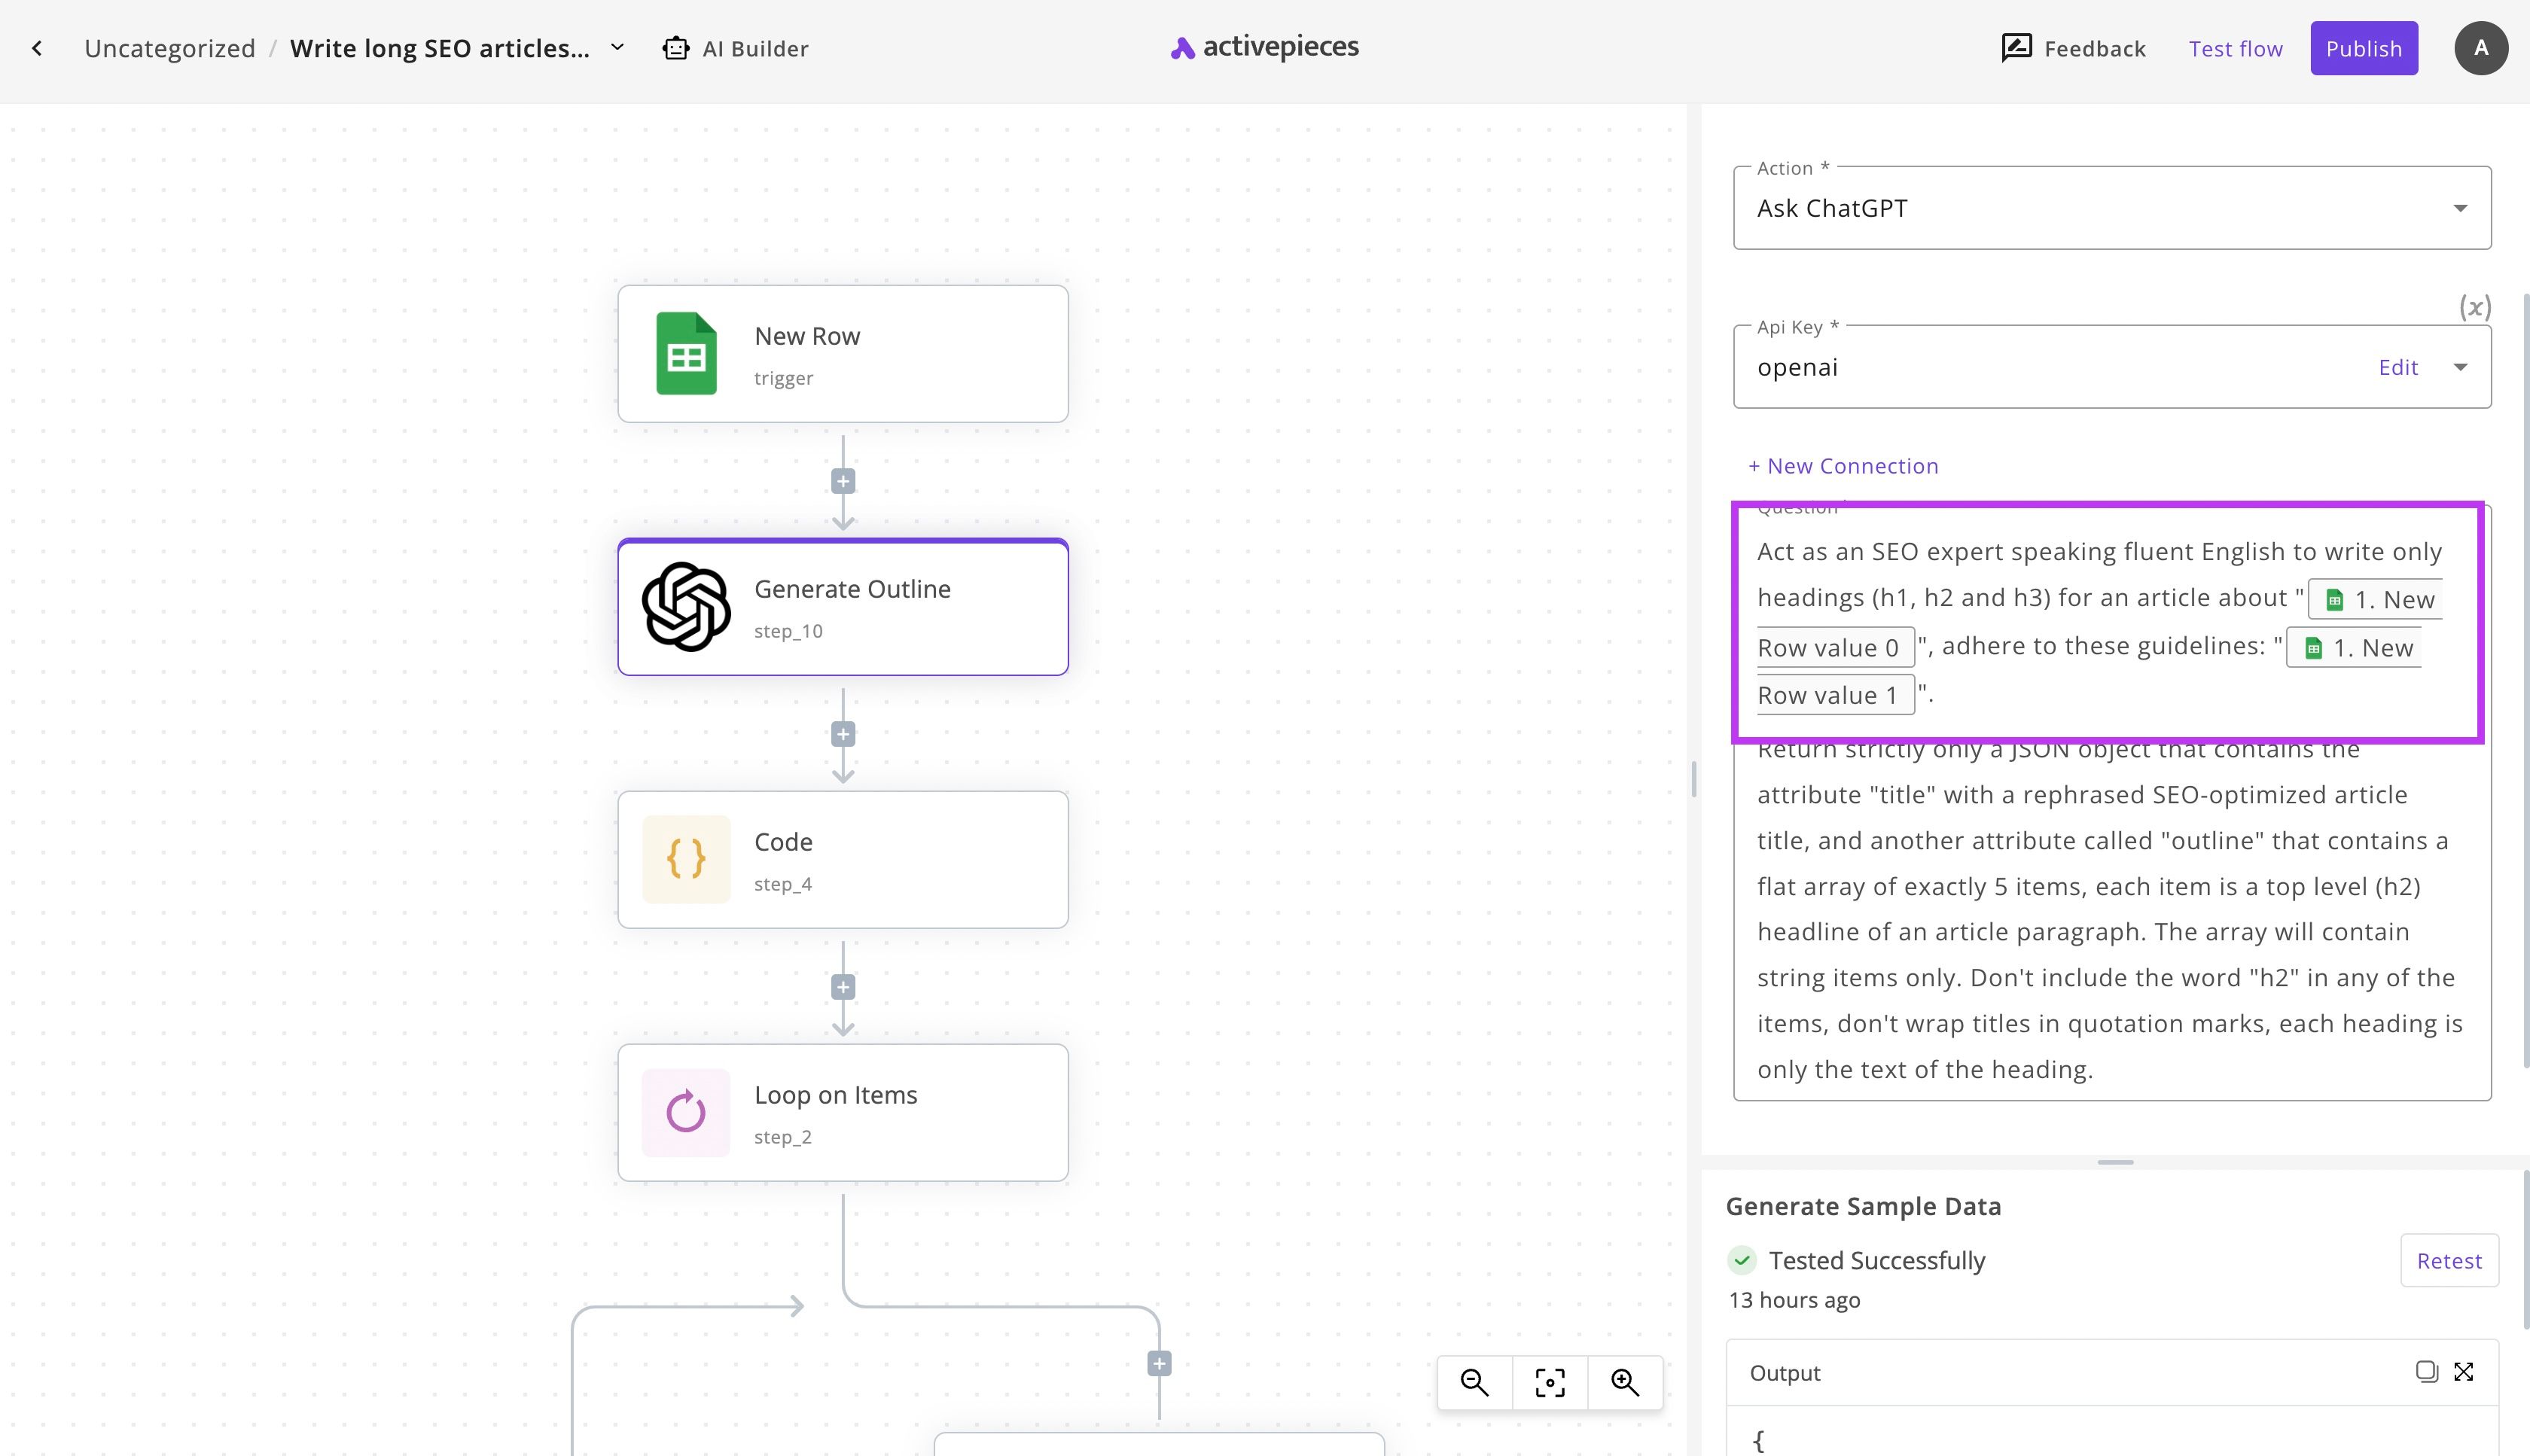
As you get done with this, jump to the other ChatGPT step, named Ask ChatGPT. From the API Key dropdown, choose the same connection you added previously, you don't have to add a new connection for this step. Take a look at the prompt and make any necessary modifications:
(3) Configure the WordPress step
Click on the Create Post step, this is the WordPress step. Then click on + New Connection and follow the instructions to connect your WordPress site to Activepieces. Make sure you read the instructions as you will need to install the Basic Auth plugin to your WordPress to make it accessible using your username and password through the API.
Once you connect your WordPress site, replace the Website URL with your real one powered by WordPress.
(4) Set up email notifications to the team
Click on the Send Email, then + New Connection to connect your Gmail account. This account will be used to send the email notification after each submitted post to your team. Then replace [email protected] with the email of your content moderator who needs to review the auto generated content before publishing it.
(5) Let your content machine run with ChatGPT and WordPress
You're ready to take this automation to real life. Click on the main Publish button in the screen. Once it's published, any new title added to your titles database will trigger this automation and post a long piece of content to your WordPress blog. There could be up-to 5 mins delay between the time you add the title and the time the flow runs, so be patient!
This is an example of a content I generated using this flow:

This article is 1,662 words long and is posted right in my WordPress site 🎉


