How to add GitHub Issues as ClickUp Tasks and get them in Slack (Step by Step)
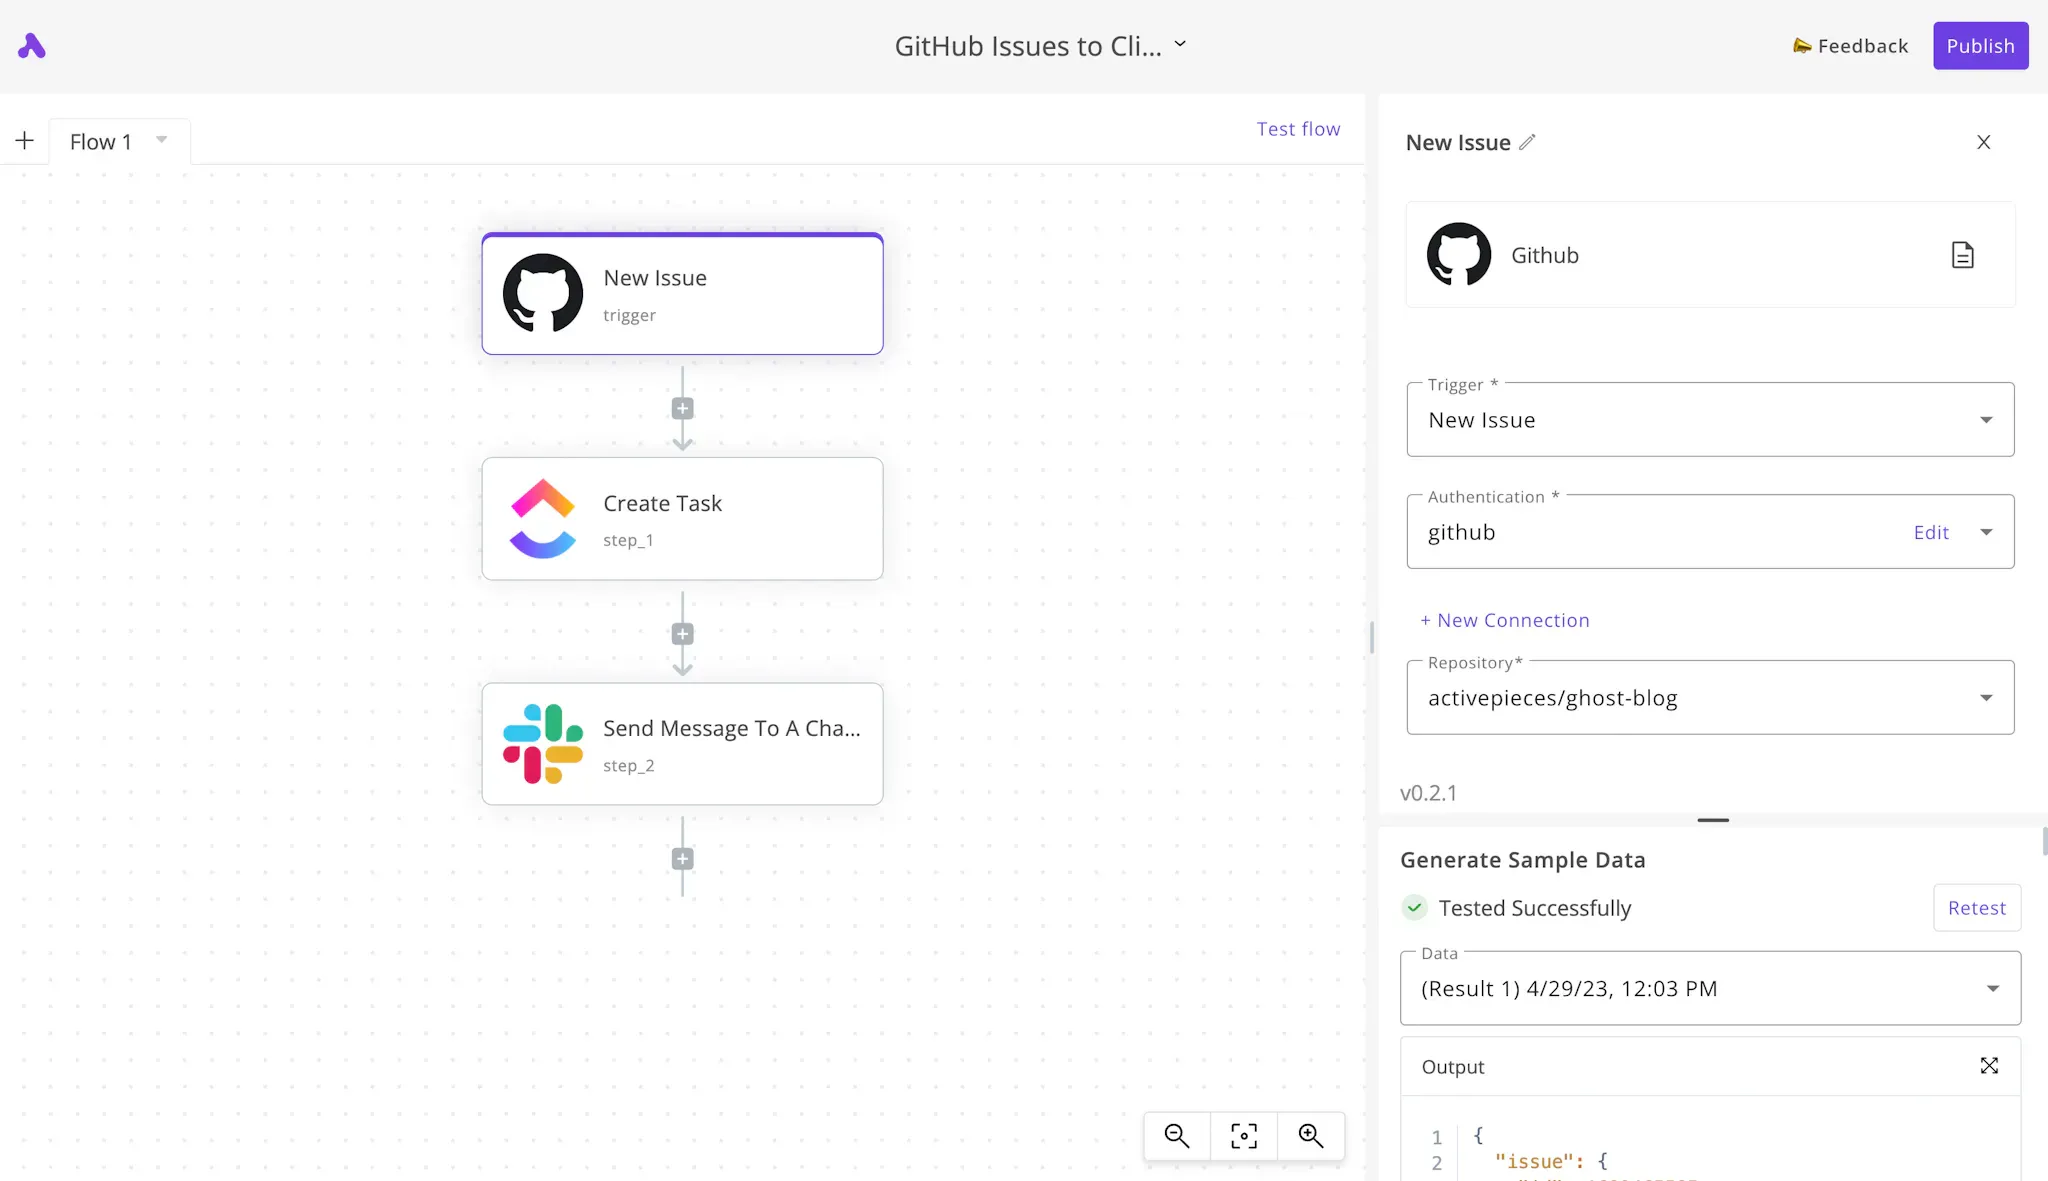
If you run a public GitHub repository and you'd like to track all new GitHub issues submitted by your community in ClickUp (a well known project management tool), this guide will take your through it step by step.
GitHub Issues to ClickUp Tasks
Although there are similarities between GitHub Issues and ClickUp Tasks, some people prefer to work inside ClickUp. If your users report issues in GitHub, it will be a tedious job to move these tasks one by one from GitHub to ClickUp, automation makes this a breeze.
Prerequisities
We'll need a set of tools in order to achieve this automation, these tools are:
- Activepieces to build the automation.
- A GitHub account and repository.
- A ClickUp account and project.
- A Slack team (optional, if you'd like to receive Slack notifications about new issues).
Steps to sync GitHub Issues into ClickUp as tasks
Follow these steps to achieve this automation job between GitHub and ClickUp:
1. Create an Activepieces account
The automation will be built and running in your Activepieces account. If you don't have one yet, go ahead and sign up.
2. Create a new automation flow
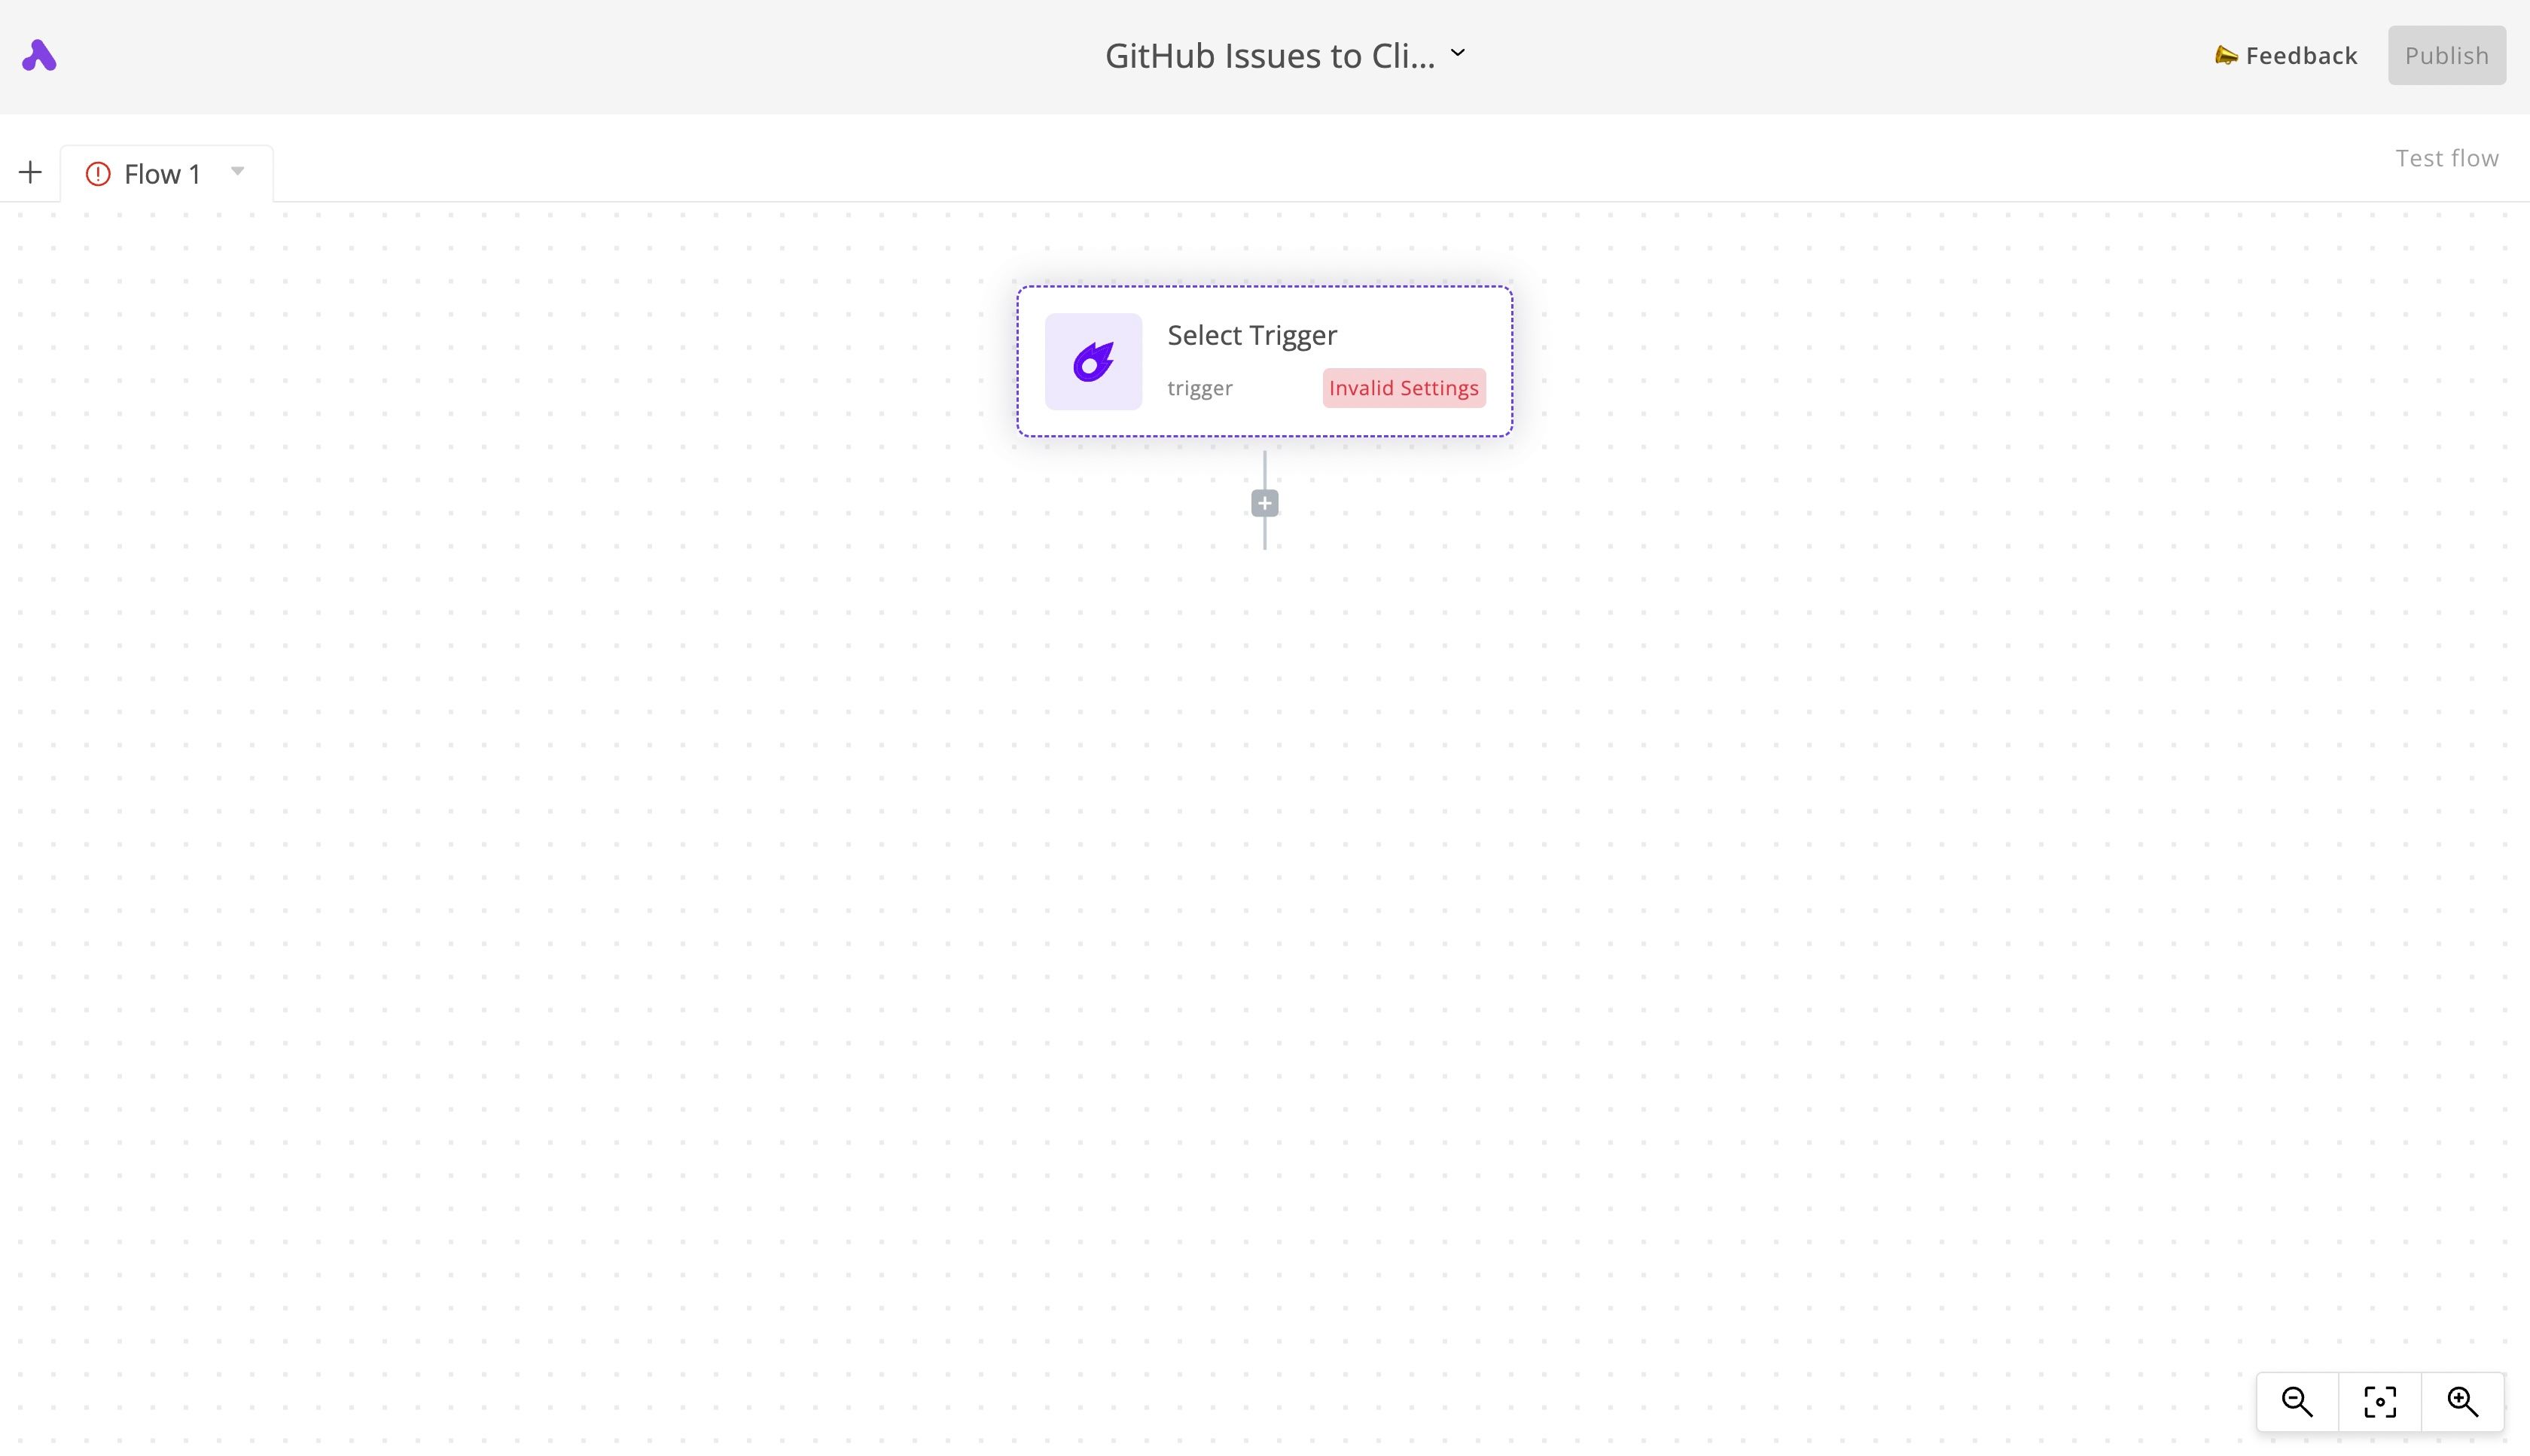
Click on Start building if it's your first automation in the account. Or on New flow if you already have other automation flows. You can name your automation "GitHub Issues to ClickUp Tasks" for example. Like this:
3. Set up the GitHub Issues trigger
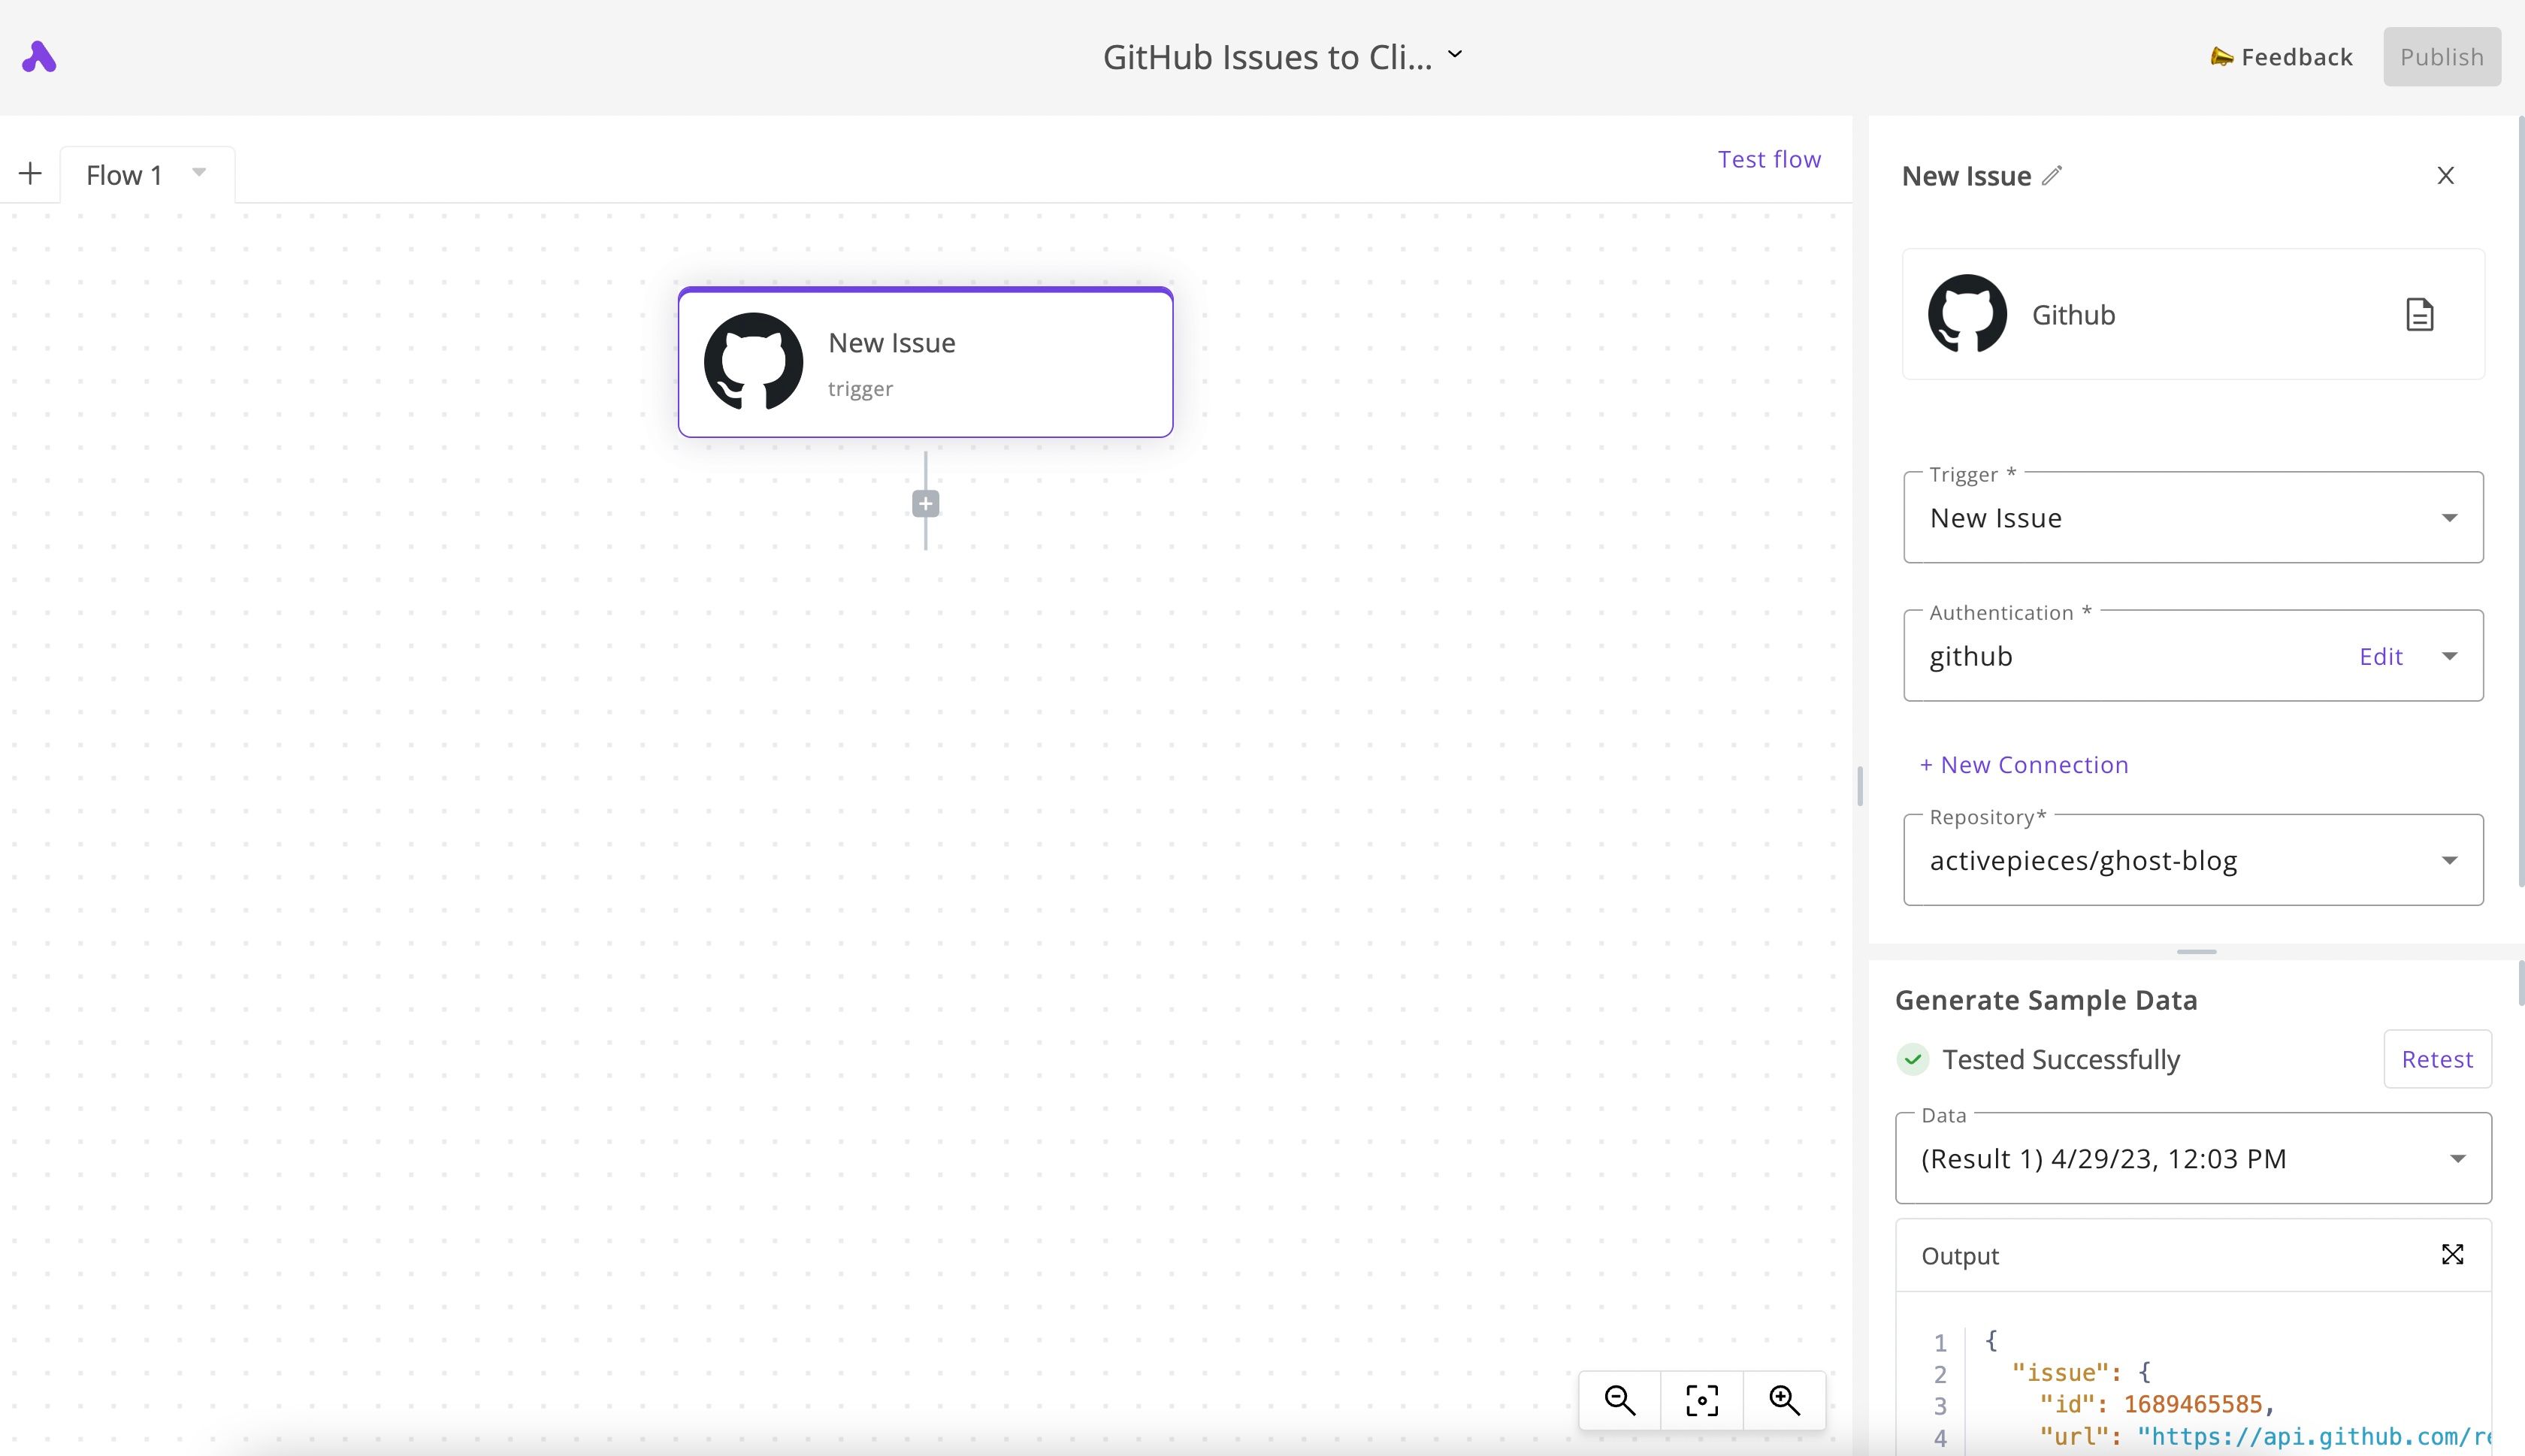
When a GitHub issue is added to our repository, we'd like to run this automation flow. Click on the Select Trigger step, select the GitHub app from the sidebar and choose the New Issue trigger.
Click on + New Connection to connect your GitHub account. Once connected, the settings panel will automatically show you the available repositories from your account. Select the Repository from which you want to read the new issues.
Now click Test trigger to the bottom of the settings panel. It will ask you to create a dummy issue in your repository to ensure everything is cool and to generate sample data to use in the next steps of the flow. My set up looked like this:
4. Add a step to create a ClickUp task
Click on the + below the New Issue trigger step. Find the ClickUp app from the sidebar panel and choose the Create Task action. Click + New Connection to connect your ClickUp account. You will connect the account that you'd like to have the GitHub issues in as tasks.
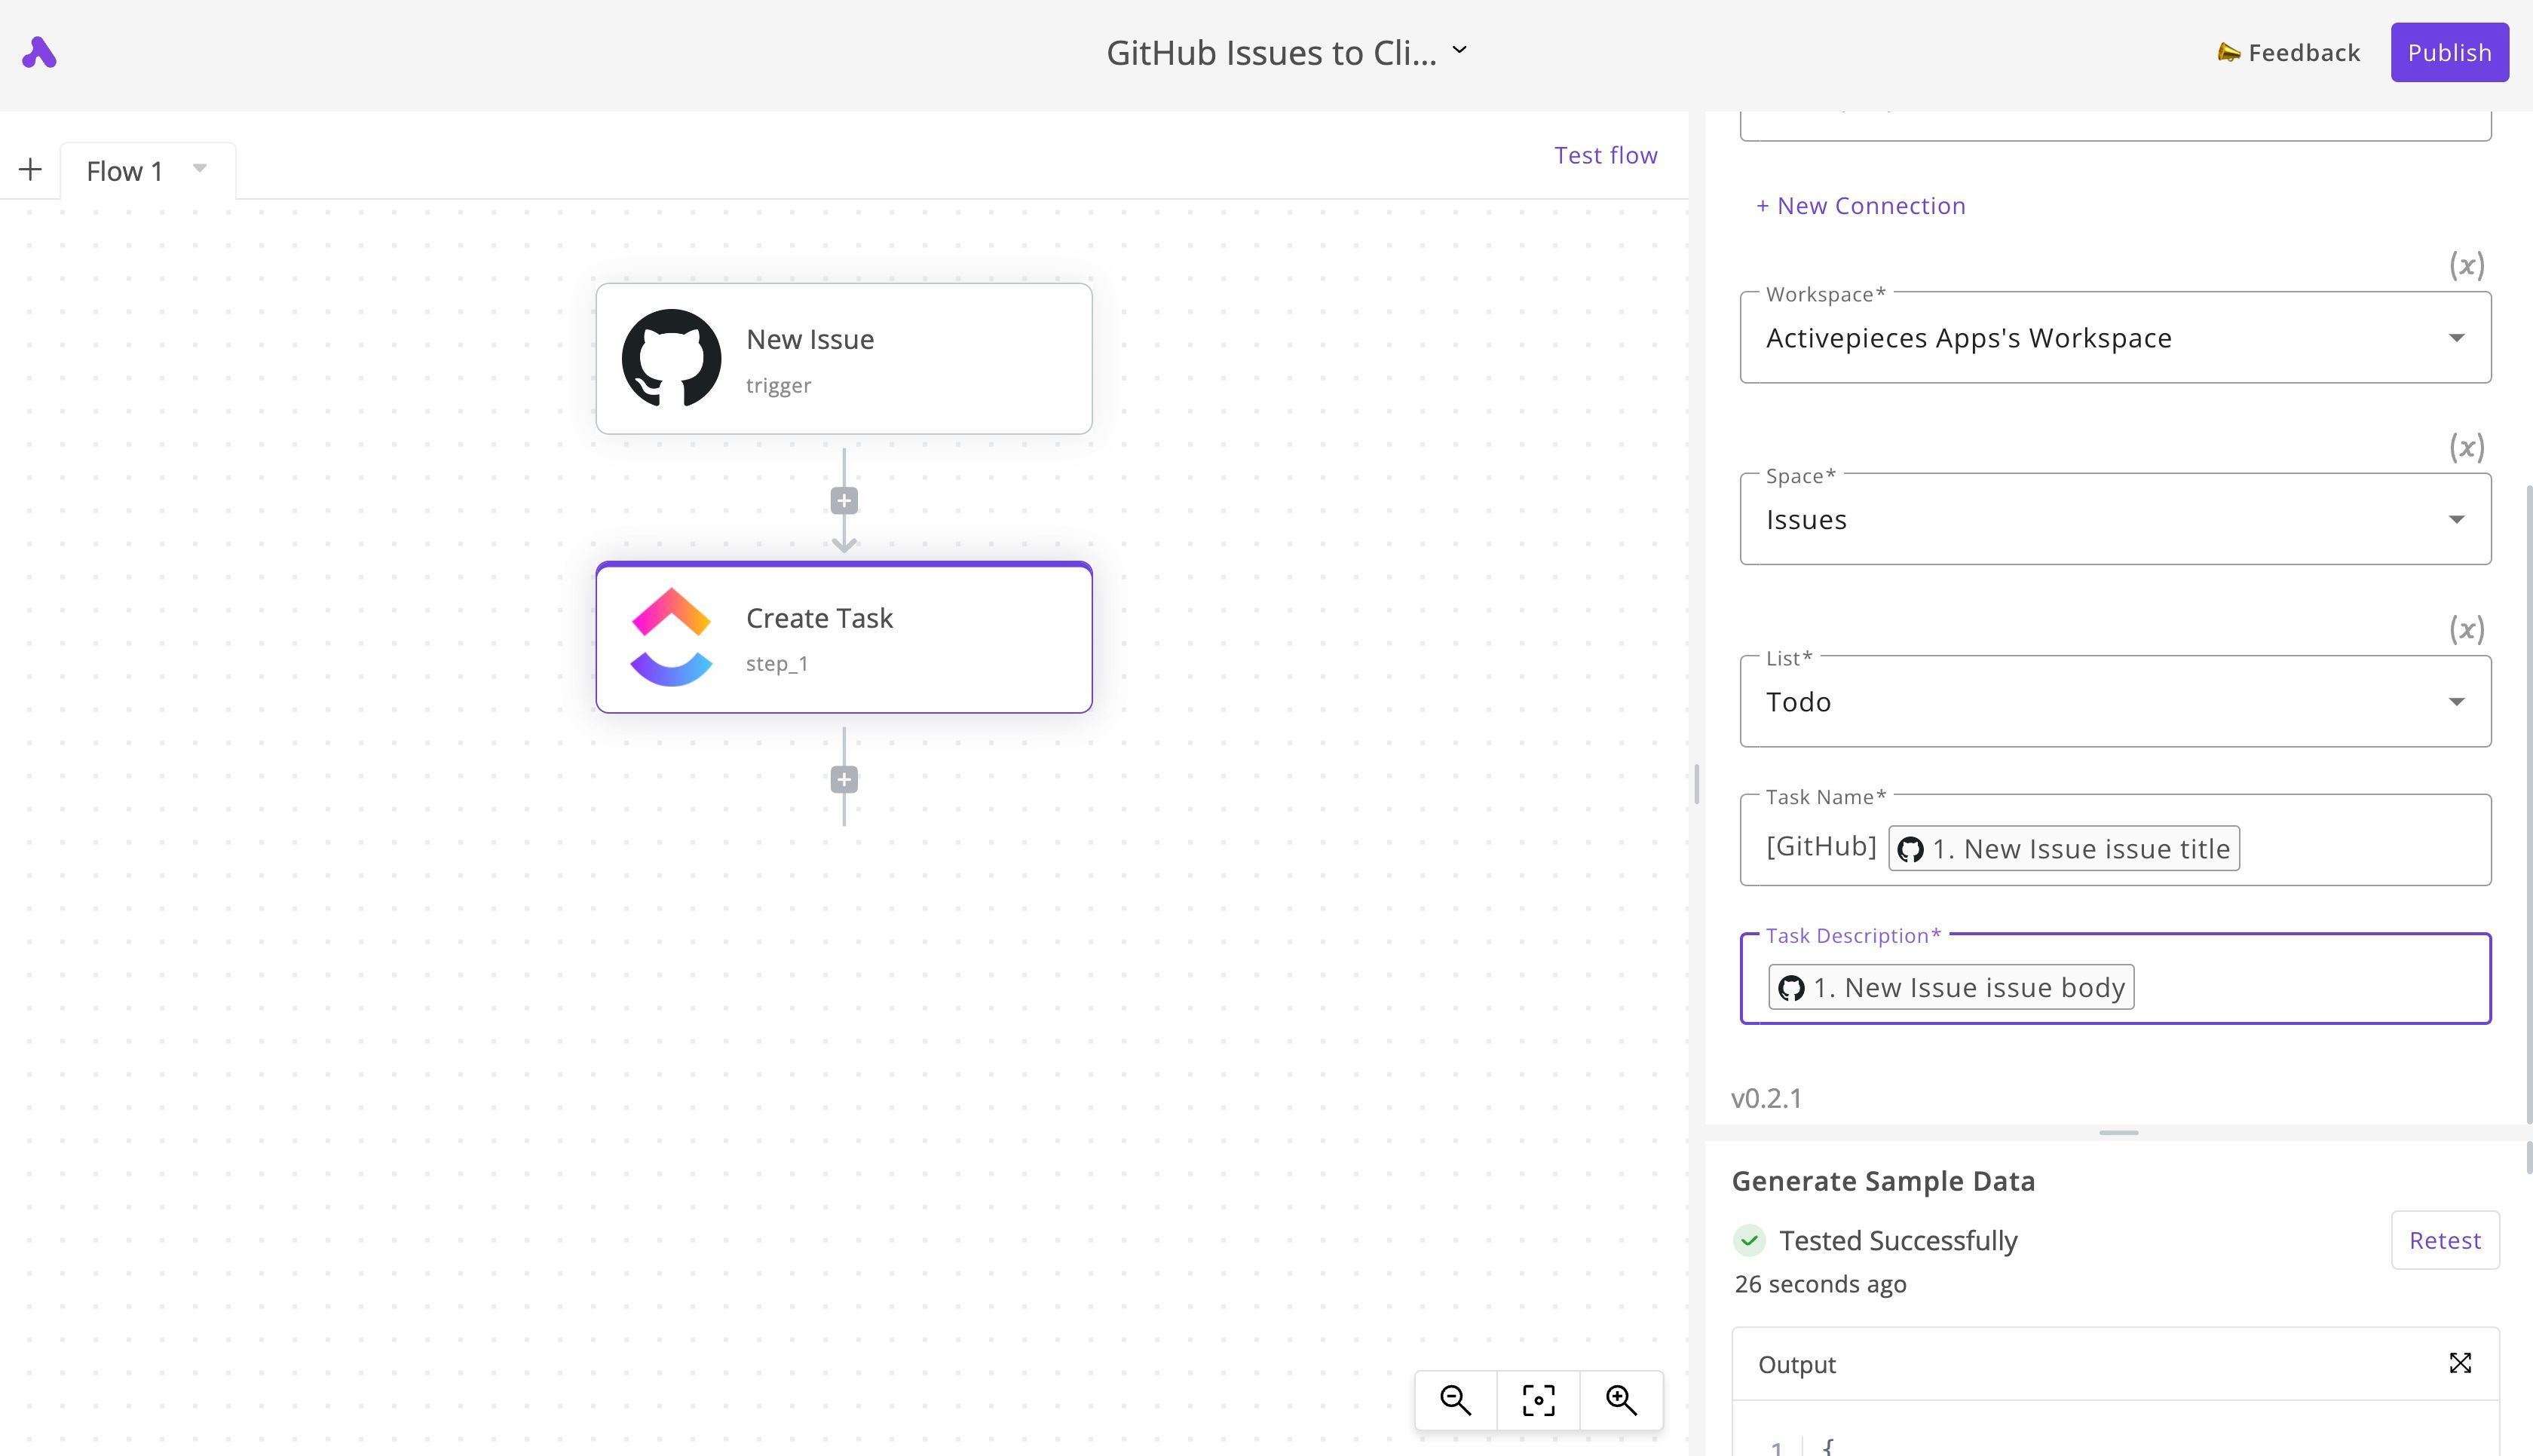
Once your account is connected, choose the Workspace, Space and List in which you'd like the tasks to be created.
The next step is to construct the name and the description of this new task from the original GitHub issue details. For this guide, I'll name the new tasks like this: [GitHub] Issue name in order to differentiate it from any other tasks in my ClickUp space.
Go to the Task Name field, type [GitHub] and a single space, then use the dropdown and navigate to the New Issue step, then click on issue and select title. You will see a variable tag added to your field. This will hold a dynamic value based on the title of the issue created in GitHub.
In the Task Description field, use the dropdown to navigate to the New Issue step, then issue and click on body. The variable tag will be added to the field.
Your overall settings for the ClickUp step should look something like this (I also tested the step from the Generate Sample Data panel, you can test it too):
5. Send a Slack notification about the new GitHub issue
Now again, click on the + below the Create Task step. Using the sidebar, choose the Slack app and the Send Message To A Channel action.
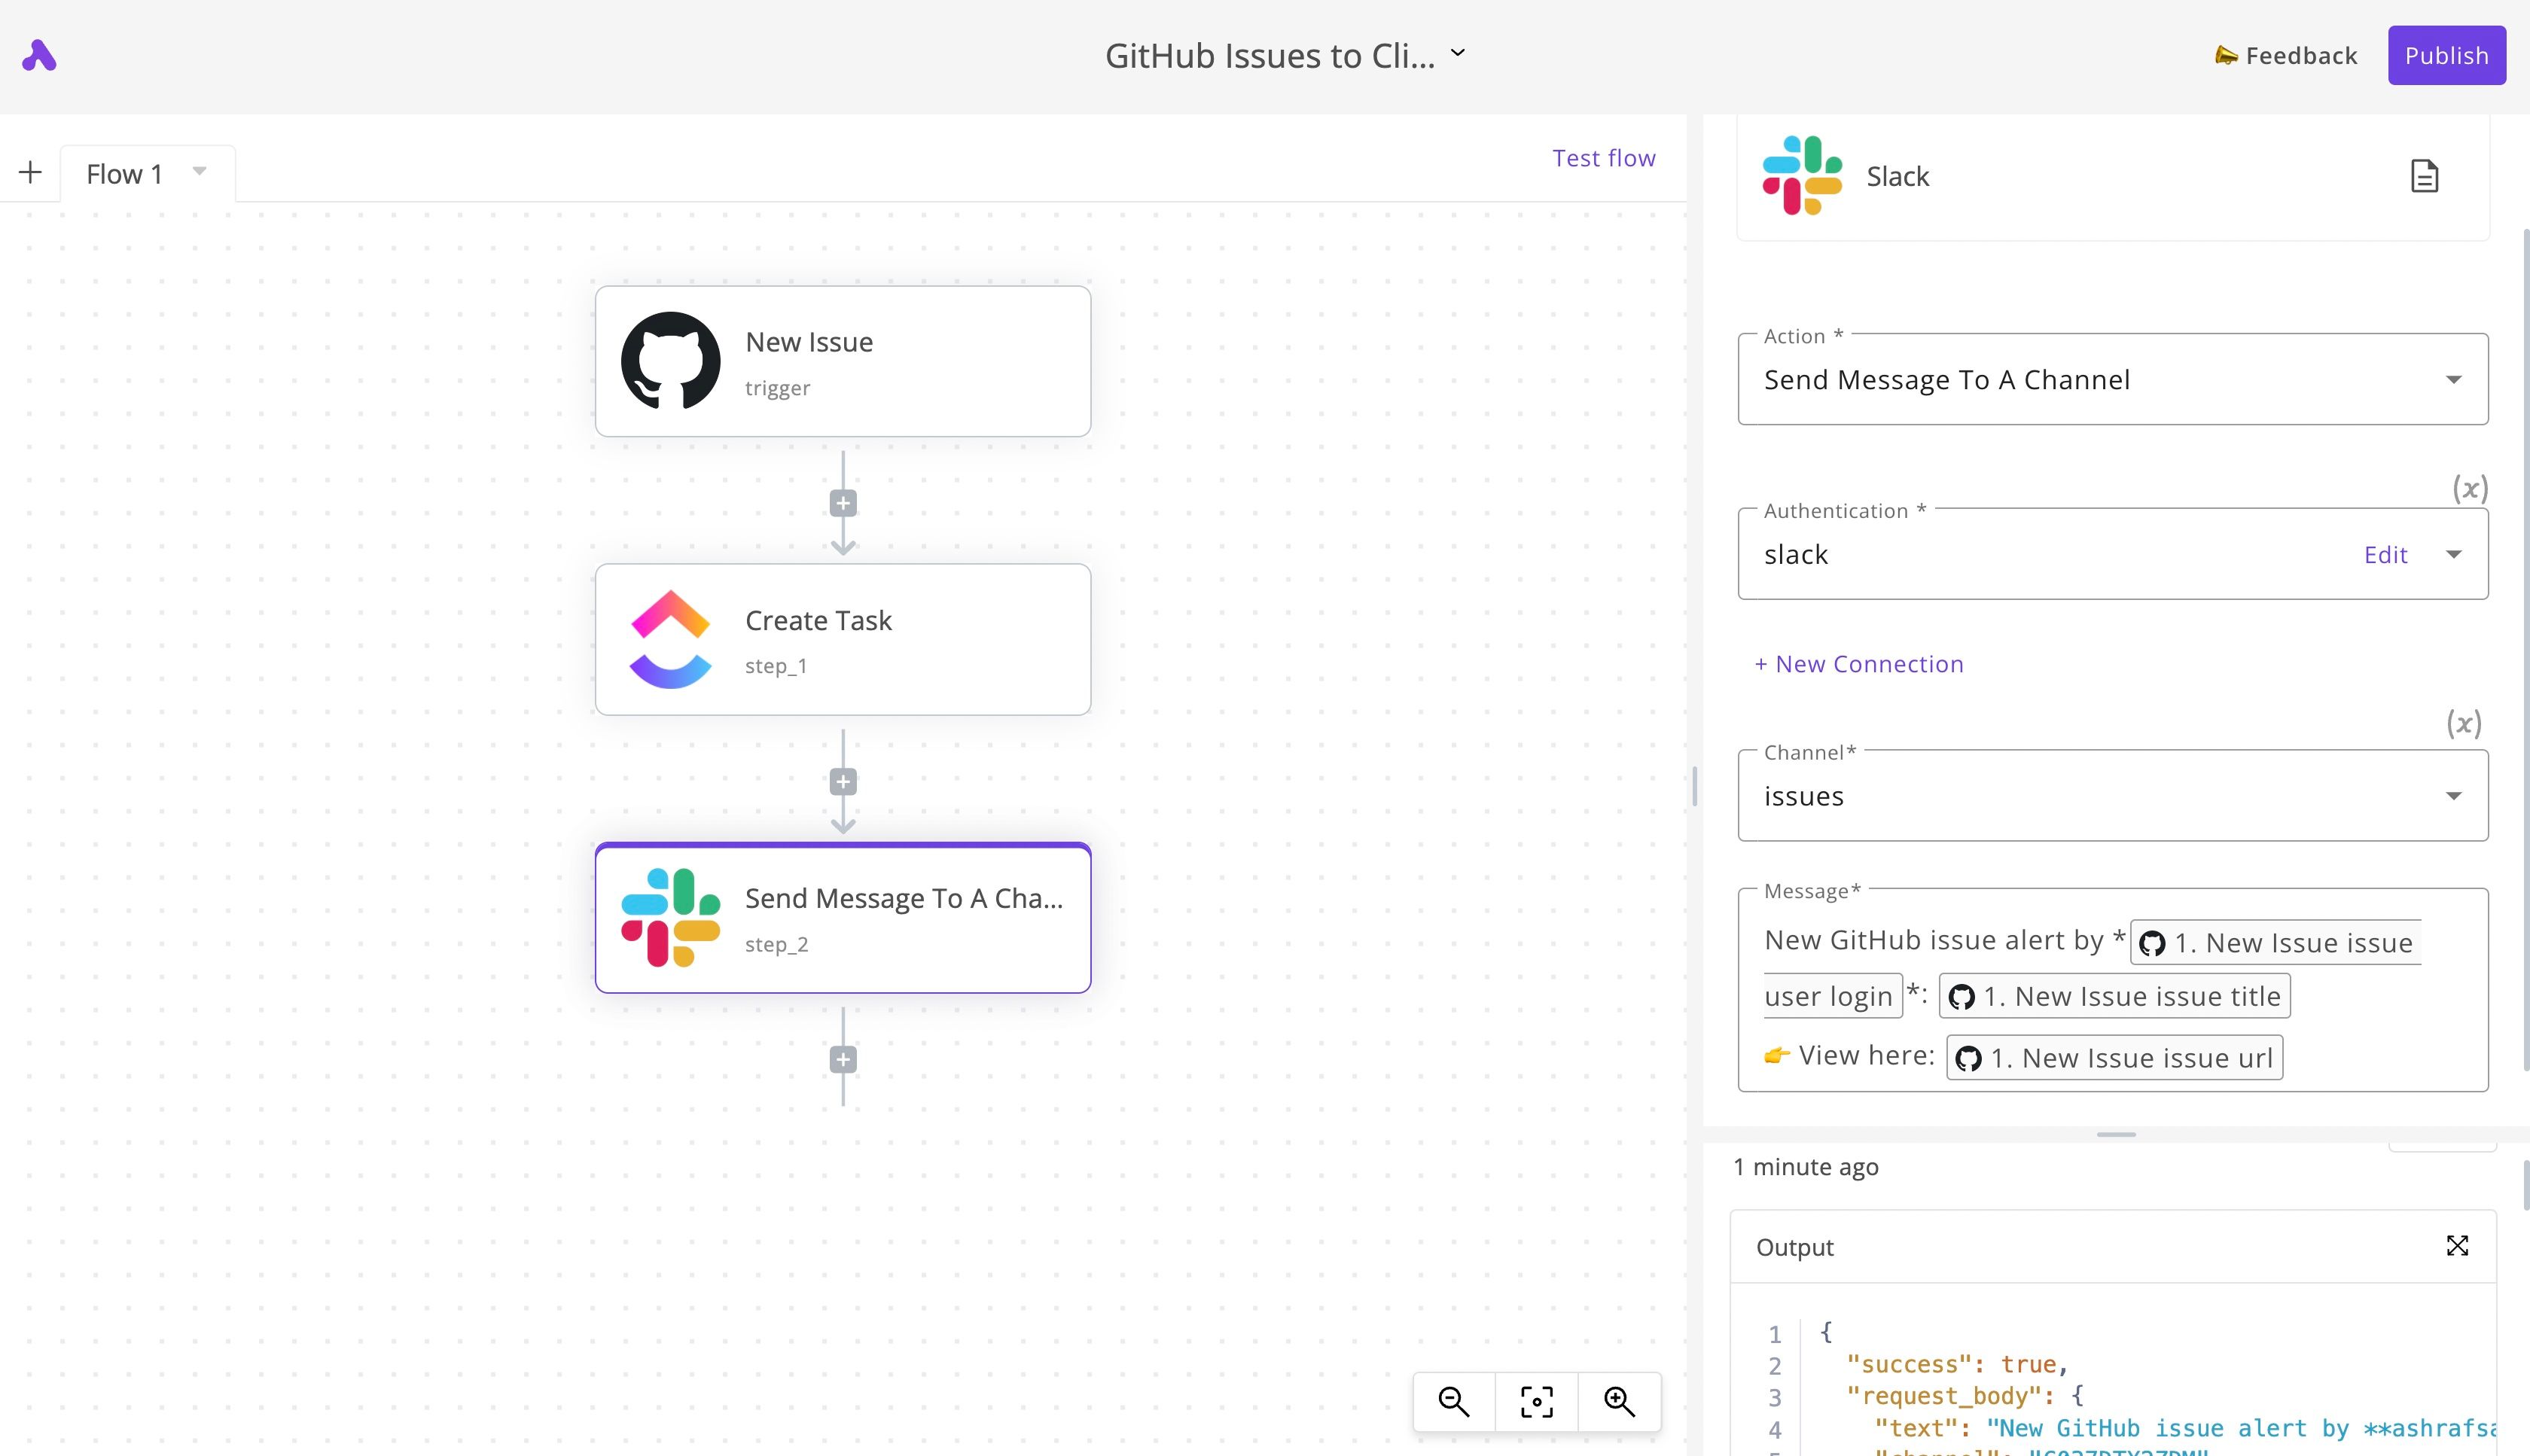
Use + New Connection to connect your Slack account, select the channel you'd like to receive issues notifications in, and the same way we constructed dynamic fields in the previous step, we'll construct the message sent to our Slack channel. My message looks like this:
New GitHub issue alert by *USER_LOGIN*: ISSUE_TITLE
👉 View here: ISSUE_URL
The ALL_CAPS parts are all dynamic variables chosen from the dropdown. In real life, my settings looked like this:
6. Test the flow from the GitHub new issue to the Slack message
Although we were testing step by step, it's now time to test the flow end to end. If you click on the Test flow button, all the steps will run and you'll be able to see which one succeeds or fails, and why. You can also see the data in your ClickUp and Slack accounts.
7. Activate the GitHub Issues / ClickUp Task / Slack Notification flow
If all looks good to you, click the main Publish button. Once the flow is published, you'll see a toggle that indicates that the flow is activated. While the flow is on, you will need to wait until a new GitHub issue is added before any new runs happen.
Other ideas to automate GitHub notifications
I understand that this flow could be inspiring to you but not exactly what you're looking for, with a no-code business automation tool like Activepieces, you can design the flow to achieve your goals, and here are some different examples than the tutorial:
- Send notifications from GitHub to any communication platform you have: Discord, Telegram, Slack, Email, SMS or anything else. For example, if any issue is added, any pull request is opened or any new star comes to your repository, you can get notified about them in realtime.
- Open tasks in other apps from GitHub issues even if you don't use ClickUp. For example, you can add the new issues to Asana, Trello, Google Tasks or a Google Sheet.


