How to Insert new Google Sheet rows from Airtable records [Step by Step Guide]

Airtable is a low code, spreadsheet-database platform that is easy to use and with a good user interface and user experience. The platform allows users to create workflows and to store, organize and collaborate on information.
Airtable platform also allows users to automate their process with other softwares in order to further ensure effective and efficient flow of information.
In this step-by-step tutorial guide, I will show you how to automate the records in your Airtable account with google sheet (a spreadsheet) and by the end of this tutorial you will be able to transfer data from your Airtable account and compile them into google sheet in a less stressful but efficient way.
Prerequisites
- An Activepieces account for the automation.
- A Airtable account.
- A Google Sheet.
Steps to sync Airtable with Google sheets
1. Create an Activepieces account
Go to Activepieces and get an account if you have not. This automation process will be built there.
Click on the Start building button if this is your first automation or click on the New Collection button at the top right corner if you already have some existing automations in your account.

2. Add and configure the Airtable New Record trigger
The goal we are trying to achieve with this automation process is to ensure we get data on our google sheet for every new Airtable record that is added to the Airtable base or table rows.
To begin, rename the collection to suit your preference but for the purpose of this tutorial guide, let us name it “auto-record”, as this will trigger for every new record and the data will be automatically updated on google sheet.
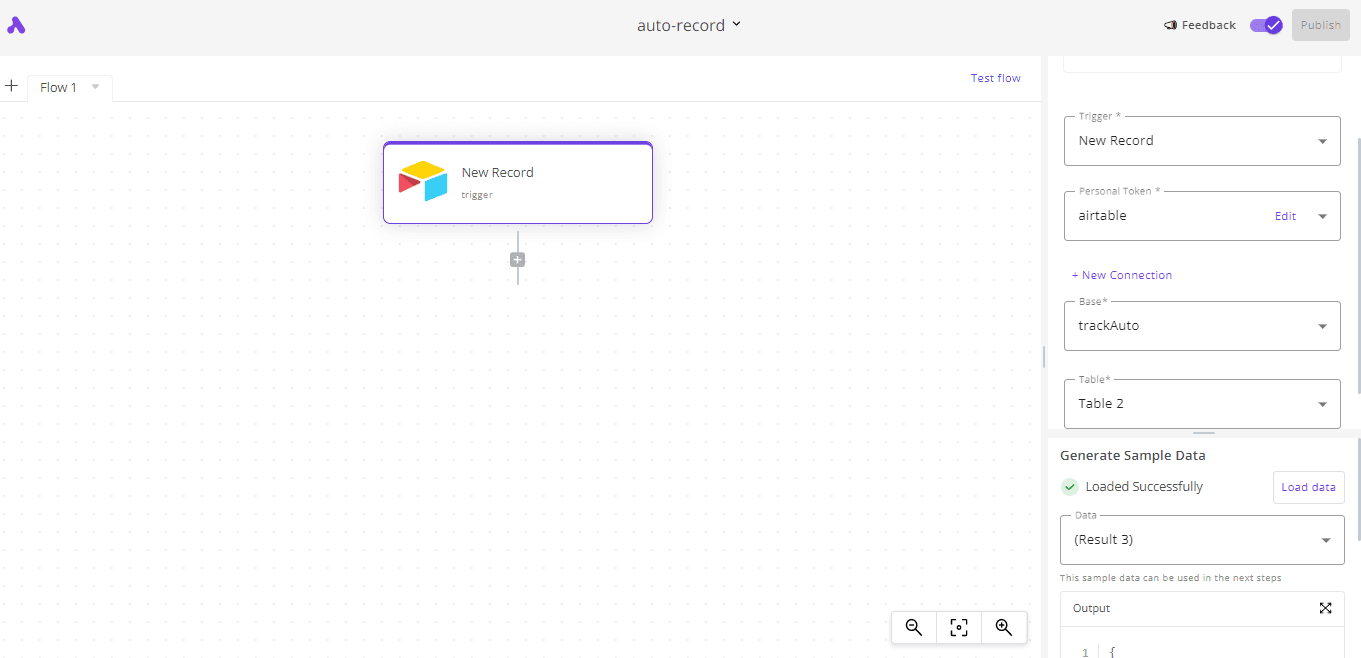
Then, click on the Select Trigger box, search and select “Airtable”, click on the Trigger field to select a trigger and select New Record, this triggers the current flow for every new record added to the Airtable base or table rows.
Click on Personal Token field, a dialog box will open, connect with your Airtable account by inputting your preferred name and your Airtable personal token. Check the note in the dialog box on how to generate a personal token if you do not know how to, afterwards, click on save.
Click on the Base field and select your preferred base in your Airtable account, then click on Table to select your preferred table.
Click on the Load data button in the Generate sample field, this ensures there are data in the selected Airtable account and then shows this as sample data that can be used in the next step. This should load successfully before you move on the next step.
Your screen should look like this after this process.

3. Add and configure the Google Sheets Insert Row action
Upon the successful completion of the steps above, we now need to add the spreadsheet where all the data from Airtable will be transferred to automatically. And for this purpose, the spreadsheet we will be using is Google sheets.
Click on the + sign below the trigger step, click on the Select Step search field, search and select “Google Sheets”. Then click on the Action field and select “Insert Row”, this is simply to ensure once the trigger is activated, the google sheets will be automatically updated and a row will be added to the spreadsheet.
Click on the Authentication field, click on edit, then connect with your google account and save it with your name of choice, then click on connect and click on save.
Click on the Spreadsheet field and select the spreadsheet you will like to connect with the flow, this simply adds this spreadsheet to the automation and it will be updated once the a new record is created. Then click on the Sheet field, and select the sheet you will like to use.
Furthermore, the main purpose of this automation is to extract data from Airtable and transfer automatically in to Google Sheet, therefore, they should appear just are they are on Airtable. In order to ensure that the data are appropriately transferred, we will use the Value field, and each value fied will serve as row for the google sheet.
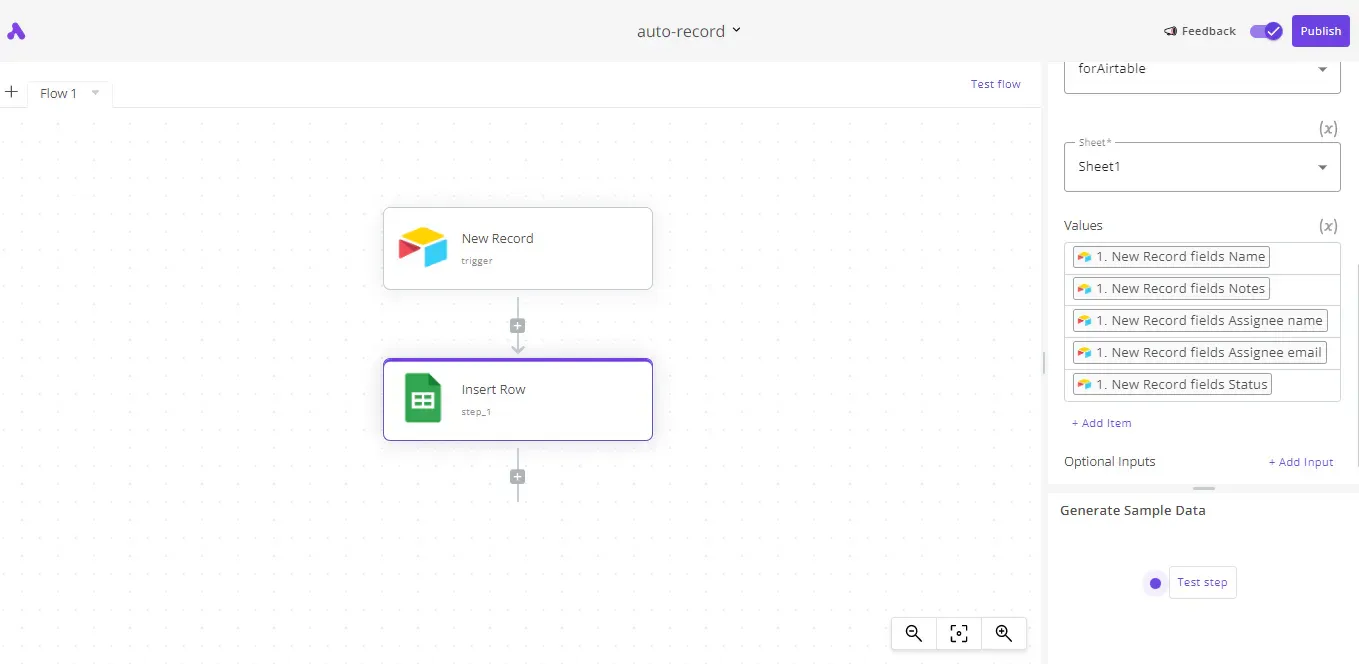
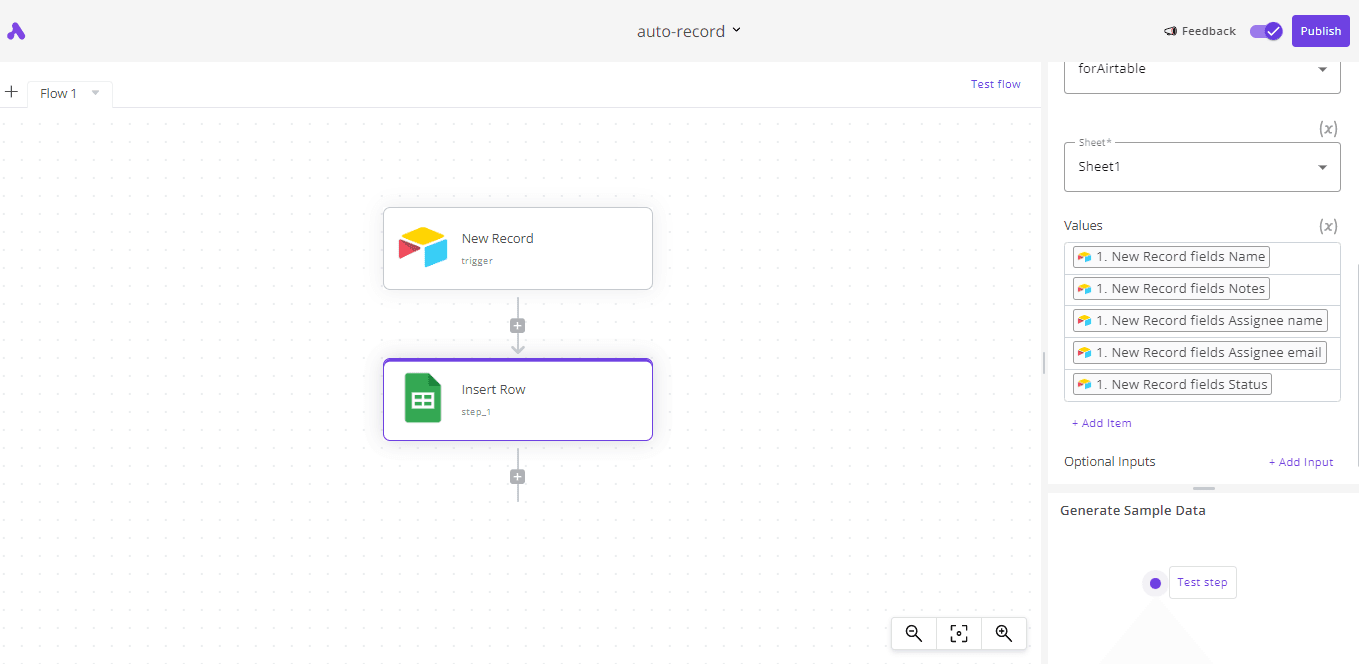
For the purpose of this tutorial guide, we will extract data for: Name of the record, Notes, Assignee name, Assignee Email and Status. In order to ensure they appear in rows, we will use multiple values fields.
Therefore, click on the Values field, a Data to Insert dialog box will appear, click on the drop down button beside New Record, click on the dropdown button beside fields and select Name. Close the Data to Insert dialog box, then click on the add item button below the values field, this will insert a new value field.
Click on the Values field, and follow the same process as above but this time, select Notes. Close the Data to Insert dialog box, then click on the add item button below the value field, this will insert a new value field.
Repeat this process for three more times and get the values for Assignee name, Assignee Email and Status.
Your screen should look like this after this process.

4. Test the Flow and Publish
On the Generate Sample Data box, you can test the step by clicking on the Test step button but it is optional.
Then, run a quick test on the flow to make sure things are working as appropriate without error. Click on Test flow to run the test then click on Publish at the top right corner of the page. You will start receiving data in your google sheets as new record is being added to your Airtable account, and each automation should take about 5 minutes to complete.
Other Airtable Automation Ideas are:
- Create HubSpot contacts from new Airtable records
- Create a Dropbox text file for every new Airtable record
We believe that there are no limits to what can be automated, and we built Activepieces to express this vision.


